Introducing the custom element
Add any HTML tag or custom attribute to an element — and unlock all of the power of HTML.
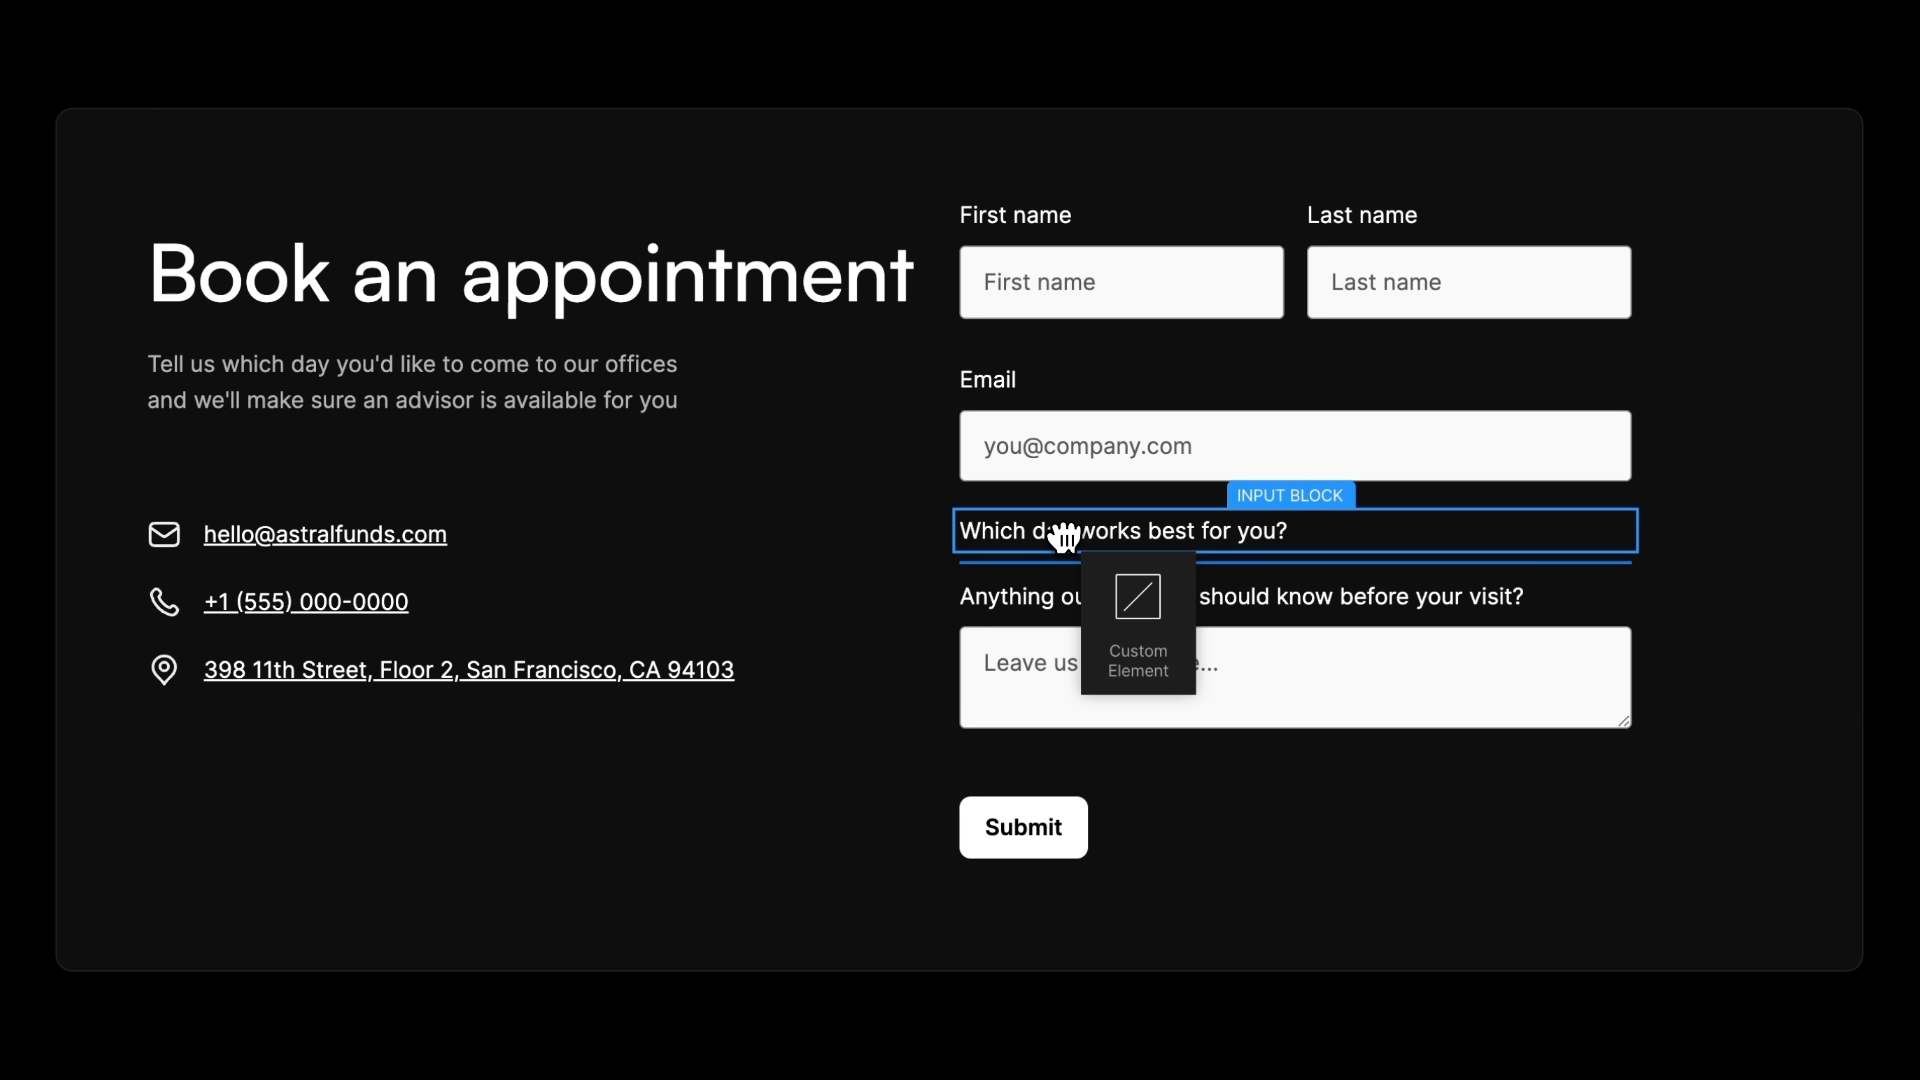
<p id="">Today we’re introducing the <strong id="">custom element</strong>. You can add any HTML tag or attribute to the custom element, opening up all of the power of HTML directly in the Webflow Designer.</p><p id="">Use it to <a href="<https://www.youtube.com/watch?v=qULN82RqAHw>" id="">wrap multiple elements as a heading</a>, include a native date picker to forms, create HTML tables, and much more.</p><figure id="" class="w-richtext-figure-type-image w-richtext-align-center" data-rt-type="image" data-rt-align="center"><div id=""><img src="<https://cdn.prod.website-files.com/64f9399ca7d13575ff21a675/655b763e6a3fe5d473f3f508_Custom%20element.webp>" loading="lazy" alt="Dragging and dropping a custom element into a form to create a date picker." id="" width="auto" height="auto"></div><figcaption id="">Adding a custom element to a form.</figcaption></figure><p id="">You can learn more about the custom element in our <a href="<https://university.webflow.com/lesson/custom-element?topics=elements>">Webflow University article</a>.</p>