Once Webflow Logic shut down in June 2025, sending a proper transactional email from a Webflow form required a real backend. Webflow Cloud makes that backend a Route Handler; a few dozen lines of TypeScript that call Postmark's API and send two emails the moment a form is submitted.
Transactional email is one of the first things clients ask me to add once a Webflow site moves beyond a brochure. Webflow's built-in form notifications are sent to the site owner, with no control over the sender address, template, or copy. Webflow Logic, which handled some of this automation, was discontinued on June 27, 2025.
The current approach is a Webflow Cloud App Route Handler that receives form data, calls Postmark's HTTP API, and sends branded emails in both directions: a confirmation to the submitter and a notification to your team.
In this guide, we cover each step: verifying your sender domain in Postmark, wiring up credentials, writing a reusable email helper, building the Route Handler, and connecting it to a Webflow form with client-side JavaScript.
What do you need to send transactional emails from Webflow Cloud?
You need a Postmark account, a verified sender domain, and a Webflow Cloud App already scaffolded before writing any code.
Be sure these prerequisites are complete before starting:
- A Postmark account: The free tier sends 100 emails per month, which is enough for development and small-volume production
- A domain you own, with DNS access: Postmark requires you to add DNS records (DKIM + Return-Path) to verify your sending domain
- AWebflow Cloud App: Run
webflow auth login && webflow cloud initif you haven't yet. - A Webflow site with at least one form that needs custom email handling
One thing to know before you start: the official postmark npm package doesn't work on Cloudflare Workers. Cloudflare's own documentation states this directly: "Postmark's JavaScript library is currently not supported on Workers." The HTTP API, however, works cleanly via fetch(). That's what this guide uses.
5 steps to send transactional emails from Webflow Cloud with Postmark
Postmark handles delivery. The Webflow Cloud App handles validation, routing, and response shaping. These steps build the integration in the following order: sender domain verification, credential setup, a reusable email helper, and a Route Handler to which the Webflow form submits.
1. Verify your sender domain in Postmark
Postmark blocks sending from unverified domains. This step cannot be skipped, and it's the single most common reason the first send fails. Set it up before writing any code.
Sign in to Postmark and navigate to Sender Signatures → Add Domain or Signature → Add Domain. Enter your domain and click Verify Domain.
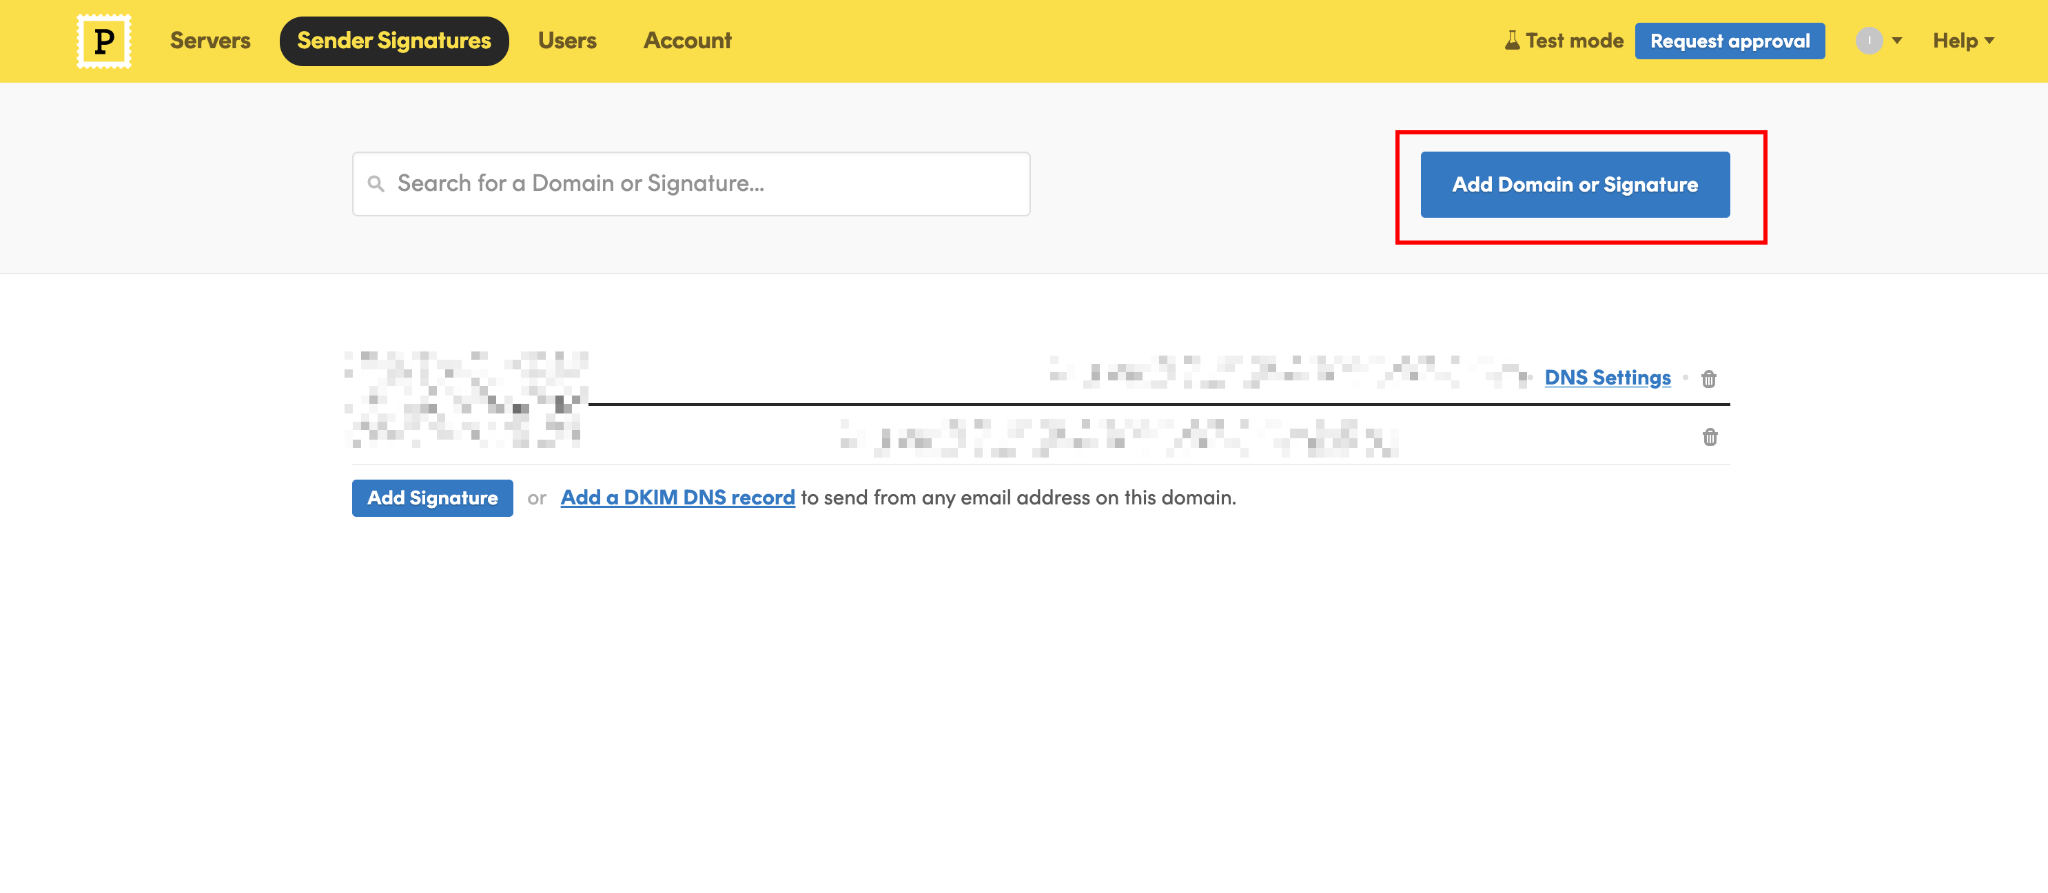
Postmark displays two DNS records to add:
- A DKIM record (TXT type)
- A Return-Path record (CNAME type)
Add both records to your DNS provider. In Cloudflare, navigate to DNS → Records → Add record and copy each value exactly. Once the records propagate (typically under 10 minutes on Cloudflare), return to Postmark and click the Verify buttons.
With the domain verified, grab your server API token. Navigate to Servers → My First Server → API Tokens and copy the server token. This value is included in the X-Postmark-Server-Tokenauthentication header for every API request.
Checkpoint: From the Postmark dashboard, use the Test button to send a test email. If it delivers, the domain is verified and the token works.
2. Add Postmark credentials to your Webflow Cloud environment
Your Cloud App needs two environment variables.
Add them to .env.local for local development:
# .env.local
POSTMARK_SERVER_TOKEN=your_server_token_here
POSTMARK_FROM_EMAIL=hello@yourdomain.com
OWNER_EMAIL=you@yourdomain.com
In your Webflow site settings, open Webflow Cloud, select your environment, and add the same variables under Environment Variables.
For local testing without sending real emails, Postmark provides a special test token: POSTMARK_API_TEST. Swap your real token for this value locally to validate request format without triggering actual delivery.
Checkpoint: Run next dev locally and confirm process.env.POSTMARK_SERVER_TOKEN resolves to your token.
3. Create the Postmark email helper
Create lib/postmark.ts in your Cloud App. This module handles the HTTP call to Postmark's /email endpoint and shapes the request into the format the API expects.
Here’s what you need to do:
// lib/postmark.ts

const POSTMARK_API = 'https://api.postmarkapp.com'

interface EmailParams {
  to: string
  from: string
  subject: string
  htmlBody: string
  textBody?: string
  replyTo?: string
  tag?: string
  messageStream?: string
}

interface PostmarkResponse {
  ErrorCode: number
  Message: string
  MessageID: string
  SubmittedAt: string
  To: string
}

export async function sendEmail(params: EmailParams): Promise<PostmarkResponse> {
  const token = process.env.POSTMARK_SERVER_TOKEN
  if (!token) throw new Error('POSTMARK_SERVER_TOKEN is not set')

  const res = await fetch(`${POSTMARK_API}/email`, {
    method: 'POST',
    headers: {
      Accept: 'application/json',
      'Content-Type': 'application/json',
      'X-Postmark-Server-Token': token,
    },
    body: JSON.stringify({
      From: params.from,
      To: params.to,
      Subject: params.subject,
      HtmlBody: params.htmlBody,
      TextBody: params.textBody ?? params.htmlBody.replace(/<[^>]+>/g, ''),
      ReplyTo: params.replyTo,
      Tag: params.tag,
      TrackOpens: true,
      MessageStream: params.messageStream ?? 'outbound',
    }),
  })

  if (!res.ok) {
    const error = (await res.json()) as PostmarkResponse
    throw new Error(`Postmark error ${error.ErrorCode}: ${error.Message}`)
  }

  return res.json() as Promise<PostmarkResponse>
}
I keep the Postmark call in a dedicated helper rather than inline in the Route Handler. When the same app sends multiple email types (contact confirmation, order receipt, password reset), each Route Handler imports sendEmail() with its own params. No duplicated fetch logic across files.
The TextBody fallback automatically strips HTML tags to generate a plain-text version. For production, write a proper plain-text body: email clients that render text-only (including many corporate spam filters) get a better experience than stripped HTML.
Checkpoint: From a quick test script, call sendEmail() with POSTMARK_SERVER_TOKEN set to POSTMARK_API_TEST. You should get back { ErrorCode: 0, Message: "Test job accepted" }.
4. Build the contact form Route Handler
Create app/api/contact/route.ts. This Route Handler receives a JSON form submission, validates the input, sends two emails via Postmark (a confirmation to the submitter and a notification to the site owner), and returns a JSON response.
Here’s the content:
// app/api/contact/route.ts
export const runtime = 'edge'

import { sendEmail } from '@/lib/postmark'

const SENDER = process.env.POSTMARK_FROM_EMAIL ?? 'hello@yourdomain.com'
const OWNER_EMAIL = process.env.OWNER_EMAIL ?? 'you@yourdomain.com'

interface ContactPayload {
  name: string
  email: string
  message: string
}

function isValidEmail(email: string): boolean {
  return /^[^\s@]+@[^\s@]+\.[^\s@]+$/.test(email)
}

export async function POST(request: Request) {
  let body: ContactPayload

  try {
    body = (await request.json()) as ContactPayload
  } catch {
    return Response.json({ error: 'Invalid JSON' }, { status: 400 })
  }

  const { name, email, message } = body

  if (!name?.trim() || !email?.trim() || !message?.trim()) {
    return Response.json(
      { error: 'Name, email, and message are required' },
      { status: 422 }
    )
  }

  if (!isValidEmail(email)) {
    return Response.json({ error: 'Invalid email address' }, { status: 422 })
  }

  try {
    // Confirmation to the submitter
    const confirmation = await sendEmail({
      to: email,
      from: SENDER,
      replyTo: OWNER_EMAIL,
      subject: `Thanks for reaching out, ${name}`,
      tag: 'contact-confirmation',
      htmlBody: `
        <p>Hi ${name},</p>
        <p>Thanks for your message. I'll get back to you within one business day.</p>
        <p>Here's what you sent:</p>
        <blockquote>${message}</blockquote>
      `,
    })

    // Notification to the site owner
    await sendEmail({
      to: OWNER_EMAIL,
      from: SENDER,
      replyTo: email,
      subject: `New contact from ${name}`,
      tag: 'contact-notification',
      htmlBody: `
        <p><strong>Name:</strong> ${name}</p>
        <p><strong>Email:</strong> <a href="mailto:${email}">${email}</a></p>
        <p><strong>Message:</strong></p>
        <p>${message}</p>
      `,
    })

    return Response.json({
      success: true,
      messageId: confirmation.MessageID,
    })
  } catch (err) {
    console.error('Email send failed:', err)
    return Response.json({ error: 'Failed to send email' }, { status: 502 })
  }
}
The handler validates before calling Postmark. An empty name or malformed email address never reaches the API, which means no wasted API calls and no confusing 422 responses from Postmark to parse.
I set ReplyTo to the owner's email on the confirmation and to the submitter's email on the notification. That way, when the site owner hits reply in their email client, they reach the submitter directly.
Checkpoint: You can test the endpoint with cURL:
curl -X POST http://localhost:3000/app/api/contact \
  -H "Content-Type: application/json" \
  -d '{"name":"Test User","email":"test@example.com","message":"Hello"}'
With POSTMARK_SERVER_TOKEN=POSTMARK_API_TEST, you should receive { "success": true, "messageId": "..." }. With your real token, check the Postmark activity log to confirm both emails appear.
5. Wire up the Webflow form
Add this to a Custom Code (Before </body>) block on any page with a contact form. The form needs three input fields with the data-contact-name, data-contact-email, and data-contact-message attributes, plus a status element with the data-contact-status.
Add a data-contact-form attribute to the form element itself:
(function () {
  const form = document.querySelector('[data-contact-form]')
  const status = document.querySelector('[data-contact-status]')

  if (!form) return

  form.addEventListener('submit', async function (e) {
    e.preventDefault()

    const name = form.querySelector('[data-contact-name]')?.value.trim()
    const email = form.querySelector('[data-contact-email]')?.value.trim()
    const message = form.querySelector('[data-contact-message]')?.value.trim()

    if (!name || !email || !message) {
      if (status) status.textContent = 'Please fill in all fields.'
      return
    }

    const submitBtn = form.querySelector('[type="submit"]')
    if (submitBtn) submitBtn.disabled = true
    if (status) status.textContent = 'Sending...'

    try {
      const res = await fetch('/app/api/contact', {
        method: 'POST',
        headers: { 'Content-Type': 'application/json' },
        body: JSON.stringify({ name, email, message }),
      })

      const data = await res.json()

      if (data.success) {
        if (status) status.textContent = 'Message sent. Check your inbox for a confirmation.'
        form.reset()
      } else {
        if (status) status.textContent = data.error ?? 'Something went wrong. Please try again.'
      }
    } catch {
      if (status) status.textContent = 'Network error. Please try again.'
    } finally {
      if (submitBtn) submitBtn.disabled = false
    }
  })
})()
I turn off the submit button while the request is in flight. Without this, double-submits send two confirmation emails to the same address. The data-contact-status element provides users with feedback without triggering the page reload that Webflow's default form handling would.
Checkpoint: Publish your Webflow site, fill in the form, and submit. The status message should update, and you should receive both the confirmation email and the owner notification.
What causes Postmark email sends to fail on Webflow Cloud?
Most failures fall into three categories: the npm SDK being imported when it shouldn't be, unverified sender signatures, and inactive recipient addresses.
Here’s what each looks like and how to address it.
The postmark npm package throws on import
If you see "Cannot find module 'events'" or "TypeError: Class extends value undefined" when your Route Handler loads, the postmark npm package is installed. Remove it with npm uninstall postmark and use the fetch()-based helper from Step 3.
The Cloudflare Workers documentation notes explicitly that Postmark's JavaScript library is not supported on Workers. The HTTP API covers every operation in this guide.
Postmark returns ErrorCode 400 or 401
ErrorCode 400means no Sender Signature exists in Postmark for the From address; it hasn't been created yet. ErrorCode 401 means the Sender Signature exists, but the confirmation email hasn't been clicked yet.
Both are resolved in the Postmark dashboard: either add the From address as a new Sender Signature, or complete domain verification under Sender Signatures. A single verified domain covers any address on that domain, so hello@yourdomain.com and no-reply@yourdomain.com both work once the domain is verified.
Postmark returns ErrorCode 406
ErrorCode 406 means the recipient address is inactive. Postmark marks recipients inactive after a hard bounce or a spam complaint. I handle 406 in the Route Handler by returning a user-facing error: "This email address has previously bounced. Please use a different address."
Sending again won't work. Inactive recipients require manual reactivation via the Postmark activity log.
What to build after transactional email is running on Webflow Cloud
If you would rather send through SendGrid, the same Route Handler shape applies and our SendGrid contact form guide covers it, including the server-side validation and honeypot spam protection this walkthrough does not go into.
With a working email setup, the natural next addition is Postmark templates. Instead of building email HTML inside the Route Handler, Postmark's Templates API lets you manage email copy in the Postmark dashboard and render it with variables at send time: a sendTemplate() call that posts to /email/withTemplate with { TemplateAlias: 'contact-confirmation', TemplateModel: { name, message } }. The HTML stays out of the codebase and can be edited without a deploy.
Explore Webflow + Postmark for a full list of integration options, or head to the Webflow Cloud documentation if you're setting up your Cloud App for the first time.
Frequently asked questions
Can I use Postmark's built-in email templates?
Yes. Postmark's Templates API accepts a TemplateAlias (the template's identifier in the dashboard) and a TemplateModel (a JSON object of variables to substitute). Replace sendEmail() with a sendTemplate() function that posts to /email/withTemplate with { TemplateAlias: 'your-alias', TemplateModel: { name, message } }. Templates are created and edited in the Postmark dashboard with no code deploy required to update copy.
How do I trigger emails from Webflow's built-in form submission?
Webflow's built-in forms fire a form_submission webhook when a visitor submits a form. Configure a webhook in Webflow Settings → Integrations → Webhooks with the trigger form_submission pointed at your Route Handler URL. The Route Handler receives the form field data as JSON and calls sendEmail() exactly as above. The only difference is the incoming payload shape: Webflow's webhook delivers a nested fieldData object rather than flat JSON fields.
How do I send to multiple recipients?
Postmark accepts comma-separated addresses in the To, Cc, and Bcc fields, with a combined limit of 50 recipients per message. For sends with more than 50 recipients, use Postmark's batch endpoint at/email/batch, which accepts up to 500 messages per API call.
How do I test without sending real emails?
Set POSTMARK_SERVER_TOKEN=POSTMARK_API_TEST in .env.local. Requests go to Postmark's API, your JSON format is validated, and you get a MessageID back. No email is delivered. This is the right way to write integration tests against the email flow without sending to real inboxes.