










Authentication and payments are the two things that turn a Webflow site into a product, and both can run on Webflow Cloud beside the site itself, with the session checks and the webhook verification happening server-side where they belong.
The pattern of "add auth and payments to a web app" is one of the most common full-stack requirements, and also one of the most fragile to assemble outside of Vercel. I've built this stack on AWS Lambda, on Netlify Functions, on standalone Express servers, and every time, there's a moment where the mental model breaks.
The webhook handler lives in one service, the session in another, and the runtime environment for each piece is subtly different. When something fails in production, you spend the first ten minutes just figuring out which layer it is.
On Webflow Cloud, this stack runs in one place. Your Next.js app, including the Auth0 middleware, the Stripe Checkout route, and the webhook handler, lives inside Webflow's infrastructure. One deployment pipeline, one environment variable panel, one set of logs when something goes wrong.
This guide covers the full integration: Auth0 v4 middleware for session-based authentication, Stripe Checkout for payment collection, and constructEventAsync webhook verification for post-payment provisioning, including Workers-specific patterns that differ from those in a standard Node.js deployment.
What do you need to add authentication and payments to a Webflow Cloud app?
You need a Webflow workspace with Cloud access, an Auth0 tenant, a Stripe account, the Webflow CLI, and Node.js 22.13.0 or higher. Both Auth0 and Stripe have generous free tiers: Auth0's free plan supports up to 25,000 monthly active users for B2C scenarios (500 MAU for B2B) and includes social login support.
Here's what you need to have in place before writing any code.
A Webflow workspace with Cloud access
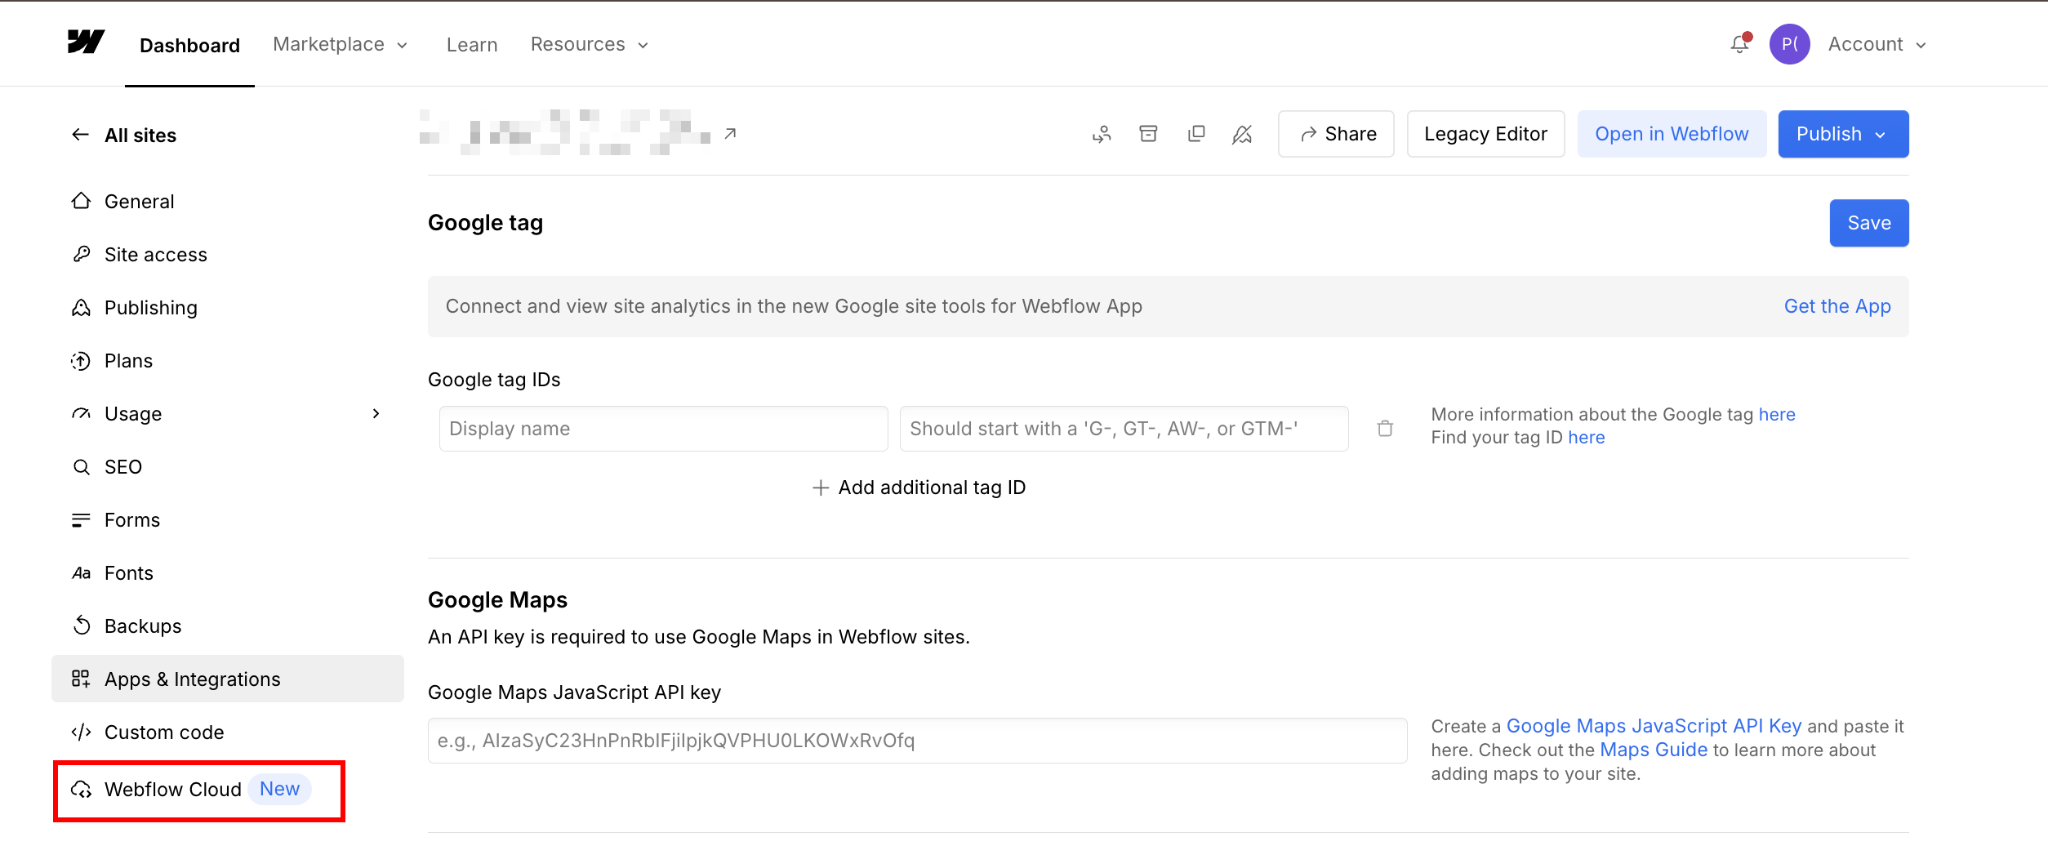
Webflow Cloud is included from the free Starter plan up, with higher app and storage limits on paid plans. Confirm you have access to the Cloud section in your Webflow dashboard before starting. If you don't see Cloud in the left sidebar, check your plan tier.
Node.js 22.13.0 or higher and npm
The @auth0/nextjs-auth0 v4 SDK requires Node.js 20 LTS or newer, and Webflow CLI 2.0 raises that floor to 22.13.0, so install 22.13.0 or higher to satisfy both. Confirm with node -v. Webflow Cloud only supports npm as the package manager.
Also, Webflow Cloud requires Next.js 15 or higher. Run next --version to confirm before initializing the project. If you're on Next.js 14 or earlier, upgrade first.
Webflow CLI
Install globally and authenticate before project initialization:
npm install -g @webflow/webflow-cliConfirm with webflow --version before proceeding.
Authenticate the CLI before starting. webflow auth login opens a browser window to complete authentication and links your terminal session to your Webflow workspace. You'll need this session active before running webflow cloud init in Step 1.
An Auth0 tenant with a Regular Web Application
Create an account at auth0.com and open the Auth0 Dashboard.

Under Applications → Applications, create a new application and select Regular Web Applications as the type. Once created, open the application's Credentials tab. You'll need the Client ID and Client Secret from there, plus the Domain from the application's top-level settings.
Auth0's free tier supports up to 25,000 monthly active users and includes full social login support. For most products, this is enough to get through the early stages without a paid plan.
A Stripe account with secret and webhook keys
Create a Stripe account at stripe.com.
From the Stripe Dashboard, navigate to Developers → API keys to get your secret key. For development, use the test mode keys. They carry a sk_test_ prefix and never charge real money.
You'll also set up a webhook endpoint later (Step 5) and retrieve a separate Signing secret for webhook verification.
Once these are ready, the full implementation takes about an hour.
6 steps to add authentication and payments to a Webflow Cloud app
These six steps cover project initialization, Auth0 and Stripe client setup, middleware and route protection, Stripe Checkout, webhook handling, and production deployment. Steps 1-3 cover authentication. Steps 4-5 cover payments.
Step 6 covers the environment variable and dashboard configuration that separates a working local setup from a working production deployment, which is a longer list than most developers expect.
If you've already initialized a Webflow Cloud project from a prior guide, the scaffolding in Step 1 will be familiar. Skip ahead to Step 2 once the config files are confirmed.
1. Initialize the project and install dependencies
Start with CLI authentication and project initialization:
webflow auth login
webflow cloud init
webflow auth login authenticates your CLI session via browser. webflow cloud init creates the four required config files and links your local directory to a Webflow Cloud project. If you've built on Webflow Cloud before (following the full-stack guide or another Cloud integration), this scaffolding will be familiar.
The webflow.json, wrangler.jsonc, open-next.config.ts, and cloudflare-env.d.ts files are identical across all Webflow Cloud projects.
Then install both SDKs in a single command:
npm install @auth0/nextjs-auth0 stripeOne architectural note worth understanding before writing any code: @auth0/nextjs-auth0 v4 is edge-compatible by default. Webflow Cloud's framework customization documentation explicitly states that only edge runtime middleware is supported; Node.js runtime middleware is not.
Auth0 v4's edge-first design means middleware.ts works on Webflow Cloud without any special configuration. This is a meaningful change from v3, which required a separate /edge import path for edge deployments.
Be sure to verify the config files.
Thewebflow.jsonfile
The webflow.json file must contain exactly:
{
  "cloud": {
    "framework": "nextjs"
  }
}
If this file is missing after webflow cloud init, create it manually at the project root. This is the only Webflow-specific config file. Everything else is standard Next.js or Cloudflare.
Thewrangler.jsoncfile
The wrangler.jsonc file must include the nodejs_compat flag, which enables the Node.js crypto APIs that both Auth0 and Stripe depend on internally:
{
  "$schema": "node_modules/wrangler/config-schema.json",
  "name": "nextjs",
  "main": ".open-next/worker.js",
  "compatibility_date": "2025-03-01",
  "compatibility_flags": ["nodejs_compat"],
  "assets": {
    "binding": "ASSETS",
    "directory": ".open-next/assets"
  },
  "observability": { "enabled": true }
}
Without nodejs_compat, both SDKs will fail at runtime with missing module errors.
Install the OpenNext adapter and add the preview script:
npm install @opennextjs/cloudflareAdd to package.json scripts:
{
  "scripts": {
    "preview": "opennextjs-cloudflare build && opennextjs-cloudflare preview"
  }
}
Run npm run preview before every deploy. The Wrangler simulation it spins up catches runtime incompatibilities before they reach production; much faster than a deploy-debug-redeploy cycle.
2. Create the Auth0 and Stripe client factories
The two clients have slightly different initialization patterns, and the difference matters for Webflow Cloud's runtime.
Create the Auth0 client
Create lib/auth0.ts:
// lib/auth0.ts
import { Auth0Client } from "@auth0/nextjs-auth0/server";

export const auth0 = new Auth0Client();
Auth0Client automatically reads the required environment variables: AUTH0_DOMAIN, AUTH0_CLIENT_ID, AUTH0_CLIENT_SECRET, and AUTH0_SECRET. APP_BASE_URL is optional; if omitted, the SDK infers the base URL from the incoming request host at runtime.
You don't pass them as constructor arguments; the SDK resolves them from process.env when the module first loads inside the Cloudflare Workers isolate, after the runtime has injected the variables. This module-level pattern is Auth0's documented approach for v4 and works correctly on Webflow Cloud.
The APP_BASE_URL variable is the one I've seen most often misconfigured. It must be set to the full production URL: https://your-production-domain.com, with the https:// prefix and no trailing slash.
If it's omitted, the SDK dynamically infers the base URL from the request host, which works in preview environments but can produce unexpected results on Webflow Cloud, where the host may reflect the platform domain rather than your production URL.
For any stable production deployment, set it explicitly. If it's accidentally set to http://localhost:3000 in your production variables, Auth0 will redirect to localhost from your live deployment.
Create the Stripe client factory
Create lib/stripe.ts:
// lib/stripe.ts
import Stripe from "stripe";

export function getStripeClient() {
  const key = process.env.STRIPE_SECRET_KEY;
  if (!key) throw new Error("Missing STRIPE_SECRET_KEY environment variable");

  return new Stripe(key, {
    httpClient: Stripe.createFetchHttpClient(),
  });
}
The httpClient: Stripe.createFetchHttpClient() option is not optional on Webflow Cloud. Stripe's default HTTP client uses node:https for its API requests. Even though Webflow Cloud's Workers runtime includes the nodejs_compat flag, node:https is among the Node.js networking modules that remain unavailable in the Workers environment.
Stripe.createFetchHttpClient() replaces the default transport with the Web Platform fetch API, which is natively available in all Workers environments. This is the only Stripe configuration change Webflow Cloud requires. Every other method in the SDK works exactly as it does in a standard Node.js environment.
The Stripe client stays inside a factory function (rather than at the module level, as with Auth0) because it reads STRIPE_SECRET_KEY from process.env, and the factory pattern ensures the key is read at runtime rather than during module evaluation.
3. Add Auth0 middleware and protect routes
Auth0 v4 handles authentication entirely through Next.js middleware. There's no route handler to create, no handleAuth() export, and no app/api/auth/ directory; the middleware file mounts all six authentication routes automatically and manages session rolling on every request.
This is a significant architectural change from v3, and it's the change most likely to break a migration if you're working from older documentation.
On Webflow Cloud, this matters for one specific reason: only Edge runtime middleware is supported. Auth0 v4's edge-first design means middleware.ts works on Webflow Cloud without any special configuration; unlike v3, which required a separate /edge import path.
Here's the full middleware setup, including the matcher pattern and the navigation components that use the new route paths.
Create middleware.ts
Create middleware.ts at the project root. In Auth0 v4, this file replaces the catch-all route handler from v3; there is no app/api/auth/[auth0]/route.ts anymore.
The middleware mounts all six authentication routes automatically and handles session rolling:
// middleware.ts
import type { NextRequest } from "next/server";
import { auth0 } from "./lib/auth0";

export async function middleware(request: NextRequest) {
  return await auth0.middleware(request);
}

export const config = {
  matcher: [
    "/((?!_next/static|_next/image|favicon.ico|sitemap.xml|robots.txt).*)",
  ],
};
This single file mounts the following paths: /auth/login, /auth/logout, /auth/callback, /auth/profile, /auth/access-token, and /auth/backchannel-logout. The route prefix has changed from v3: these are all /auth/*, not /api/auth/*.
If you're migrating from a v3 project, every login and logout link in your app needs to be updated to the new paths.
Next.js 16note: Next.js 16 deprecates middleware.ts in favor of proxy.ts. However, proxy.ts runs on the Node.js runtime, and Webflow Cloud only supports Edge runtime middleware. Do not rename middleware.ts to proxy.ts for a Webflow Cloud deployment.
Keep middleware.ts as-is. Auth0 confirms that middleware.ts continues to work under the Edge runtime in Next.js 16 without issue. The deprecation applies only to the Node.js runtime path, which Webflow Cloud doesn't use anyway.
Add login and logout navigation
Auth0 v4's routing works through standard <a> tags, not Next.js <Link> components.
The SDK processes these routes at the middleware layer before Next.js's client-side router, so <Link> causes unexpected behavior:
// app/components/Nav.tsx
import { auth0 } from "@/lib/auth0";

export default async function Nav() {
  const session = await auth0.getSession();

  return (
    <nav>
      {session ? (
        <>
          <span>Welcome, {session.user.name}</span>
          <a href="/auth/logout">Sign out</a>
        </>
      ) : (
        <a href="/auth/login">Sign in</a>
      )}
    </nav>
  );
}
auth0.getSession() returns the current session object if the user is authenticated, or null if not. I use this call in every server component that needs to branch on auth state. It's a single async call with no extra configuration. Session decryption and cookie validation happen automatically within the SDK.
Protect a page with a session guard
To gate a page behind authentication, call getSession() at the top of the server component and redirect on null:
// app/dashboard/page.tsx
import { auth0 } from "@/lib/auth0";
import { redirect } from "next/navigation";

export default async function Dashboard() {
  const session = await auth0.getSession();
  if (!session) {
    redirect("/auth/login?returnTo=/dashboard");
  }

  return (
    <main>
      <h1>Dashboard</h1>
      <p>Welcome back, {session.user.email}</p>
    </main>
  );
}
The returnTo query parameter tells Auth0 where to redirect after a successful login. This is built into the SDK; no additional configuration required. I use it on every protected page so users land back where they started after signing in, rather than being dropped at a generic home page.
4. Build the Stripe Checkout route
Stripe Checkout is Stripe's hosted payment page. Your route handler creates a Checkout session on the server side, specifying the product, price, and redirect URLs. The user gets redirected to Stripe's page to complete payment, then redirected back to your app.
The key to connecting Auth0 and Stripe is client_reference_id. I set this to session.user.sub: Auth0's stable, unique identifier for the user. The sub claim doesn't change if the user updates their email or profile, and it persists across sessions.
In the webhook handler (Step 5), you retrieve this ID from the completed Checkout session to know exactly which user to provision.
Create the checkout session route
The route checks for an active Auth0 session first; unauthenticated requests return 401 before any Stripe API call is made. The session's sub claim becomes the client_reference_id, which Stripe passes back in the webhook payload when the payment completes.
This is how the webhook handler (Step 5) knows which user to provision.
// app/api/checkout/route.ts
import { auth0 } from "@/lib/auth0";
import { getStripeClient } from "@/lib/stripe";
import { NextRequest, NextResponse } from "next/server";

export async function POST(request: NextRequest) {
  const session = await auth0.getSession();

  if (!session) {
    return NextResponse.json({ error: "Not authenticated" }, { status: 401 });
  }

  const stripe = getStripeClient();

  const checkoutSession = await stripe.checkout.sessions.create({
    payment_method_types: ["card"],
    mode: "payment",
    client_reference_id: session.user.sub,
    customer_email: session.user.email,
    line_items: [
      {
        price_data: {
          currency: "usd",
          product_data: {
            name: "Pro access",
          },
          unit_amount: 4900, // $49.00 in cents
        },
        quantity: 1,
      },
    ],
    success_url: `${process.env.APP_BASE_URL}/dashboard?payment=success`,
    cancel_url: `${process.env.APP_BASE_URL}/dashboard?payment=cancelled`,
  });

  return NextResponse.json({ url: checkoutSession.url });
}
The success_url and cancel_url use APP_BASE_URL from environment variables (the same one Auth0 uses) rather than hardcoded domains. This means local development and production use different origins without any code changes, just different variable values.
Add the checkout trigger
On the client side, a button component calls this route and redirects to the Stripe Checkout URL:
// app/components/CheckoutButton.tsx
"use client";

export default function CheckoutButton() {
  async function handleCheckout() {
    const response = await fetch("/api/checkout", { method: "POST" });
    const { url } = await response.json();
    if (url) window.location.href = url;
  }

  return (
    <button onClick={handleCheckout}>
      Get Pro Access — $49
    </button>
  );
}
This component only handles the redirect. The session check, Checkout session creation, and URL generation all happen server-side in the route handler. If an unauthenticated user somehow triggers this button (for example, if the containing page doesn't have a session guard), the route handler returns 401, and the redirect never fires.
5. Handle Stripe webhooks with constructEventAsync
Webhooks are how Stripe notifies your app that a payment succeeded. When the user completes Stripe Checkout, Stripe sends a checkout.session.completed event to your endpoint.
Your handler verifies the event signature, retrieves the session data, and provisions access for the user identified by client_reference_id.
Two patterns differ from a standard Node.js webhook handler on Webflow Cloud:
constructEventAsyncinstead ofconstructEvent: Cloudflare Workers' WebCrypto API (SubtleCrypto) is asynchronous. Stripe's constructEvent uses Node.js's synchronous crypto module for HMAC signature verification, which doesn't work in the Workers runtime, even with nodejs_compat. constructEventAsync with Stripe.createSubtleCryptoProvider() uses the Web Crypto API and works natively.
Read the raw body first: Stripe signature verification requires the raw, unparsed request body. In a Next.js route handler on Webflow Cloud, await request.text() gives you the raw body as a string. You must call this once, before anything else, and pass that string to constructEventAsync.
I read the raw body on the first line of every webhook handler, no exceptions. I've been burned by this twice; once by a logging middleware that cloned the request, and once by accidentally calling request.json() before the webhook handler ran.
The body stream is destructive: once consumed, it's gone.
// app/api/webhooks/stripe/route.ts
import { getStripeClient } from "@/lib/stripe";
import Stripe from "stripe";
import { NextRequest, NextResponse } from "next/server";

const webCrypto = Stripe.createSubtleCryptoProvider();

export async function POST(request: NextRequest) {
  // Read raw body FIRST — before any other body access
  const body = await request.text();
  const signature = request.headers.get("stripe-signature");

  if (!signature) {
    return NextResponse.json(
      { error: "Missing stripe-signature header" },
      { status: 400 }
    );
  }

  const stripe = getStripeClient();
  let event: Stripe.Event;

  try {
    event = await stripe.webhooks.constructEventAsync(
      body,
      signature,
      process.env.STRIPE_WEBHOOK_SECRET!,
      undefined,
      webCrypto
    );
  } catch (err) {
    console.error("Webhook signature verification failed:", err);
    return NextResponse.json({ error: "Invalid signature" }, { status: 400 });
  }

  if (event.type === "checkout.session.completed") {
    const session = event.data.object as Stripe.Checkout.Session;
    const userId = session.client_reference_id;

    if (userId) {
      // userId is the Auth0 sub — provision access here
      // e.g., write to Supabase, Cloudflare KV, or your database
      console.log(`Payment completed for user: ${userId}`);
    }
  }

  return NextResponse.json({ received: true });
}
The webCrypto provider is created once at module scope because it has no dependency on environment variables; it's a static utility from the Stripe SDK. The Stripe client stays inside the function because it reads STRIPE_SECRET_KEY at call time. This is the same factory pattern as the checkout route.
The userId retrieved from the session.client_reference_id is the Auth0 sub; the same value you passed in Step 4. At this point in the handler, you have a verified payment event and a user ID.
What you do with it depends on your access model: write a record to Supabase, set a flag in Cloudflare KV, update your CMS, or call an external service. The pattern is the same regardless.
6. Configure production variables and deploy
Local development and production require different values for several variables. The most reliable way I've found to manage this: treat the Webflow Cloud Settings → Variables panel as the single source of truth for production, and .env.local as the local override.
Never copy .env.local values to production.
Set all variables in Webflow Cloud Settings → Variables
Before running webflow cloud deploy, confirm every variable below is set in your Webflow Cloud project's Settings → Variables panel. Variables in .env.local are read-only during local development; they're neither deployed to nor read by the production worker.
# Auth0
AUTH0_DOMAIN=your-tenant.us.auth0.com
AUTH0_CLIENT_ID=your-client-id
AUTH0_CLIENT_SECRET=your-client-secret
AUTH0_SECRET=64-hex-char-string-from-openssl
APP_BASE_URL=https://your-production-domain.com

# Stripe
STRIPE_SECRET_KEY=sk_live_...
STRIPE_WEBHOOK_SECRET=whsec_...
Generate AUTH0_SECRET with openssl rand -hex 32; this produces exactly 64 hexadecimal characters. If the value is shorter or contains non-hex characters, Auth0 session decryption will fail with a cryptic error on every login.
Update Auth0 application URLs
Before deploying, update your Auth0 application settings.
In the Auth0 Dashboard under Applications → [your app] → Settings, update these three fields for your production domain:
- Allowed Callback URLs:
https://your-production-domain.com/auth/callback - Allowed Logout URLs:
https://your-production-domain.com - Allowed Web Origins:
https://your-production-domain.com
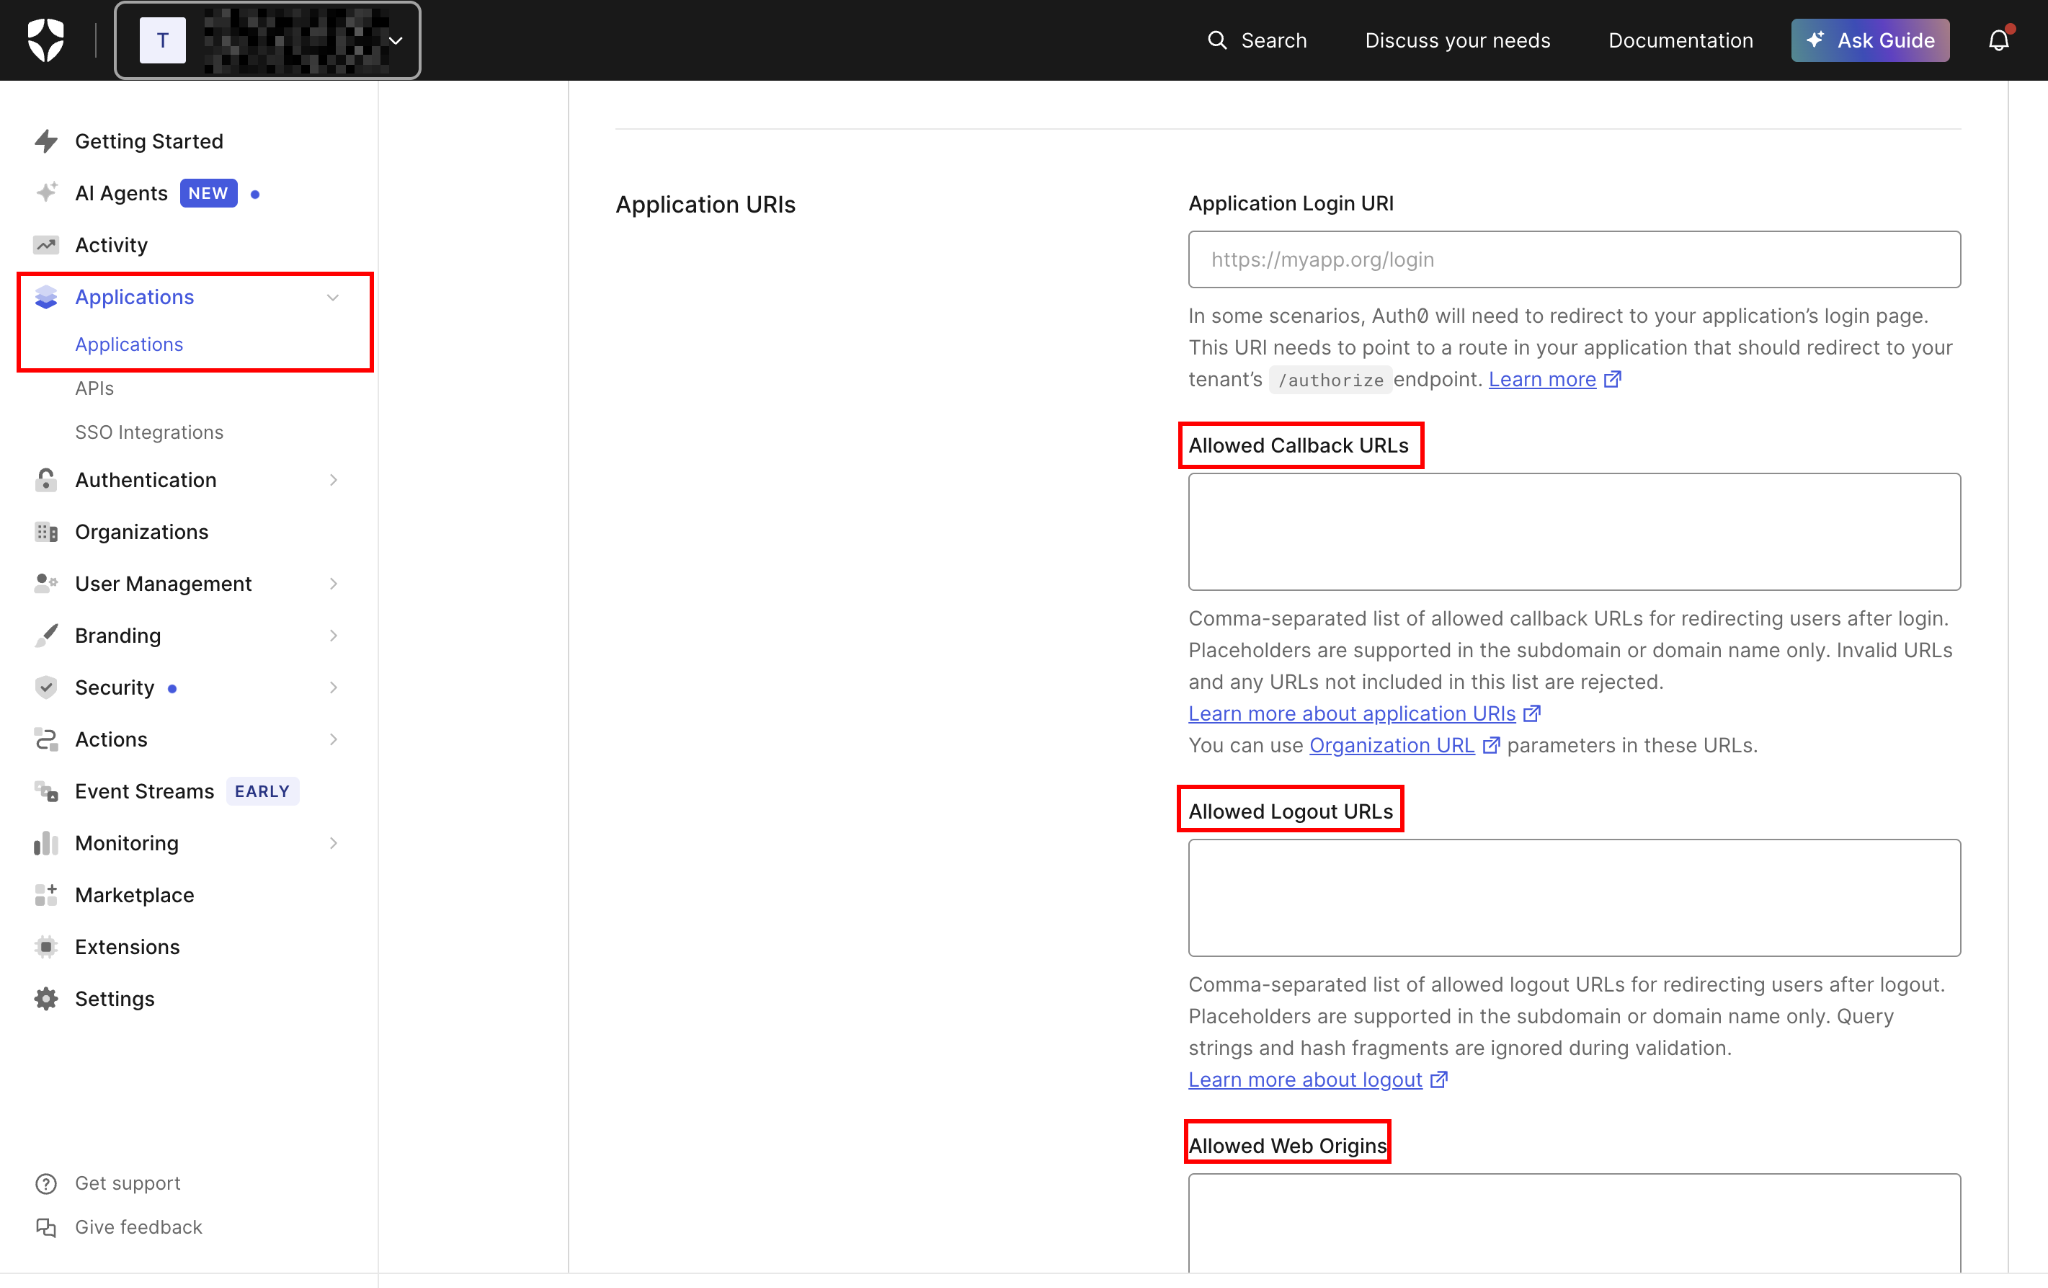
Auth0 does exact URL matching: a trailing slash or www. prefix mismatch causes a callback error. If you're running both a Webflow Cloud staging URL and a custom domain, add both to each field, separated by commas. I keep this checklist next to my deployment checklist: every new domain gets added to these three fields before the first deploy.
Register the Stripe webhook endpoint
In the Stripe Dashboard under Developers → Webhooks, click Add endpoint and enter your production webhook URL:
https://your-production-domain.com/api/webhooks/stripeSelect the checkout.session.completed event.
After saving, reveal the Signing secret (it starts with whsec_) and add it to Webflow Cloud Settings → Variables as STRIPE_WEBHOOK_SECRET. This production signing secret is different from the secret the Stripe CLI generates for local development; keep them separate.
Then, deploy:
webflow cloud deployAfter deployment, test the full flow from the live URL: sign in with Auth0, trigger checkout, complete payment using Stripe's test card (4242 4242 4242 4242; any future expiry; any CVV), and verify that the webhook fires.
Check Stripe Dashboard → Developers → Webhooks → [endpoint] → Events to confirm delivery. A 200 response confirms the handler ran correctly. A 400 almost always indicates a body parsing or signature mismatch.
What causes authentication and payment flows to fail on Webflow Cloud?
Most failures fall into five categories: wrong or missing environment variables, Auth0 URL mismatches, body access order in webhook handlers, the wrong Stripe verification method, and leftover v3 route patterns.
Here's the diagnostic for each.
Auth0 login fails with "callback URL mismatch" error
Cause: Either APP_BASE_URL in Webflow Cloud's Settings → Variables doesn't match the production domain, or the production domain hasn't been added to Auth0's Allowed Callback URLs field.
Fix: Confirm APP_BASE_URL is set to https://your-domain.com; exact match, https:// prefix, no trailing slash. Then open the Auth0 Dashboard → Applications → [your app] → Settings and verify https://your-domain.com/auth/callback is in the Allowed Callback URLs field.
Both must match exactly. Auth0 does exact URL matching, not prefix, not wildcard by default. A www. or a trailing slash difference will cause a mismatch error.
Login and logout links return 404
Cause: Almost always a v3-to-v4 migration issue. Auth0 v4 mounts routes at /auth/*, not /api/auth/*. Any link pointing to /api/auth/login or /api/auth/logout will 404 because those routes no longer exist.
Fix: Search the entire codebase for /api/auth/ and replace all occurrences with /auth/. This includes hardcoded links, Next.js redirects, returnTo parameters, and any API route that constructs login URLs programmatically.
Also, confirm the middleware.ts matcher doesn't exclude /auth/* paths; those routes must pass through the middleware to function.
Stripe webhook throws "Body has already been used" error
Cause: The request body stream was consumed before reaching the webhook handler. This happens when middleware calls request.json(), request.text(), or request.body on the incoming request before the route handler reads it. The stream is destructive; once read, it can't be re-read.
Fix: Confirm no middleware touches the request body on the webhook route path. In your middleware matcher, exclude the webhook path explicitly if needed: add "/((?!api/webhooks).*)" to prevent session or body-parsing logic from running on webhook requests.
Then confirm await request.text() is the very first operation in the route handler.
Webhook signature verification fails, throwingconstructEventAsync
Cause: Either constructEvent (synchronous) is being used instead of constructEventAsync, or STRIPE_WEBHOOK_SECRET is the Stripe CLI development secret rather than the production endpoint signing secret.
Fix: Confirm the webhook handler uses stripe.webhooks.constructEventAsync() with Stripe.createSubtleCryptoProvider() as the fifth argument. constructEvent uses synchronous node:crypto operations that don't work in the Workers runtime; the error message is usually "Cannot read properties of undefined" or a crypto-related exception.
Also, confirm STRIPE_WEBHOOK_SECRET in Webflow Cloud Settings → Variables is the whsec_... value from the Stripe Dashboard endpoint's Signing secret panel; not the whsec_... value displayed by stripe listen during local development. These are different secrets.
Build access control and subscription billing on this foundation
This guide covered the full integration: Auth0 v4 middleware for session-based authentication and Stripe Checkout for payment collection, with constructEventAsync verifying every webhook on the Workers runtime.
Explore the Webflow + Auth0 integration page for additional authentication patterns, including social login, enterprise SSO, and multi-factor authentication. The Webflow + Stripe integration page also covers subscription billing and customer portal patterns for when one-time Checkout isn't sufficient.
For the platform side of both integrations, including environment variables, storage bindings, and how Webflow Cloud builds and deploys a Next.js app, Webflow's developer docs cover the runtime your Route Handlers and middleware actually run on.
Frequently asked questions
What changed from Auth0 v3 to v4 for Webflow Cloud deployments?
Auth0 v3 required a catch-all route handler at app/api/auth/[auth0]/route.ts using handleAuth(). In v4, this file is removed entirely; middleware.ts automatically mounts all authentication routes. The route paths also changed: v4 uses /auth/* instead of /api/auth/*. Beyond the structural change, v4 is edge-compatible by default, so it meets Webflow Cloud's edge-only middleware requirement without additional configuration.
Why does Stripe requireconstructEventAsyncinstead ofconstructEventon Webflow Cloud?
constructEvent uses Node.js's synchronous crypto module to compute the HMAC signature. Cloudflare Workers' Web Cryptography API (SubtleCrypto) is asynchronous by design; there is no synchronous HMAC available in the Workers runtime. constructEventAsync uses SubtleCrypto instead, and Stripe.createSubtleCryptoProvider() specifies which provider to use. This is a constraint of the Cloudflare Workers runtime itself, not specific to Webflow Cloud. It applies anywhere Stripe is used in a Workers environment.
Can I add subscription billing instead of one-time payments?
Yes. Change mode: "payment" to mode: "subscription" in stripe.checkout.sessions.create() and replace the price_data object with a price field referencing a recurring price ID from your Stripe Dashboard. In the webhook handler, add listeners for customer.subscription.created, customer.subscription.updated, and customer.subscription.deleted events to manage subscription state.



















