


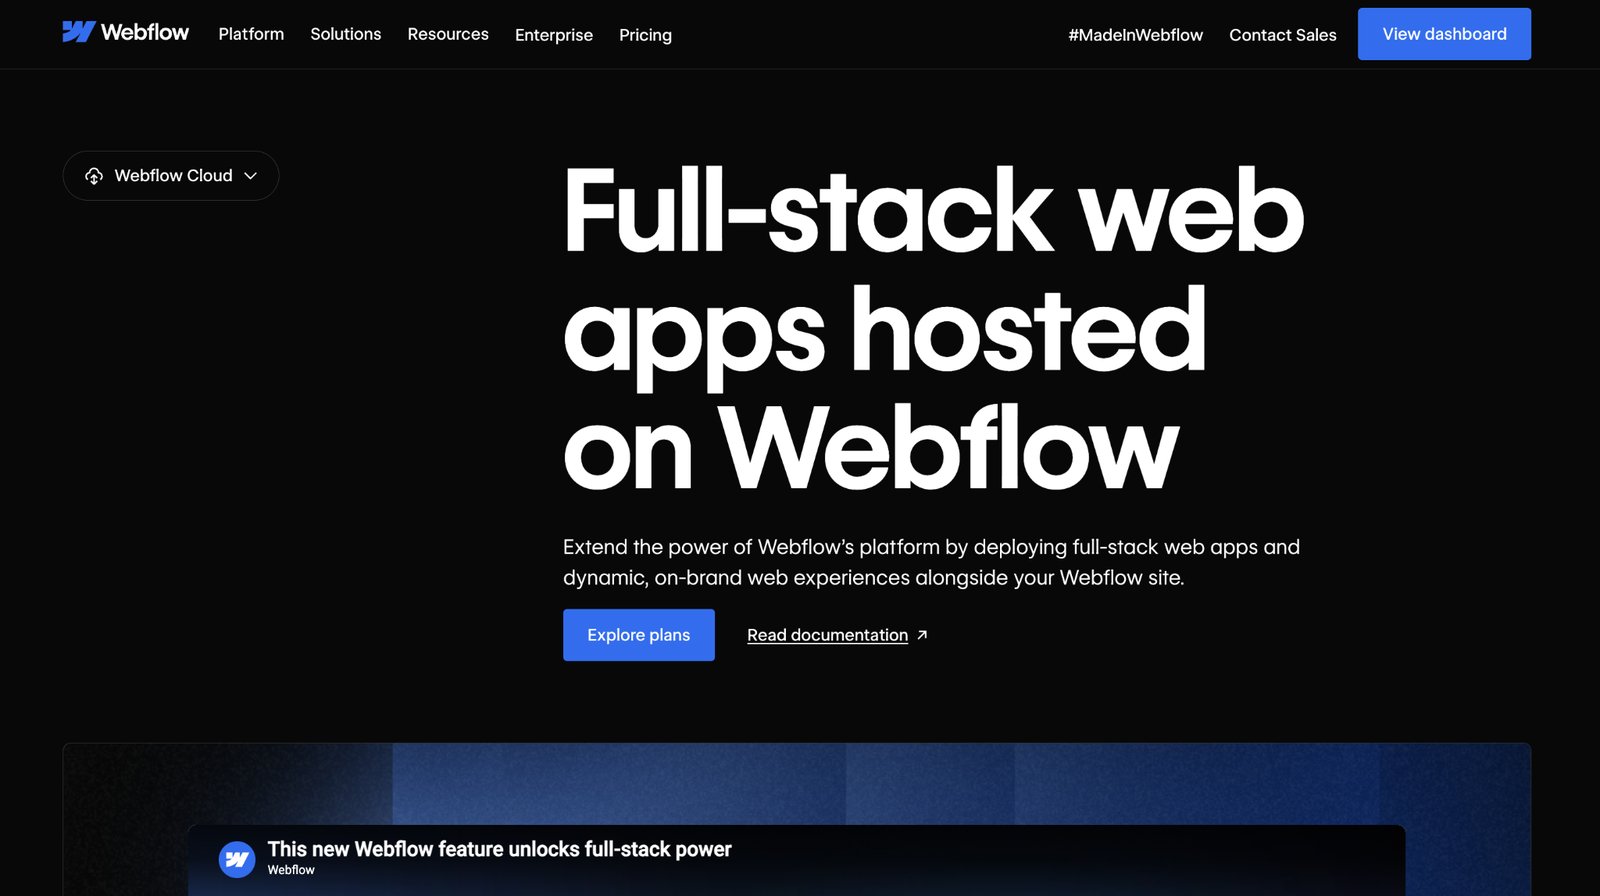
Using Sentry is one of the fastest ways to know exactly what broke, where, and why, but getting it to actually deliver events on Webflow Cloud requires one non-obvious configuration change that most setups miss.
Production observability is a separate concern from deployment, and on Webflow Cloud, adding Sentry is the most direct way to get it. The integration works cleanly for both Next.js and Astro, with one setup detail that determines whether error events actually arrive.
The Cloudflare Workers runtime Webflow Cloud runs on has one non-obvious requirement for Sentry to actually deliver error events: a compatibility_date of 2025-08-16 or later in your wrangler.jsonc.
Without it, Sentry initializes cleanly, your dashboard shows no errors, and you have no idea whether that's because nothing broke or because nothing is being captured. Most setups miss this.
This guide covers the full Sentry setup for Webflow Cloud: the correct SDK for Next.js or Astro, storing your DSN securely in Webflow Cloud's environment variable dashboard, and the wrangler.jsonc change that makes events actually arrive.
What do you need to add Sentry error tracking to a Webflow Cloud app?
You need a live Webflow Cloud deployment, a Sentry account with a project DSN, and a local copy of your app with push access to GitHub. No additional Cloudflare account, third-party middleware, or Webflow plan upgrade required.
Here's the full breakdown before you start.
A live Webflow Cloud project
Your app must be deployed to Webflow Cloud, either created via the Webflow CLI or brought in as your own app. Webflow Cloud supports Next.js (version 15 or higher) and Astro. If you haven't set that up yet, do that before continuing.
Webflow Cloud deploys from a GitHub branch you link during project setup. If you've gone through the CLI setup or brought your own app, your project will have at least one environment (typically production) with a deployment ID you can reference in the Environments Dashboard.
If you haven't deployed yet, Webflow Cloud's getting-started walks you through creating your first project from the CLI. Come back here once you have a live deployment. Sentry needs a real runtime to send events to, and local-only setups won't complete the verification step in Step 5.
A Sentry account and project
Create a free account at sentry.io if you don't have one.
Once logged in, create a new project and select the platform that matches your framework: Next.js for a Next.js app, Cloudflare for an Astro app on Cloudflare. The platform determines which SDK Sentry recommends and which setup instructions it shows.
Your project's DSN is the string Sentry uses to route error events. It looks like:
https://abc123xyz@o12345.ingest.sentry.io/9876543You'll need this string in Step 3.
GitHub access and a local copy of your app
Webflow Cloud deploys from GitHub automatically on each push to the linked branch. Make sure your local repo is up to date with the deployed branch before starting.
Webflow Cloud connects to GitHub via the Webflow Cloud GitHub App, which you authorize during project setup. When you push to the linked branch, Webflow Cloud detects the change and automatically kicks off a build. No manual deploy step required.
Node.js 20.0.0+ and npm
Required for installing Sentry packages. Webflow Cloud currently only supports the npm package manager for project dependencies.
Node.js 20 is the minimum because the Sentry SDK packages use Node.js APIs that aren't available in earlier LTS versions. You can check your current version by running node --version in your terminal. If you're below 20, install the latest LTS release from nodejs.org, or use a version manager like nvm to switch versions.
npm comes bundled with Node.js, so upgrading Node.js also upgrades npm. Webflow Cloud's build environment uses Node.js 20 by default — matching your local version prevents dependency resolution mismatches between local installs and the cloud build.
Once these are in place, the full setup takes about 20–30 minutes, depending on your framework.
5 steps to add Sentry error tracking to a Webflow Cloud app
The setup splits into two paths (Next.js and Astro) because each framework requires different SDK packages and configuration files.
The core concepts are the same: install the SDK, configure it to read the DSN from an environment variable, store that variable in Webflow Cloud's dashboard, and confirm the Workers runtime compatibility date.
One important thing to know before you start: Webflow Cloud injects environment variables at runtime only, not during the build. Any code that reads process.env.SENTRY_DSN at build time (including top-level validation checks) will fail the build even when the variable is correctly configured.
The steps below are written to avoid this.
1. Install the Sentry SDK(s) for your framework
The Sentry SDK you install depends on your framework. Next.js uses a single package that handles both client- and server-side tracking.
Astro requires two:
- One for client-side tracking via Astro's build pipeline
- One for server-side tracking via the Cloudflare Workers runtime
Installing the wrong package (or only one of the two for Astro) is the most common setup mistake.
Before running the install command, make sure you're in the root of your local project and that your terminal is pointing to the correct directory. All packages are installed to the project root's node_modules and should appear in package.json under dependencies, not devDependencies.
Install the package that matches your framework.
For Next.js:
npm install @sentry/nextjs --saveThis single package handles client-side (browser), server-side, and edge tracking. In Step 2, you'll create separate initialization files for each environment.
@sentry/nextjs is purpose-built for Next.js and includes App Router instrumentation, edge runtime support, and source map integration. It's the correct and complete package for a Next.js app on Webflow Cloud.
For Astro:
Astro on Webflow Cloud requires two packages: one for client-side tracking and source maps, and one for server-side edge runtime tracking:
npx astro add @sentry/astro
npm install @sentry/cloudflare --save
@sentry/astro handles client-side error capture and integrates with Astro's build pipeline for source maps. @sentry/cloudflare handles server-side error tracking via Cloudflare Pages middleware. Both are needed for complete coverage.
After installation, verify that both packages appear in package.json under dependencies.
The correct Sentry package(s) for your framework appear in package.json under dependencies.
2. Create Sentry configuration files
Sentry configuration files tell the SDK how to initialize, which DSN to use, and how to hook into your framework's error pipeline.
The exact files depend on your framework: Next.js needs three files to cover the edge runtime, server runtime, and request error hook. Astro needs a client config file, a config entry in astro.config.mjs, and a middleware file for server-side coverage.
All config files read the DSN from an environment variable, never hardcoded. The variable isn't available yet (you'll add it in Step 3), but having the config reference it by name now means you only need to set it once in Webflow Cloud's dashboard for it to flow through to all three files.
Here's the full configuration for each framework.
For Next.js (App Router):
Create four files at the project root:
instrumentation-client.ts:Browser-side error captureinstrumentation.ts: Registers server and edge configs with Next.jssentry.server.config.ts: Server-side init (Node.js runtime)sentry.edge.config.ts: Edge runtime init
Webflow Cloud deploys Next.js via the OpenNext Cloudflare adapter, which uses Next.js's Node.js runtime. In production, NEXT_RUNTIME evaluates to "nodejs", meaning sentry.server.config.ts is the active server-side config.
The sentry.edge.config.ts config is included for completeness, but will not be the active path on Webflow Cloud.
Each file serves a distinct role in the initialization chain.
instrumentation.ts:
import * as Sentry from "@sentry/nextjs";

export async function register() {
  if (process.env.NEXT_RUNTIME === "nodejs") {
    await import("./sentry.server.config");
  }
  if (process.env.NEXT_RUNTIME === "edge") {
    await import("./sentry.edge.config");
  }
}

// Captures errors from Server Components, middleware, and proxies
export const onRequestError = Sentry.captureRequestError;sentry.edge.config.ts:
import * as Sentry from "@sentry/nextjs";

Sentry.init({
  dsn: process.env.SENTRY_DSN,
  tracesSampleRate: 1.0,
  enableLogs: true,
});sentry.server.config.ts:
import * as Sentry from "@sentry/nextjs";

Sentry.init({
  dsn: process.env.SENTRY_DSN,
  tracesSampleRate: 1.0,
  enableLogs: true,
});
Next.js calls register() in both runtimes on startup. The NEXT_RUNTIME guard ensures each config file loads only in its target environment. The onRequestError export is what hooks into Next.js's request error pipeline. Without it, errors from Server Component and API routes are captured less reliably.
If you ran Sentry's wizard: The wizard adds withSentryConfig to next.config.ts, which expects SENTRY_AUTH_TOKEN at build time for source map upload. If you skip adding this token, your first push will fail with a build error. Either add SENTRY_AUTH_TOKEN as an environment variable in Webflow Cloud (Step 3), or remove withSentryConfig from next.config.ts to get basic error tracking working first — source map upload can be added later.instrumentation-client.ts:
// instrumentation-client.ts
import * as Sentry from "@sentry/nextjs";

Sentry.init({
  dsn: process.env.NEXT_PUBLIC_SENTRY_DSN,
  tracesSampleRate: 1.0,
  enableLogs: true,
});
For Astro:
The Astro setup has two parts: registering the @sentry/astro integration in astro.config.mjs for client-side tracking, and adding the @sentry/cloudflare middleware for server-side tracking.
First, add the Sentry integration to astro.config.mjs alongside the Cloudflare adapter:
// astro.config.mjs
import { defineConfig } from "astro/config";
import cloudflare from "@astrojs/cloudflare";
import sentry from "@sentry/astro";

export default defineConfig({
  adapter: cloudflare(),
  integrations: [sentry()],
});
Then create a sentry.client.config.ts file at the project root for client-side initialization:
// sentry.client.config.ts
import * as Sentry from "@sentry/astro";

Sentry.init({
  dsn: import.meta.env.PUBLIC_SENTRY_DSN,
  tracesSampleRate: 1.0,
  enableLogs: true,
});
Finally, create functions/_middleware.ts at the project root for server-side tracking:
// functions/_middleware.ts
import * as Sentry from "@sentry/cloudflare";

export const onRequest = [
  // Sentry must be the first middleware in the array
  Sentry.sentryPagesPlugin((context) => ({
    dsn: context.env.SENTRY_DSN,
    tracesSampleRate: 1.0,
    enableLogs: true,
  })),
];
Two DSN variable names for Astro: The client-side config (sentry.client.config.ts) accesses the DSN via import.meta.env.PUBLIC_SENTRY_DSN — the PUBLIC_ prefix makes the variable available in the browser.
The server-side config (functions/_middleware.ts) accesses it via context.env.SENTRY_DSN. You'll need to add both PUBLIC_SENTRY_DSN and SENTRY_DSN as environment variables in Webflow Cloud in Step 3.
Expected outcome: Configuration files exist in your project and reference the Sentry DSN via environment variable only — no hardcoded strings.
3. Add your Sentry DSN as a secret in Webflow Cloud
Your DSN needs to be available at runtime as an environment variable. Webflow Cloud injects environment variables at runtime only; they're not accessible during the build process.
Open your Webflow site, navigate to Site Settings, and select Webflow Cloud from the sidebar.
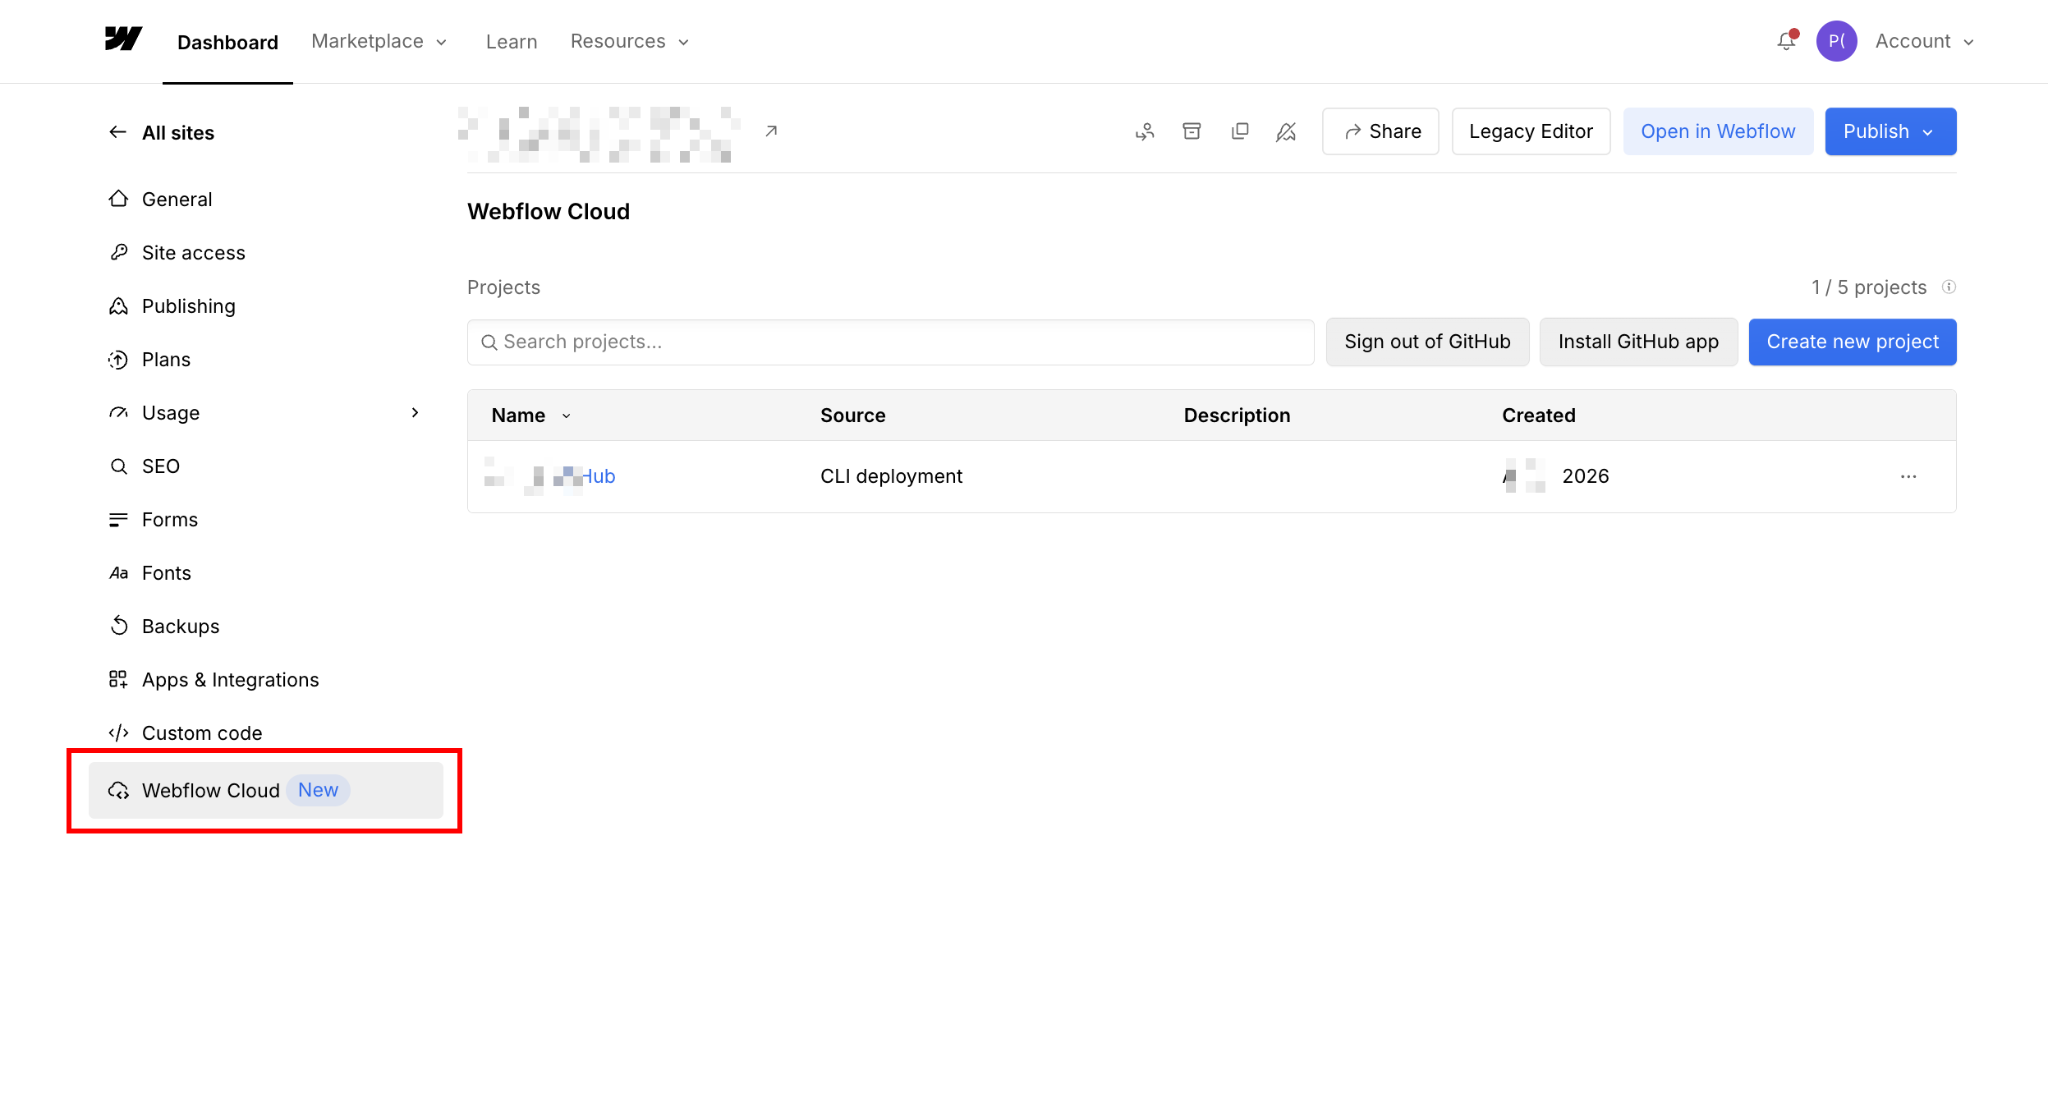
Click your project name to open the Environments Dashboard, then click your environment name to open the Deployment Dashboard. Select the Environment Variables tab and click Add variable.
For Next.js, add two variables:
- Variable Name:
SENTRY_DSN| Value: your full DSN string | Enable Secret (used by server and edge configs) - Variable Name:
NEXT_PUBLIC_SENTRY_DSN| Value: your full DSN string | Enable Secret (used by the client config; theNEXT_PUBLIC_prefix exposes it to the browser)
For Astro, add two variables:
- Variable Name:
SENTRY_DSN| Value: your DSN | Enable Secret - Variable Name:
PUBLIC_SENTRY_DSN| Value: your DSN | Enable Secret (this one is public, but masking it in the dashboard prevents accidental exposure in logs)
Expected outcome: The required variable(s) appear in the Environment Variables list with masked values.
Bulk import shortcut: In the Environment Variables tab, click Add variable > Bulk import to drag in a .env file. Webflow Cloud automatically flags variables ending in _DSN, _KEY, or _TOKEN as secret candidates.
4. Update your local wrangler.jsonc
Webflow Cloud auto-generates a production wrangler.json at deploy time. You can't edit it directly. For local development and Wrangler preview, create or update your wrangler.jsonc at the project root:
// wrangler.jsonc
{
  // nodejs_compat is automatically applied by Webflow Cloud in production.
  // Include here so local previews match production behavior.
  "compatibility_flags": ["nodejs_compat"],
  // Required for Sentry — introduces https.request to the Workers runtime,
  // which Sentry needs to deliver events to sentry.io.
  "compatibility_date": "2025-08-16"
}
The "compatibility_date": "2025-08-16" line is the critical change. Sentry uses https.request to send events, and Cloudflare introduced that API on this compatibility date. Earlier dates and omission both result in Sentry initializing silently, but events never arriving in your Sentry dashboard.
Test locally before pushing: Run npm run preview (the Wrangler preview command configured by the Webflow CLI) to serve your app locally against the Workers runtime. Navigate to your debug route (localhost:PORT/your-mount-path/debug-sentry) and check whether the error appears in Sentry. If it does locally but not after deploying, the issue is Webflow Cloud's production compatibility date. If it doesn't appear locally either, the issue is your wrangler.jsonc config or the DSN value itself.Note on Webflow Cloud's production wrangler config: Webflow Cloud manages the production wrangler configuration, so you can't inspect or edit it directly. The wrangler.jsonc you create applies only to local development.
If events flow in the local Wrangler preview but not in the deployed app, Webflow Cloud's production compatibility date may be set earlier than 2025-08-16.
Expected outcome: wrangler.jsonc at the project root contains both nodejs_compat and "compatibility_date": "2025-08-16" or later.
5. Push to GitHub and verify events in Sentry
Commit and push your changes to the GitHub branch linked to your Webflow Cloud environment:
git add .
git commit -m "add Sentry error tracking"
git push origin main
Webflow Cloud detects the push and automatically starts a deployment. In Webflow Cloud, click your project name to open the Environments Dashboard, click your environment name to open the Deployment Dashboard, then click the Deployment ID (Commit SHA) to monitor build logs in real time.
Once the deployment completes, add a temporary test route to confirm Sentry is receiving events:
Next.js (App Router):
// app/debug-sentry/route.ts
export async function GET() {
  throw new Error("Sentry test error from Webflow Cloud");
}
Astro:
// src/pages/api/debug-sentry.ts
export const prerender = false;

export async function GET() {
  throw new Error("Sentry test error from Webflow Cloud");
}
Your mount path is the path you configured when creating your Webflow Cloud environment. For example, if your mount path is /app, the URL is yoursite.webflow.io/app/debug-sentry.
Navigate to yoursite.webflow.io/your-mount-path/debug-sentry (or /api/debug-sentry for Astro). Within a few seconds, the error should appear in your Sentry project's Issues tab.
Expected outcome: The test error appears in Sentry's Issues list with a stack trace and request context. Once confirmed, remove the test route and push again. Do not leave this route in production. Remove it and push before going live.
What causes Sentry to fail on Webflow Cloud?
The most common failure categories are a missing compatibility date, environment variable timing, and a known tracing limitation in the Workers runtime. Most of these fail silently: Sentry initializes without error, but events never appear in your dashboard.
Known issue (as of Q1 2026): Sentry's server-side integration with Next.js on OpenNext/Cloudflare Workers has known compatibility issues currently being tracked in sentry-javascript #18842. If you encounter AsyncLocalStorage errors or "Server failed to respond" after adding server-side Sentry, try removing sentry.server.config.ts and sentry.edge.config.ts temporarily — client-side tracking via instrumentation-client.ts and withSentryConfig in next.config.ts will still function. Monitor the linked issue for resolution status.Here's how to identify which failure you're dealing with and what to fix.
Events initialize but never appear in Sentry Issues
Cause: "compatibility_date" in wrangler.jsonc is earlier than 2025-08-16, or is absent. Sentry initializes without error, but can't deliver events over HTTPS.request isn't available on earlier dates.
Fix: Open wrangler.jsonc and confirm "compatibility_date": "2025-08-16" or later is set. Push a new commit to redeploy. If events flow in the local Wrangler preview but not in the deployed app, contact Webflow support, as Webflow Cloud's production compatibility date may be set earlier than your local config.
SENTRY_DSN is undefinedin runtime logs
Cause: The variable wasn't saved, the key name is misspelled, or you're looking at a different environment's variables. Webflow Cloud only injects environment variables at runtime, not during the build.
Fix: In the Webflow Cloud dashboard, navigate to your environment → Environment Variables and confirm the variable name is spelled exactly (case-sensitive). For Astro, confirm both SENTRY_DSN and PUBLIC_SENTRY_DSN are present. Click Edit to verify the DSN string starts with https://. After saving, push a new commit to redeploy.
Note:Do not check SENTRY_DSN at module-level build time. Any top-level check, such as if (!process.env.SENTRY_DSN) throw new Error(...), will fail the Webflow Cloud build even when the variable is correctly configured at runtime.
Server-side spans all show 0ms duration
Cause: This is expected behavior, not a misconfiguration. The Cloudflare Workers runtime prevents performance.now() and Date.now() from advancing during CPU-only operations as a security measure against timing attacks. This affects every framework deployed to Cloudflare Workers.
Fix: There is no fix. Client-side tracing from the browser shows accurate timings. For server-side timing context, use structured logging with manual timestamps.
Next.js API route and Server Component errors aren't captured
Cause: Webflow Cloud's Next.js apps run on the Node.js runtime via the OpenNext Cloudflare adapter — NEXT_RUNTIME evaluates to "nodejs" in production. If sentry.server.config.ts isn't loading correctly, or onRequestError is missing from instrumentation.ts, Server Component and API route errors won't be captured.
Fix: Confirm instrumentation.ts exports onRequestError = Sentry.captureRequestError and that the NEXT_RUNTIME === "nodejs" block correctly imports ./sentry.server.config. Also, confirm SENTRY_DSN is set in the Webflow Cloud environment variables dashboard and that the deployment completed after you added it.
Build fails after adding Sentry to Next.js
Cause: Sentry's wizard adds withSentryConfig to next.config.ts, which expects SENTRY_AUTH_TOKEN at build time for source map upload. If this token is missing, the build fails.
Fix: Add SENTRY_AUTH_TOKEN as an environment variable in Webflow Cloud, or temporarily remove withSentryConfig from next.config.ts to get basic error tracking working first. Source map upload is optional for initial setup.
What to instrument next
Error tracking is the baseline.
Once Sentry is receiving events, three things are worth adding before calling the setup production-ready:
- Source maps: Without them, Sentry shows minified stack traces that are difficult to read. Add
withSentryConfigtonext.config.ts(Next.js) or configure source map upload in@sentry/astro(Astro), then addSENTRY_AUTH_TOKENas an environment variable in Webflow Cloud. - Release tracking: Tag each Sentry release with the GitHub commit SHA from your Webflow Cloud deployment. This ties errors to specific deployments and makes regression tracking straightforward.
- Performance monitoring:
tracesSampleRate: 1.0captures 100% of transactions in development, but production sites should lower this (0.1–0.2 is common) to avoid hitting Sentry's quota limits.
Explore Webflow + Sentry for custom error boundaries, distributed tracing across services, and the full Webflow Cloud configuration reference.
Frequently asked questions
Which Sentry SDK do I use for a Next.js app on Webflow Cloud?
Use @sentry/nextjs, the standard Next.js SDK. Sentry officially supports Next.js deployed on Cloudflare Workers using @sentry/nextjs, with one additional requirement: set "compatibility_date": "2025-08-16" or later in your wrangler.jsonc. This date introduces https.request to the Workers runtime, which Sentry needs to deliver events.
Which Sentry SDK do I use for an Astro app on Webflow Cloud?
You need two packages: @sentry/astro (for client-side error tracking and source maps) and @sentry/cloudflare (for server-side tracking via Pages middleware). Install them with npx astro add @sentry/astro and npm install @sentry/cloudflare. Configure the Sentry integration in astro.config.mjs, create sentry.client.config.ts for client-side init, and add sentryPagesPlugin to functions/_middleware.ts for server-side tracking.
Do I need a paid Sentry plan to use it on Webflow Cloud?
No. Sentry's free Developer plan includes error monitoring, performance tracing, and structured logging with 5,000 errors and 10,000 performance units per month.
Why do my server-side performance traces all show 0ms?
This is a known Cloudflare Workers platform limitation, not a Sentry misconfiguration. The Workers runtime prevents timing APIs from advancing during CPU-only operations to prevent timing attacks. Every framework deployed to Cloudflare Workers has this behavior. Client-side traces from the browser are unaffected.


