






Elfsight-countdown-timer-widget
Connect Elfsight Countdown Timer with Webflow to add live deadlines to any page with a Code Embed element.

A sale end date typed into a text block stays static. Weekly restarts, expiry hiding, timezone math, per-visitor persistence, and redirects require custom JavaScript. Elfsight Countdown Timer replaces that work with a hosted widget.
Connecting the two puts a live countdown on any Webflow page with Elfsight installation code. The deadline, theme, layout, and expiry action live in the Elfsight editor. Edits appear there without re-pasting the code or re-deploying.
Ecommerce teams use it for Black Friday and flash-sale bars. Marketers running product launches, webinars, and course enrollments use it on landing and coming-soon pages. Webflow freelancers and agencies add it to client sites from one Elfsight dashboard.
How to integrate Elfsight Countdown Timer with Webflow
What is Elfsight Countdown Timer? Elfsight Countdown Timer is a cloud-hosted, embeddable countdown widget made by Elfsight. Countdown to Date handles fixed deadlines, while Personal Countdown handles per-visitor urgency. Number Counter displays rising or falling counts. Five layouts are available: Inline, Full-width Section, Top Bar, Bottom Bar, and Static Top Bar. You configure it in the Elfsight editor, and the widget loads those settings from Elfsight's servers at runtime.
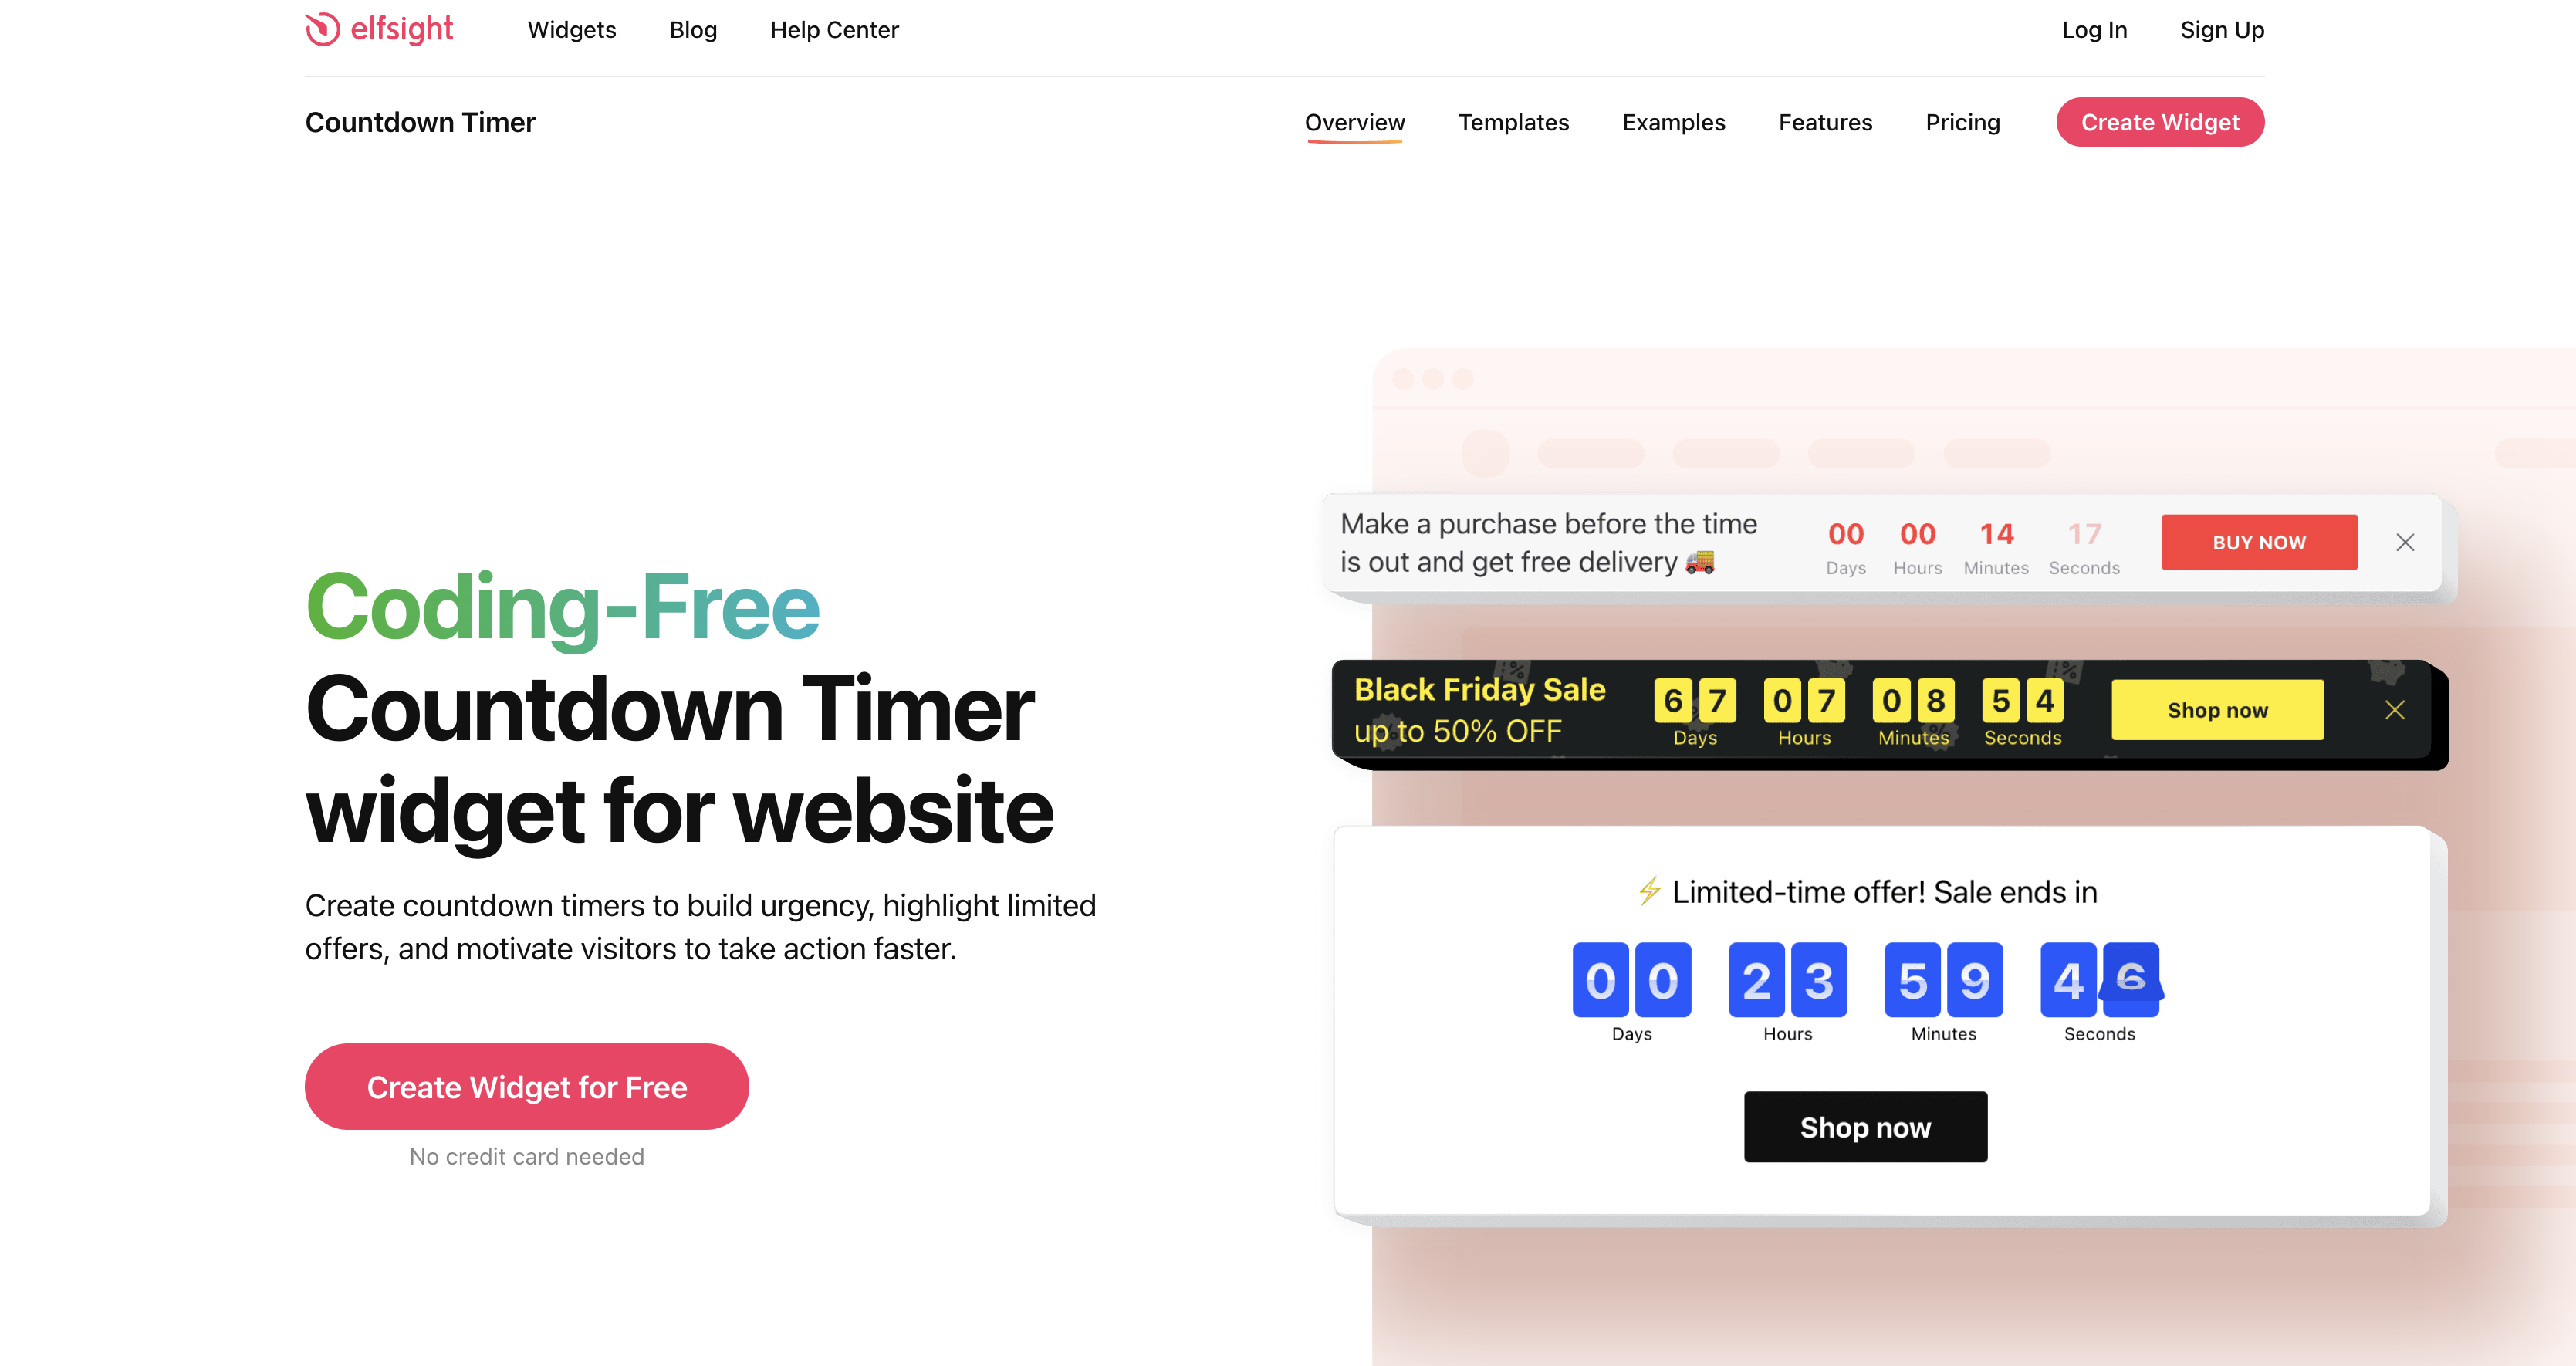
A launch page counts down to release day, and a pricing page shows each visitor a personal offer window. A Webflow CMS events Collection shows registration deadlines on every event page. Elfsight's Webflow page frames the widget around sale urgency, falling stock counts, and holiday sale bars.
The Elfsight Countdown Timer-Webflow integration supports three approaches:
- Code Embed elements place the timer on specific pages, sections, or Collection template pages by pasting the snippet.
- Site-wide custom code loads a floating Top Bar or Bottom Bar timer on every page. The snippet goes in the Head Code field in site settings.
- The Webflow Data API custom code endpoints register and apply the Elfsight script from a Webflow App. This path requires server-side development.
Use the Code Embed path for specific pages and site-wide head code for floating bars. Elfsight publishes no Webflow Marketplace app, so every method here is a pasted embed rather than an install.
Add the timer with a Code Embed element
A two-line snippet handles most installations. The Code Embed element is the path Elfsight documents for Webflow. You paste the widget's installation code into the element, place it where the timer should render, and publish. It works on static and Collection template pages. Examples include a single landing page and a hero section on the home page. You need a paid Site plan, or a Core, Growth, Agency, or Freelancer Workspace plan. The free Starter plan blocks custom JavaScript. Each Code Embed accepts up to 50,000 characters.
To set up the integration:
- Log in at dash.elfsight.com, open My Apps, select your Countdown Timer, and click Install.
- Click Copy Code. The snippet has two parts: a
<script>tag that loads Elfsight's platform file from Elfsight's CDN, and a container<div class="elfsight-app-[UUID]"></div>carrying your widget's UUID. Paste both, exactly as Elfsight gives them to you. - Open your site in Webflow, open the Add panel, and drag a Code Embed element to the target location.
- Paste the code into the Code Embed editor and click Save & Close.
- Click Publish > Publish to Selected Domains.
After that one paste, every timer setting changes in the Elfsight editor, including:
- Timer mode and deadline, with a Time Zone option and a Repeat schedule (daily, weekly, monthly, yearly, or custom dates) for Countdown to Date
- Layout and theme, including Light, Dark, Gradient, and seasonal Halloween, Black Friday, Christmas, and New Year themes
- Action buttons during the countdown (Link, Form, or Add to Google Calendar) and expiry actions (Hide Timer, Redirect to URL, or Message)
- Google Analytics events for Countdown Completed, Countdown Restarted, Form Started, Form Submitted, and Button Clicked
- Custom CSS and Custom JS fields for styling beyond the editor controls
Use Preview mode with the Enable custom code toggle in the bottom-left corner, or check the published site. Current snippets also ship with data-elfsight-app-lazy, which delays loading until the visitor scrolls or hovers. A timer below the fold therefore starts ticking visually only when it enters view.
Repeat the timer across Collection template pages
An events or courses Collection can show a timer on every item page. A product-drop Collection can use the same setup. A Code Embed placed on its Collection template page renders on every item page in that Collection, just as a Collection List repeats items on a static page. Collection fields can be added to a Code Embed as dynamic data references when the embed sits on a Collection page or inside a Collection List. A CMS field can hold each item's widget UUID and select a different Elfsight widget per item.
To set this up:
- Add a field to the Collection to hold each item's Elfsight widget UUID. Paste each UUID from the Elfsight dashboard.
- Open the Collection template page, drag in a Code Embed, and paste the platform loader script.
- In the same embed, write the container div and reference that Collection field where the UUID belongs in
class="elfsight-app-[UUID]". - Click Publish > Publish to Selected Domains.
Set each Countdown Timer's end date in the Elfsight editor. External values cannot set it through an embed parameter or JavaScript method. Each item with a different end date therefore needs its own Elfsight widget. Each widget counts against your Elfsight account's widget allowance. A Date/Time field can print the end date as text beside the timer, but it does not drive the timer.
Load a floating timer bar on every page with site-wide custom code
A promotion that follows visitors across the site needs one snippet in site settings. The Top Bar and Bottom Bar layouts suit that placement, and Elfsight documents this method for floating widgets. For a static (embed) widget on all pages, Elfsight asks you to contact its Support Team. You paste the snippet once in site settings, and it loads everywhere after publish. The head and body code fields share the same character limit as Code Embed elements and the same paid-plan requirement.
To set this up:
- In the Webflow dashboard, click the site's ⋯ menu, choose Settings, then open Custom Code in the left sidebar.
- Paste the Elfsight installation code into the Head Code field and click Save.
- Click Publish > Publish to Selected Domains.
Head Code loads inside <head> on every page. Footer Code loads before </body> on every page. Page settings provide an Inside <head> tag field and a Before </body> tag field for one page.
Custom code takes effect after publishing. The canvas does not run it. Elfsight recommends async over defer and the platform script in <head> for load speed. Widgets installed after October 7, 2024 copy out with async, while an older install may still carry defer, which holds the loader back until the rest of the page has loaded. Elfsight's terms of service require loading the platform file only from Elfsight's own CDN, and bar self-hosting or substituting it.
Build with the Webflow Data API
Agencies installing the loader across many client sites need server-side development and a Data Client App with an OAuth token. The available public API path is Webflow-side and suits a Webflow App that installs the Elfsight loader. Teams managing deadline data in the CMS programmatically have the same need. Site tokens cannot call these endpoints. Only a Webflow App holding an OAuth token can.
The available APIs are:
- Elfsight Embed SDK handles widget listing and display through
ElfsightEmbedSDK.getApplications()andElfsightEmbedSDK.displayWidget(container, widgetId). It does not control a timer's date or runtime state - Webflow's custom code endpoints register hosted or inline scripts and apply them to sites and pages
- Webflow's CMS item endpoints handle Collection items and their Date/Time fields
- Webflow webhooks trigger real-time events such as
collection_item_changedandsite_publish
Countdown Completed is available as a Google Analytics event; timer completion does not send an Elfsight webhook. Deadline dates can still live in the CMS as data. Write them with PATCH /v2/collections/{collection_id}/items for staged items. Use PATCH /v2/collections/{collection_id}/items/live for published items. Both need the cms:write scope. To catch editor changes, create a webhook with POST https://api.webflow.com/v2/sites/{site_id}/webhooks set to collection_item_changed or collection_item_published. That call uses the sites:write scope. On each delivery, verify the x-webflow-timestamp and x-webflow-signature (SHA-256 HMAC) headers per the webhooks guide. Treat a request older than 5 minutes as a possible replay. The payload has no Elfsight destination, so someone still changes the widget's end date in the Elfsight dashboard.
Register the Elfsight loader from a Webflow App
Agencies can provision timers without opening each client's site settings. A Webflow App with the custom_code:write scope can install the Elfsight loader on a site. This pattern supports an agency tool that provisions timers across a client portfolio.
To implement this:
- Register the loader with
POST /v2/sites/{site_id}/registered_scripts/hostedand pass theplatform.jsURL. - Apply it site-wide with
PUT /v2/sites/{site_id}/custom_code, or to one page withPUT /v2/pages/{page_id}/custom_code. - Confirm placement with
GET /v2/sites/{site_id}/custom_code/blocks, which lists scripts applied site-wide and per page. - Place the container
<div class="elfsight-app-[UUID]"></div>in the page body through a Code Embed. The snippet has two parts, so the container still has to exist on the page.
When a client offboards, DELETE /v2/sites/{site_id}/custom_code removes every script your App applied to that site.
What you can build with the Elfsight Countdown Timer Webflow integration
Expiry actions determine what visitors see after a deadline, while Repeat schedules support recurring and personal offers. You write and maintain no timer script of your own.
- Black Friday sale bar: A Top Bar timer with the Black Friday theme loads from site-wide head code. It counts to the sale's end across the whole store. A Redirect to URL expiry action sends late visitors to the regular-price collection page when it hits zero.
- Coming-soon launch page: A Full-width Section timer on a Webflow landing page counts to release day. A Form button collects early-access signups. On expiry, the Message action swaps in launch copy and a Link button to the product page.
- Webinar registration page: A Countdown to Date timer sits above the registration form, with the Add to Google Calendar button. Elfsight offers that button for this mode only. A weekly Repeat schedule runs a recurring webinar without anyone resetting the widget.
- Evergreen offer on a pricing page: A Personal Countdown starts when each visitor lands. It keeps running across pages and return sessions. Repeat Countdown restarts it after the set Time Amount, and Countdown Completed fires to Google Analytics for reporting.
If you need to install the loader across many client sites at once, read our guide to applying custom code through the Data API, then come back for the per-widget deadline setup, which still applies.
Frequently asked questions
No. Custom code needs a paid Site plan, or a Core, Growth, Agency, or Freelancer Workspace plan, and Elfsight states the same requirement in its own Webflow install guide. If a site later drops to Starter, published custom code stays live. It cannot be edited until a paid Site plan returns, unless the site sits in a Workspace on a paid Workspace plan, where a Site plan downgrade leaves custom code alone. To get started, choose a Site plan for the site that will carry the timer.
The canvas does not execute the widget. Use the Preview workflow described in the installation section. Since April 29, 2025, previews run custom code, so you can check the timer before publishing by switching on the custom code toggle in Preview.
Use the per-item UUID pattern in the Collection template setup above. For a Collection with ten events on ten dates, that means ten widgets in the Elfsight dashboard.
The timer may be absent because the widget is hidden or deleted in Elfsight, the countdown already ended, its start date has not arrived, a visitor dismissed a bar layout, the installation code is missing, browser protections block it, or the monthly view cap is exhausted. Start with the widget's own settings, then the page, then your traffic. Elfsight's timer troubleshooting article covers the timer-specific causes. A finished countdown set to Hide Timer or Redirect to URL leaves nothing on the page. Hide Widget Before Countdown Starts keeps a Countdown to Date timer out of sight until its start date. A Top Bar, Bottom Bar or Static Top Bar carries a close button, and once a visitor clicks it the bar stays hidden for that visitor, which an incognito window will confirm. For the account and page side, Elfsight's general checklist covers the Hide from Website option, a deleted widget, installation code that was removed or commented out, ad blockers and privacy extensions, and a Content Security Policy that has to allow
*.elfsight.comand*.elfsightcdn.com. A plan's monthly view cap can also be exhausted by real traffic: once it is exceeded the widget is deactivated, in Elfsight's words, “as though it was never installed”, then reactivates at the next refresh date or after an upgrade.That's your call as the data controller. The widget sets one cookie,
elfsight_viewed_recently, oncore.service.elfsight.comwith a 15-second lifetime. It prevents inflated view counts, per Elfsight's GDPR article. Elfsight's privacy policy says Elfsight is a processor and stores visitor IP address, operating system, and browser type for 7 days. It leaves the legal basis and the visitor notices to the account owner. Elfsight also states: “We don’t currently offer a Data Processing Agreement (DPA).” For the banner itself, our tracking consent guide names DataGrail, the Finsweet Components App, TrustArc and OneTrust as consent management routes, plus a custom code approach.
Description
Add a hosted countdown to any Webflow page with a Code Embed element, or to every page at once through the Head code field in site settings, then change deadlines, themes and expiry actions from the Elfsight editor without re-pasting code.
This integration page is provided for informational and convenience purposes only.

Storesynk (formerly Shopyflow)
Connect Storesynk (formerly Shopyflow) with Webflow to run a Shopify-backed storefront designed in Webflow, with payment completed on Shopify checkout.

Looop
Connect Looop with Webflow to sync Shopify products into Webflow CMS and build headless e-commerce storefronts with full checkout functionality
AstroIC
Connect AstroIC with Webflow Ecommerce via OAuth to generate invoices and manage product catalogs in bulk for your ecommerce store.

Smootify
Connect Smootify with Webflow to run a Shopify store on a custom Webflow front end, built by hand or, in the Smootify 2.0 public beta, by an AI agent.

ShipStation
Revidflow
Connect Revidflow to your Webflow e-commerce store to automate review collection and display customer feedback.

Brandzway - Reviews, Photos & More
Connect Brandzway with Webflow to collect customer reviews automatically after purchase and display them on your ecommerce store.

Shipping IO
Connect Shipping IO with Webflow to route new store orders into Shipping IO for label generation and write tracking numbers back to each order.

Penni Cart
Connect Penni Cart with Webflow to sell products from CMS collections with a cart and checkout you design.
Related integrations
Get started for free
Try Webflow for as long as you like with our free Starter plan. Purchase a paid Site plan to publish, host, and unlock additional features.
