

Cometly
Connect Cometly, a multi-touch attribution platform, with Webflow to tie ad spend to real revenue from form submissions and pipeline events.
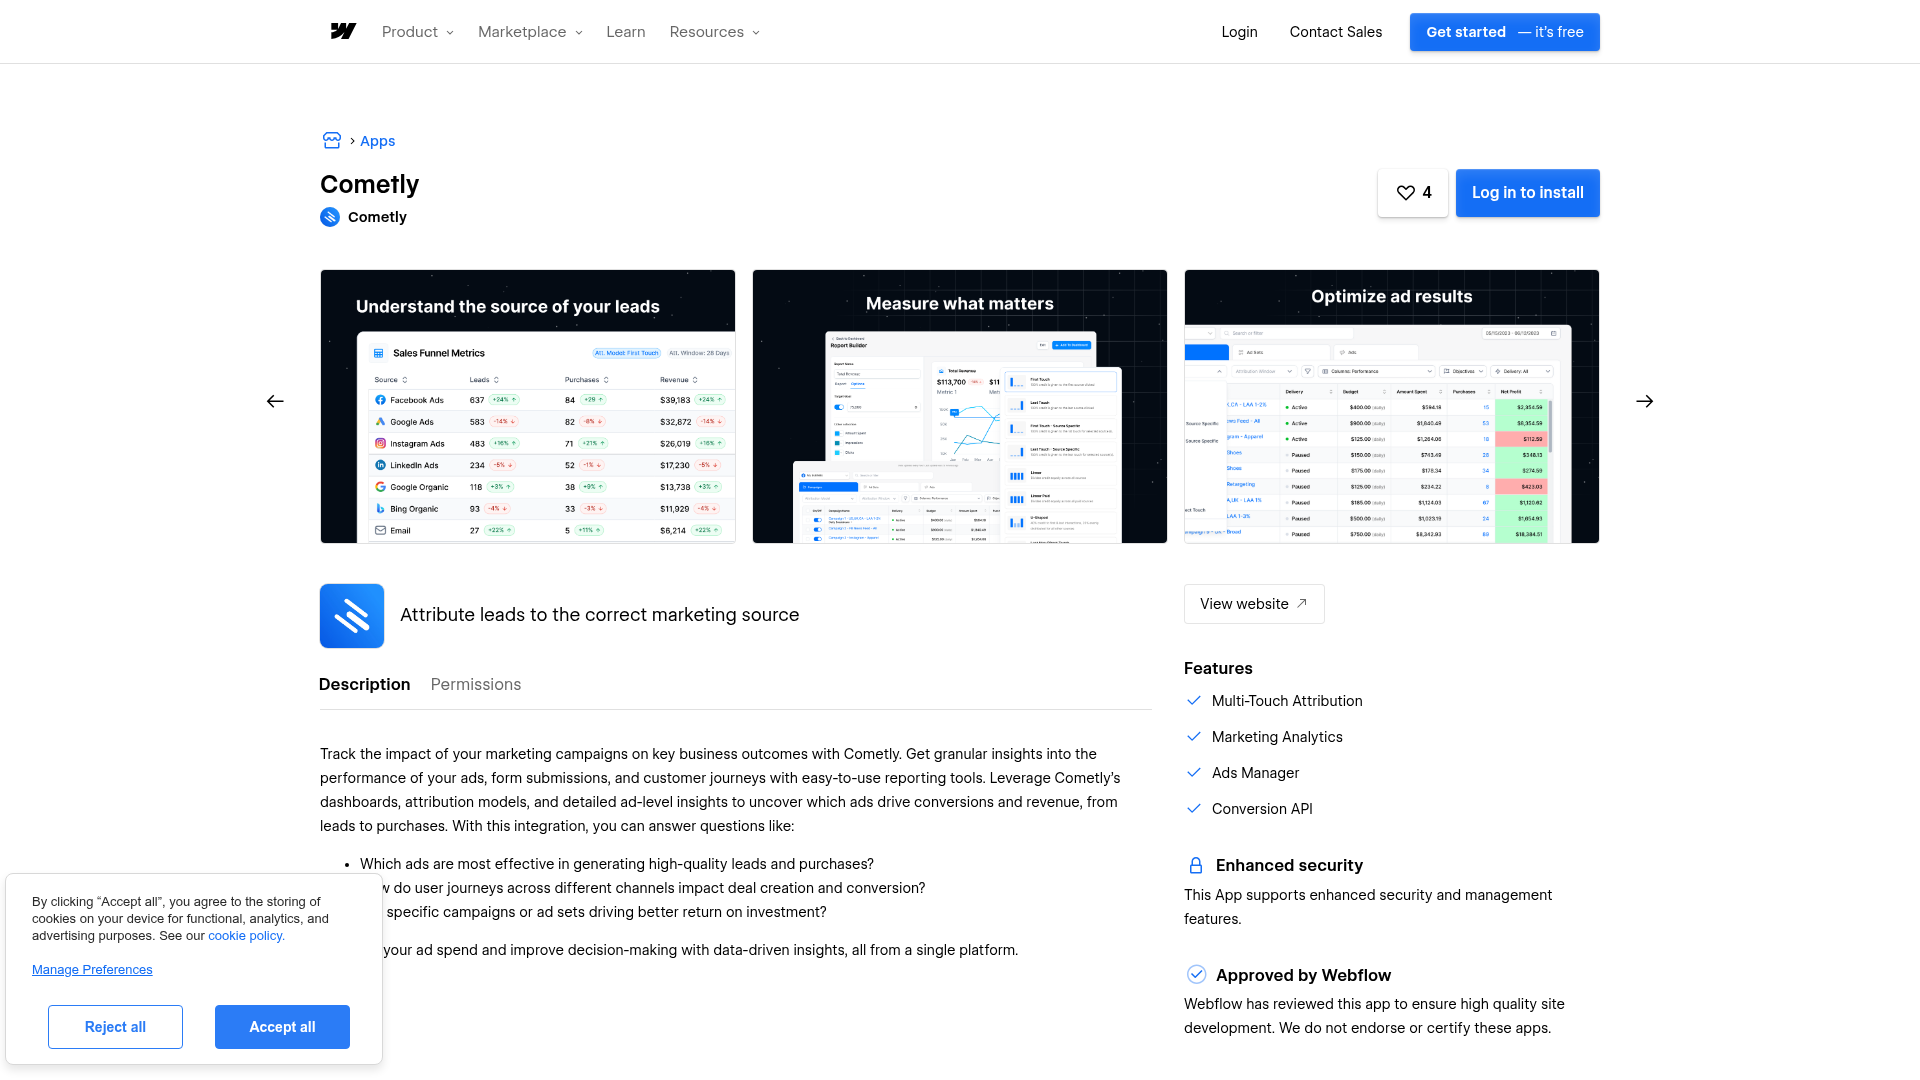
Cometly is a multi-touch attribution platform that ties every form submission and page visit on your Webflow site back to the exact ad campaign, set, or creative that drove it. The pixel identifies visitor sources, a webhook captures form conversions, and the Conversion API sends attributed events back to Meta, Google, LinkedIn, and TikTok — recovering data that browser-based tracking loses to Safari ITP, ad blockers, and consent banners.
If you're a growth marketer, demand gen manager, or agency team running paid campaigns to Webflow landing pages, this integration gives you first-party attribution data tied directly to ad spend — so you can measure cost-per-customer and report real ROAS instead of reconciling self-reported numbers from each platform.
How to integrate Cometly with Webflow
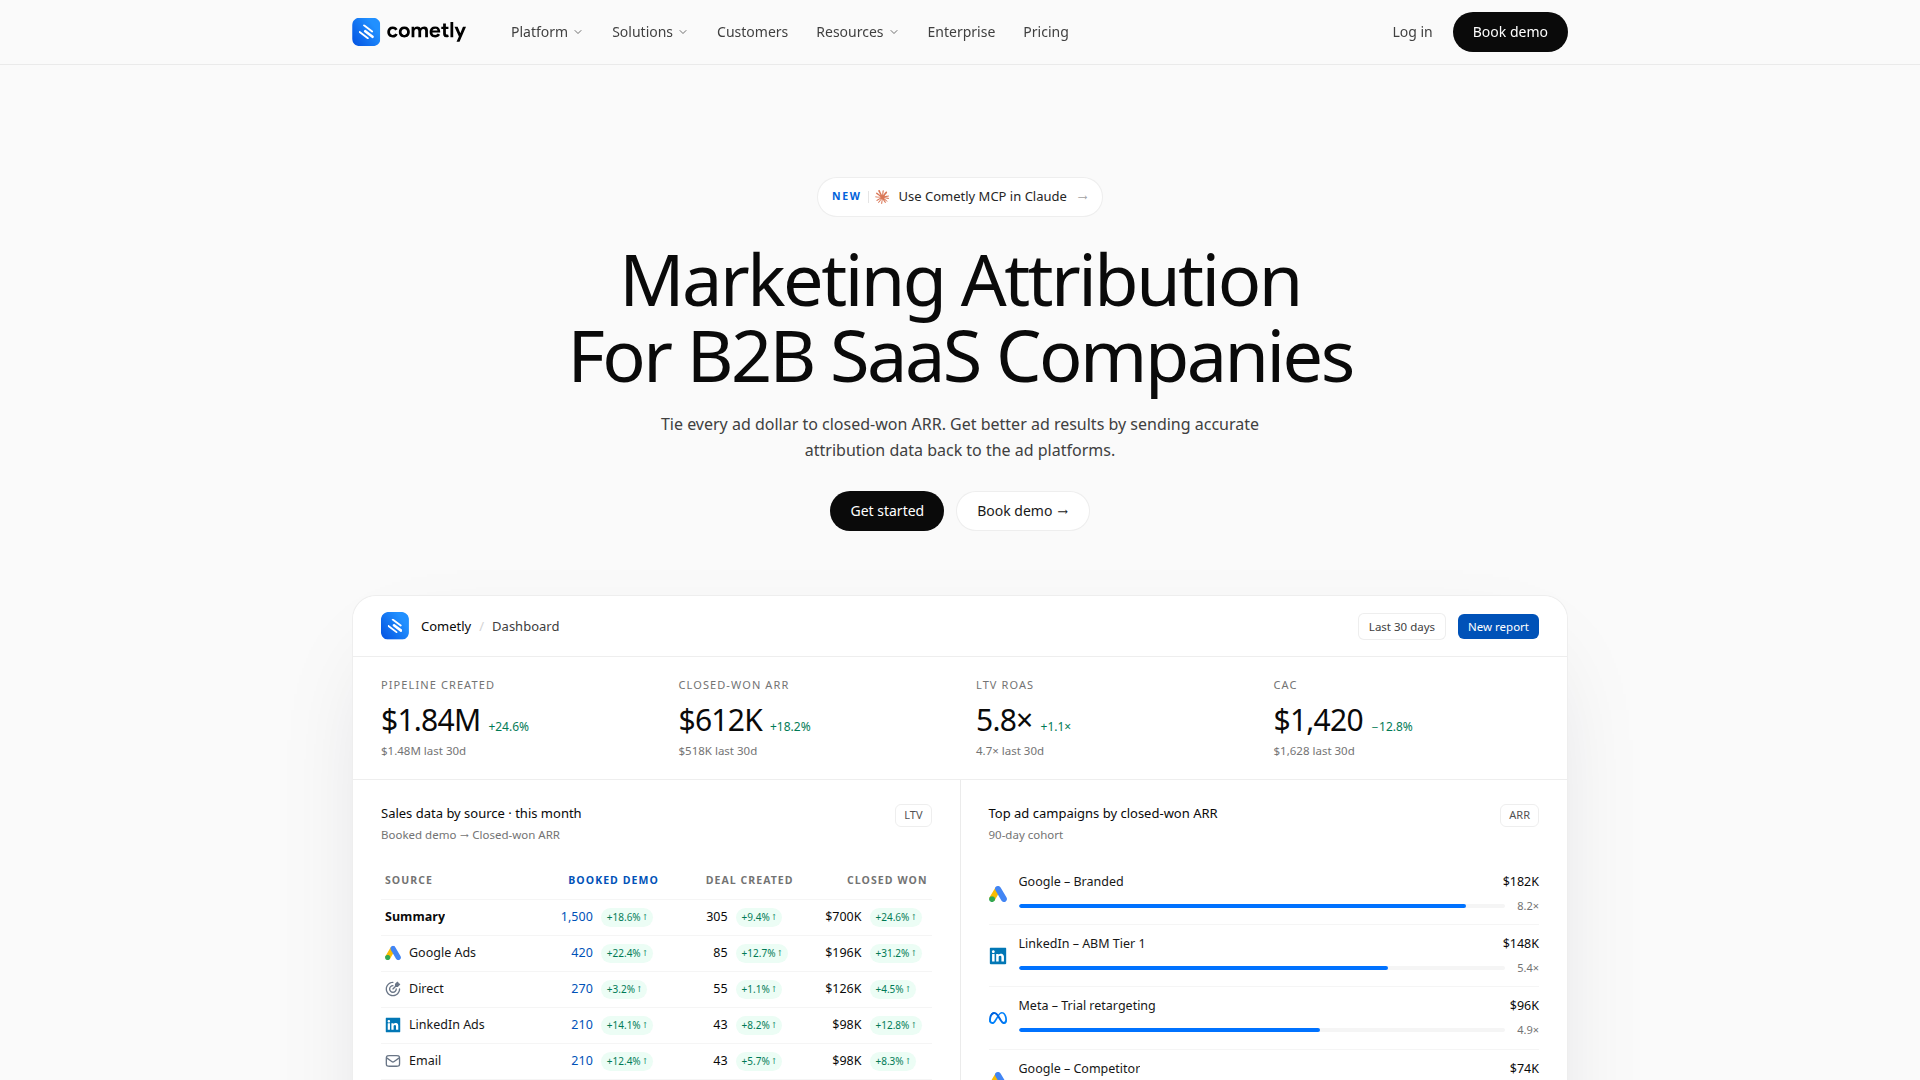
What is Cometly? Cometly is multi-touch marketing attribution software that connects ad spend to revenue outcomes across Meta, Google, LinkedIn, Microsoft, and TikTok campaigns. It tracks visitor sources with a client-side pixel and server-side events, then maps every touchpoint back to pipeline stages, MRR, and LTV in your CRM. Cometly also sends attributed conversion signals back to ad platforms via Conversion API to improve campaign optimization.
If you run paid ads to Webflow sites, you'll want to pair these tools when you need to see which specific campaigns generate revenue, not just form fills. The pixel tracks visitors across sessions and devices, while the webhook ties each form submission to its original ad click. Together, they give you one attribution dataset to work from instead of reconciling conflicting numbers from each ad platform.
You have 4 ways to connect Cometly and Webflow:
- Cometly app installs from the Webflow Marketplace and connects your Cometly account to your site without writing code.
- Custom code pixel and webhook setup lets you add the Cometly tracking pixel site-wide and configure form submission webhooks directly in site settings.
- Zapier lets you route Webflow form submissions to Cometly as attribution events through pre-built workflow templates.
- Webflow and Cometly APIs give you direct control over event tracking, contact management, and programmatic script injection, but require server-side development.
Most teams combine the pixel installation with either the webhook or Zapier method, depending on how complex the tracking setup needs to be.
Install the Cometly app
Install the Cometly app on the Webflow Marketplace to connect your Cometly account to a Webflow site quickly. It manages the connection between platforms and requests permissions to read workspace resources, read and write site data and publishing, read information about authorized users, and read and write site forms and submissions. After installation, you still need to add the Cometly tracking pixel to your site's head code for visitor-level attribution. You'll need a paid site plan since custom code fields aren't available on the free Starter plan.
To set up the integration:
- In your Cometly dashboard, go to Space Setup and click Install & Verify Cometly Pixel.
- Scroll to the bottom of the setup page and click Copy Code.
- In Webflow, open your project dashboard and go to Site Settings > Custom Code.
- Paste the pixel snippet into the Head Code field.
- Click Save Changes and publish your site.
The app connects your accounts, but the pixel does the visitor tracking. After publishing, verify the installation in Cometly by going to Space Setup > Add and verify domains, entering your domain, and checking for a verified status.
The pixel alone won't capture form submissions as conversion events. You also need to set up the form webhook, covered in the next section.
Add the Cometly pixel and form webhook with custom code
Install tracking directly through site settings if you'd rather skip the Marketplace app. You'll need to complete two separate steps: install the pixel for visitor tracking, and configure a webhook for form conversion attribution. Skipping the webhook is the most common setup mistake — visitor tracking works correctly, but zero form conversions show up in Cometly.
Install the Cometly pixel
The Cometly pixel is a <script> tag unique to your Cometly account. It tracks visitor sources automatically and captures form opt-in data including first name, last name, email, and phone number. Put the pixel in the <head> section of your site so it fires before the page renders.
To install the pixel:
- In your Cometly dashboard, go to Space Setup > Install & Verify Cometly Pixel.
- Scroll to the bottom of the page and click Copy Code.
- In Webflow, go to Site Settings > Custom Code.
- Paste the snippet into the Head Code field and click Save Changes.
- Publish your site to a live domain. Custom code doesn't run in preview mode.
- Back in Cometly, go to Add and verify domains, enter your domain (match the exact format your browser shows, with or without
www.), and click Confirm. - Check for a verified status. If you see failed, consult the Cometly Pixel Troubleshooting Guides.
You can also verify the pixel using the Cometly Pixel Helper Chrome extension.
Configure the form submission webhook
Send form submission data from Webflow to Cometly as conversion events with the webhook. Without this step, Cometly tracks visitors but can't attribute form fills to specific ad campaigns.
To set up the webhook:
- In your Cometly dashboard, create a webhook event and copy the generated webhook URL. Follow the Cometly Webhooks Guide for creating the event type and mapping fields.
- In Webflow, go to Settings > Apps & Integrations.
- Scroll to the bottom and click Add Webhook.
- Set the event type to Form Submissions.
- Paste the Cometly webhook URL and click Save.
- Back in Cometly, map the incoming webhook fields to your event properties and activate the webhook.
This webhook works with Webflow-hosted sites that use native form handling. Exported or self-hosted Webflow sites don't support this integration path, since exporting removes the native form backend.
Page-specific tracking with Code Embed
To track only individual pages, like thank-you or confirmation pages, use a Code Embed element instead of the site-wide head code.
To add the pixel to a specific page:
- In the Webflow Designer, open the page where you want tracking.
- Open the Add panel.
- Drag a Code Embed element onto the canvas.
- Open the embed editor and paste your Cometly pixel snippet.
- Save the embed and publish your site.
Don't use this method on pages that already have the pixel installed via site settings. Dual installation fires the pixel twice and corrupts your tracking data.
Google Tag Manager as an alternative
If you manage multiple tracking pixels through Google Tag Manager, you can add the Cometly pixel as a Custom HTML tag with an All Pages trigger. Cometly recommends direct head placement over GTM for best accuracy. GTM adds value mainly when you're managing pixels for Meta, Google, LinkedIn, and Cometly from a single interface.
Don't install the Cometly pixel both in GTM and in the site's head code — this fires duplicate events. Pick one method. Full GTM setup steps are in the Cometly GTM installation guide.
Connect Cometly and Webflow with Zapier
Use Zapier to send Webflow form submissions to Cometly events when you don't want to configure webhooks directly in site settings, or when you need to transform field data before it reaches Cometly.
A dedicated Webflow + Cometly integration page on Zapier includes a ready-made workflow template:
- Trigger: New Form Submission (Webflow)
- Action: Send Event (Cometly)
To set up the Zapier connection:
- Log in to Zapier and create a new Zap.
- Select Webflow as the trigger app and choose New Form Submission as the trigger event.
- Connect your Webflow account and select the site and form to monitor.
- Select Cometly as the action app and choose Send Event as the action.
- Connect your Cometly account and map the Webflow form fields to Cometly event fields (email, first name, last name, phone number, event name, comet token, and amount).
- Test the Zap and turn it on.
Cometly's Send Event action on Zapier accepts fields including Event, Event Time, Email, First Name, Last Name, Full Name, Phone Number, Amount, URL, IP Address, Fingerprint, Comet Token, Tracking ID, Order ID, Order Name, and Upsell.
Build with the Webflow and Cometly APIs
Reach for the REST APIs when pixel tracking and form webhooks aren't enough. This path fits development teams building server-side attribution flows, sending conversion data to external systems, or managing tracking code across multiple sites with code.
Available APIs:
- The Cometly Events API handles event creation, retrieval, and export. The
POST /public-api/v1/events/trackendpoint accepts conversion events with email, comet_token, or fingerprint+IP as identifiers. - The Webflow Data API v2 handles content in the Webflow CMS and form submissions.
- Webflow webhooks send real-time events between systems, including
form_submissionpayloads.
For Cometly API requests, you'll need a Bearer token generated at app.cometly.com/integrations. API keys are scoped per Space. The Cometly authentication docs cover key generation.
Send conversion events from a custom backend
If your Webflow site connects to a custom application layer (for processing payments, managing accounts, or handling signups), you can send attributed events directly to Cometly's API.
To implement server-side event tracking:
- Capture the
comet_tokenvalue from the visitor's session using thewindow.cometToken()JavaScript function exposed by the pixel. Pass this value to your backend with the form submission or conversion event. - Send a
POSTrequest tohttps://app.cometly.com/public-api/v1/events/trackwith theevent_name,email, andcomet_tokenfields. Includeamountfor revenue attribution. - The API returns
202 Acceptedfor successfully queued events. Events process asynchronously.
This approach works for deeper funnel events that happen outside Webflow, like trial upgrades, demo completions, or closed-won deals that originate from a Webflow form submission.
Register webhooks programmatically
Instead of configuring webhooks manually in the Webflow dashboard, you can register them via code with the Webflow Webhooks API. This helps when you're an agency managing attribution across multiple client sites.
To register a form submission webhook:
- Generate a Webflow API token with site-level access.
- Send a
POSTrequest tohttps://api.webflow.com/v2/sites/:site_id/webhookswith"triggerType": "form_submission"and the Cometly webhook URL as the"url"value. - Confirm the webhook is active by checking the
GET /v2/sites/:site_id/webhooksendpoint.
The Webflow webhook creation docs cover the full request schema and available trigger types.
What can you build with the Cometly Webflow integration?
Integrating Cometly with Webflow lets you attribute every form submission and conversion to the exact ad campaign that drove it, without rebuilding your existing site or CRM setup.
- Lead source attribution for paid campaigns: Track which Meta, Google, or LinkedIn ad set generated each Webflow form submission. If you run a B2B SaaS company with demo request forms, you can see cost-per-demo and cost-per-closed-deal by campaign, ad group, and individual creative.
- Server-side conversion signals for ad platform optimization: Send attributed events (MQL, Demo Booked, Closed-Won) back to Meta and Google via Conversion API. Instead of optimizing for raw form fills, ad algorithms target higher-intent audiences. This often raises your cost-per-lead while lowering your cost-per-customer.
- Full-funnel ROAS reporting with first-party data: Build dashboards that connect ad spend to pipeline stages and actual revenue. You can present ROAS figures based on CRM deal data and Stripe payments rather than self-reported platform numbers.
- Multi-touch journey mapping across channels: See every touchpoint a prospect takes across the customer journey, from the first ad click to the Webflow form fill and CRM deal close. If you run an agency managing multiple client sites, you can show which combination of channels (LinkedIn awareness, Google retargeting, Meta conversion) drives the highest LTV customers.
If you need more control over custom conversion events or cross-platform data flows, the API integration path gives you direct control over event tracking, contact management, and programmatic script injection.
Frequently asked questions
Yes. The pixel tracks visitor sources and sessions, but it does not capture Webflow native form submissions as conversion events on its own. The webhook is a separate, required step that sends form submission data to Cometly for attribution. Without the webhook, you will see visitor tracking but zero form conversions in your Cometly dashboard.
No. Custom code does not execute in preview mode. You must publish your site to a staging or live domain before the pixel fires. Attempting to verify the pixel in preview will produce a false negative. After publishing, use the Cometly Pixel Helper Chrome extension or the domain verification tool in Space Setup to confirm the installation.
You need a paid site plan. The free Starter plan does not support custom code in head and body tags, which is required for the Cometly pixel. Any paid site plan (CMS, Business, or Ecommerce) includes custom code access with a 50,000-character limit per code section.
Yes, but do not install the pixel in both GTM and the site's head code at the same time. Dual installation causes the pixel to fire twice and corrupts tracking data. Cometly recommends direct head placement over GTM for best accuracy. GTM is most useful when you already manage multiple ad platform pixels from a single interface.
No. The webhook integration depends on Webflow's native form handling backend, which is removed when you export a site. Self-hosted exports require a third-party form solution and a separate Cometly integration path, such as sending events directly via the Cometly Events API. Sites hosted on Webflow's infrastructure work with both the pixel and webhook methods.
Description
Connects Cometly's multi-touch attribution tracking to Webflow sites through pixel installation, form submission webhooks, and Zapier workflows.
This integration page is provided for informational and convenience purposes only.
Google Analytics
Connect Google Analytics 4 with Webflow to track traffic, user behavior, and conversions — through a native integration, the official Google Site Tools app, or direct API access.
AddThis
Turn your visitors into engaged customers.
Related integrations
Get started for free
Try Webflow for as long as you like with our free Starter plan. Purchase a paid Site plan to publish, host, and unlock additional features.
