All-in-One Accessibility
Connect All-in-One Accessibility, an AI-based accessibility widget, with Webflow to add screen reader support, color blindness modes, keyboard navigation, and 90+ WCAG compliance features to any page.
Semantic HTML and ARIA attributes are generated automatically, but WCAG compliance requires more than clean markup. Screen reader support, contrast adjustments, keyboard navigation, and disability-specific profiles fall outside what's handled natively, leaving a gap for sites that need to meet ADA, Section 508, or European Accessibility Act requirements.
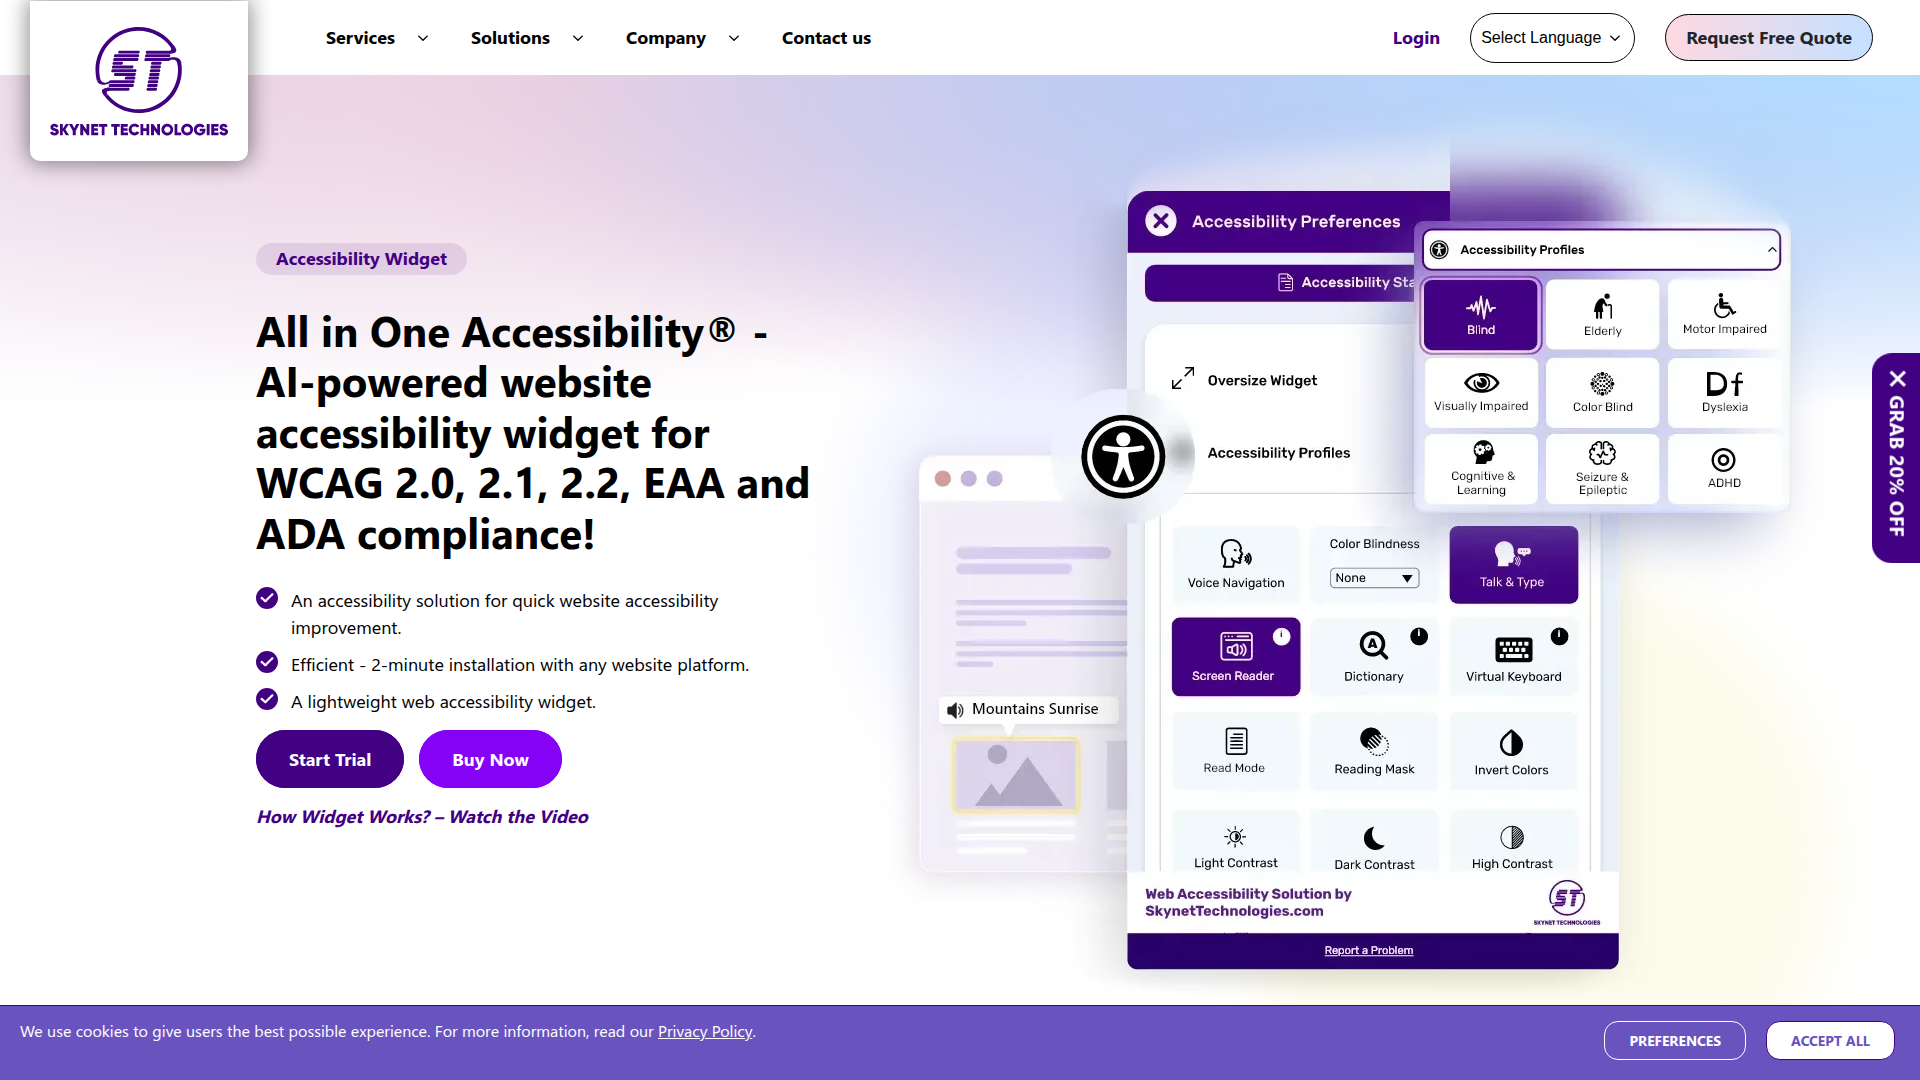
All-in-One Accessibility fills that gap with a widget that loads on every page, giving visitors controls for font sizing, color blindness modes, reading guides, voice navigation, and eleven disability profiles. Configuration happens through a hosted dashboard, so changes apply live without editing code or republishing.
This integration suits site owners responding to audits, agencies managing client compliance, and marketing teams meeting legal requirements without developer involvement—especially e-commerce, healthcare, and government contractors under ADA Title III or Section 508.
How to integrate All-in-One Accessibility with Webflow
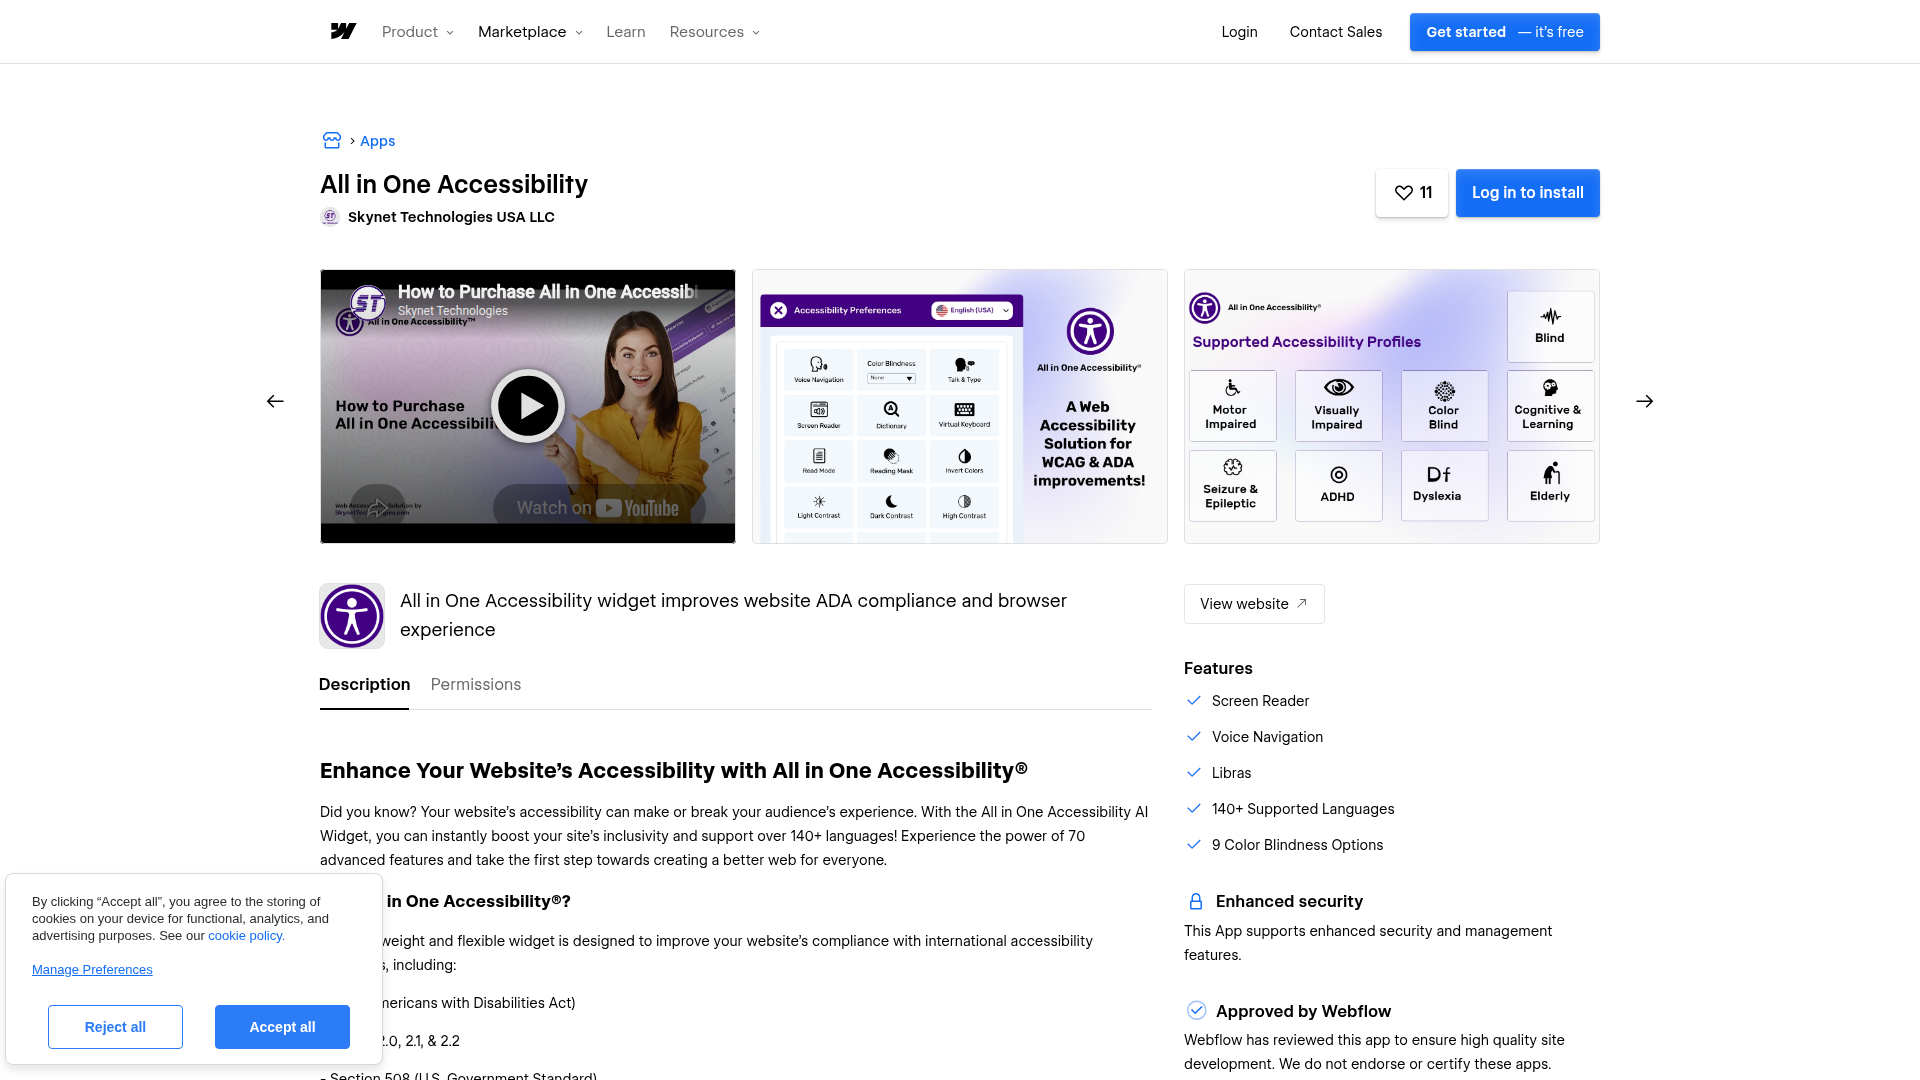
What is All-in-One Accessibility? All-in-One Accessibility is an AI-based website accessibility widget developed by Skynet Technologies. It installs via a single script tag and has 90+ features covering WCAG 2.0, 2.1, and 2.2, along with ADA Title III, Section 508, and 27+ international accessibility standards. The widget loads asynchronously and includes preset profiles for eleven disability types, multilingual support for 190+ languages, and a dashboard for widget customization and compliance reporting.
Teams add All-in-One Accessibility when they need to address accessibility requirements without building custom solutions. Common triggers include responding to an audit, preparing for a legal compliance deadline, or scaling accessibility across multiple client sites. The widget handles the visitor-facing accessibility layer while layout, content, and hosting stay managed within the site.
You can add All-in-One Accessibility to a Webflow site in 2 ways:
- All-in-One Accessibility Marketplace app installs the widget through an OAuth authorization flow without writing code.
- Custom code embedding lets you paste the widget script directly into site settings for site-wide deployment.
Most implementations use one of these methods depending on whether you prefer a managed app experience or direct control over the script placement.
Install the All-in-One Accessibility app
The All-in-One Accessibility app on the Marketplace is the fastest way to add the widget. It uses an OAuth-based authorization flow that connects your site to Skynet Technologies' platform. This method requires no code editing. A paid site plan is required, and the app offers a 10-day free trial before billing begins.
The app handles these tasks after installation:
- Injects the accessibility widget script across all pages on your site
- Connects to the Skynet Technologies dashboard for widget configuration
- Has screen reader, voice navigation, color blindness modes, and 90+ features total
To set up the integration:
- Go to the All-in-One Accessibility listing on the Marketplace and click Add to Site.
- Click AUTHORIZE W. WEBFLOW on the authorization page.
- Select All in One Accessibility Site and click Authorize App.
- Complete the registration form with your site and account details.
- Select a plan and click Continue.
- Submit payment details.
After installation, log in to the Skynet Technologies dashboard to configure widget appearance. You can change the icon type, icon size, color, position, and link a custom accessibility statement. Dashboard changes sync to your site automatically without republishing.
Add the widget with custom code
If you prefer direct control over the script, you can paste the All-in-One Accessibility embed code into the custom code in head and body tags settings, specifically into the Footer Code section. This approach is useful for teams that manage multiple third-party scripts through site settings and want the widget in a predictable location alongside other code. A paid site plan is required. You also need an All-in-One Accessibility account from Skynet Technologies, which sends your unique script tag by email after signup.
Site-wide deployment via footer code
This method places the widget on every page of your site. Skynet Technologies' Webflow installation guide and the integration reference both document this approach.
To add the widget site-wide:
- Sign up at skynettechnologies.com and copy the script tag from the email you receive. The script follows this format:```html
- Open your site's Dashboard.
- Select your Workspace, then click the more icon (⋯) and click Settings.
- In the left navigation, click Custom Code.
- Scroll to the Footer Code section and paste the complete script tag.
- Click Save Changes, then republish your site.
The widget will not appear until you republish. Custom code does not render in the canvas preview. Test on a published staging URL to confirm the widget loads correctly. Scripts with domain-based security controls may fail on preview URLs, which use .canvas.webflow.com subdomains per the external resources documentation.
Single-page deployment
You can limit the widget to a specific page by using page-level custom code instead of site-wide footer code. This is useful if you need to exclude the widget from payment pages to reduce PCI scope exposure.
To add the widget to one page:
- Open your site in the Designer.
- Click the Pages panel in the left sidebar.
- Hover over the target page and click the gear icon.
- Scroll to the Custom Code section.
- Paste the script into the Before