All-in-One Accessibility

Conecta All-in-One Accessibility, un widget de accesibilidad basado en IA, con Webflow para añadir compatibilidad con lectores de pantalla, modos para daltonismo, navegación por teclado y más de 90 funciones de cumplimiento de las WCAG a cualquier página.

→
↗
►
↓
←
↑
Instalar aplicación
→
↗
►
↓
←
↑
Ver sitio web
→
↗
►
↓
←
↑
Ver lección
→
↗
►
↓
←
↑
Configuración de registros A
→
↗
►
↓
←
↑
Configuración de registros CNAME
All-in-One Accessibility

Semantic HTML and ARIA attributes are generated automatically, but WCAG compliance requires more than clean markup. Screen reader support, contrast adjustments, keyboard navigation, and disability-specific profiles fall outside what's handled natively, leaving a gap for sites that need to meet ADA, Section 508, or European Accessibility Act requirements.

All-in-One Accessibility fills that gap with a widget that loads on every page, giving visitors controls for font sizing, color blindness modes, reading guides, voice navigation, and eleven disability profiles. Configuration happens through a hosted dashboard, so changes apply live without editing code or republishing.

This integration suits site owners responding to audits, agencies managing client compliance, and marketing teams meeting legal requirements without developer involvement—especially e-commerce, healthcare, and government contractors under ADA Title III or Section 508.

How to integrate All-in-One Accessibility with Webflow

What is All-in-One Accessibility? All-in-One Accessibility is an AI-based website accessibility widget developed by Skynet Technologies. It installs via a single script tag and has 90+ features covering WCAG 2.0, 2.1, and 2.2, along with ADA Title III, Section 508, and 27+ international accessibility standards. The widget loads asynchronously and includes preset profiles for eleven disability types, multilingual support for 190+ languages, and a dashboard for widget customization and compliance reporting.
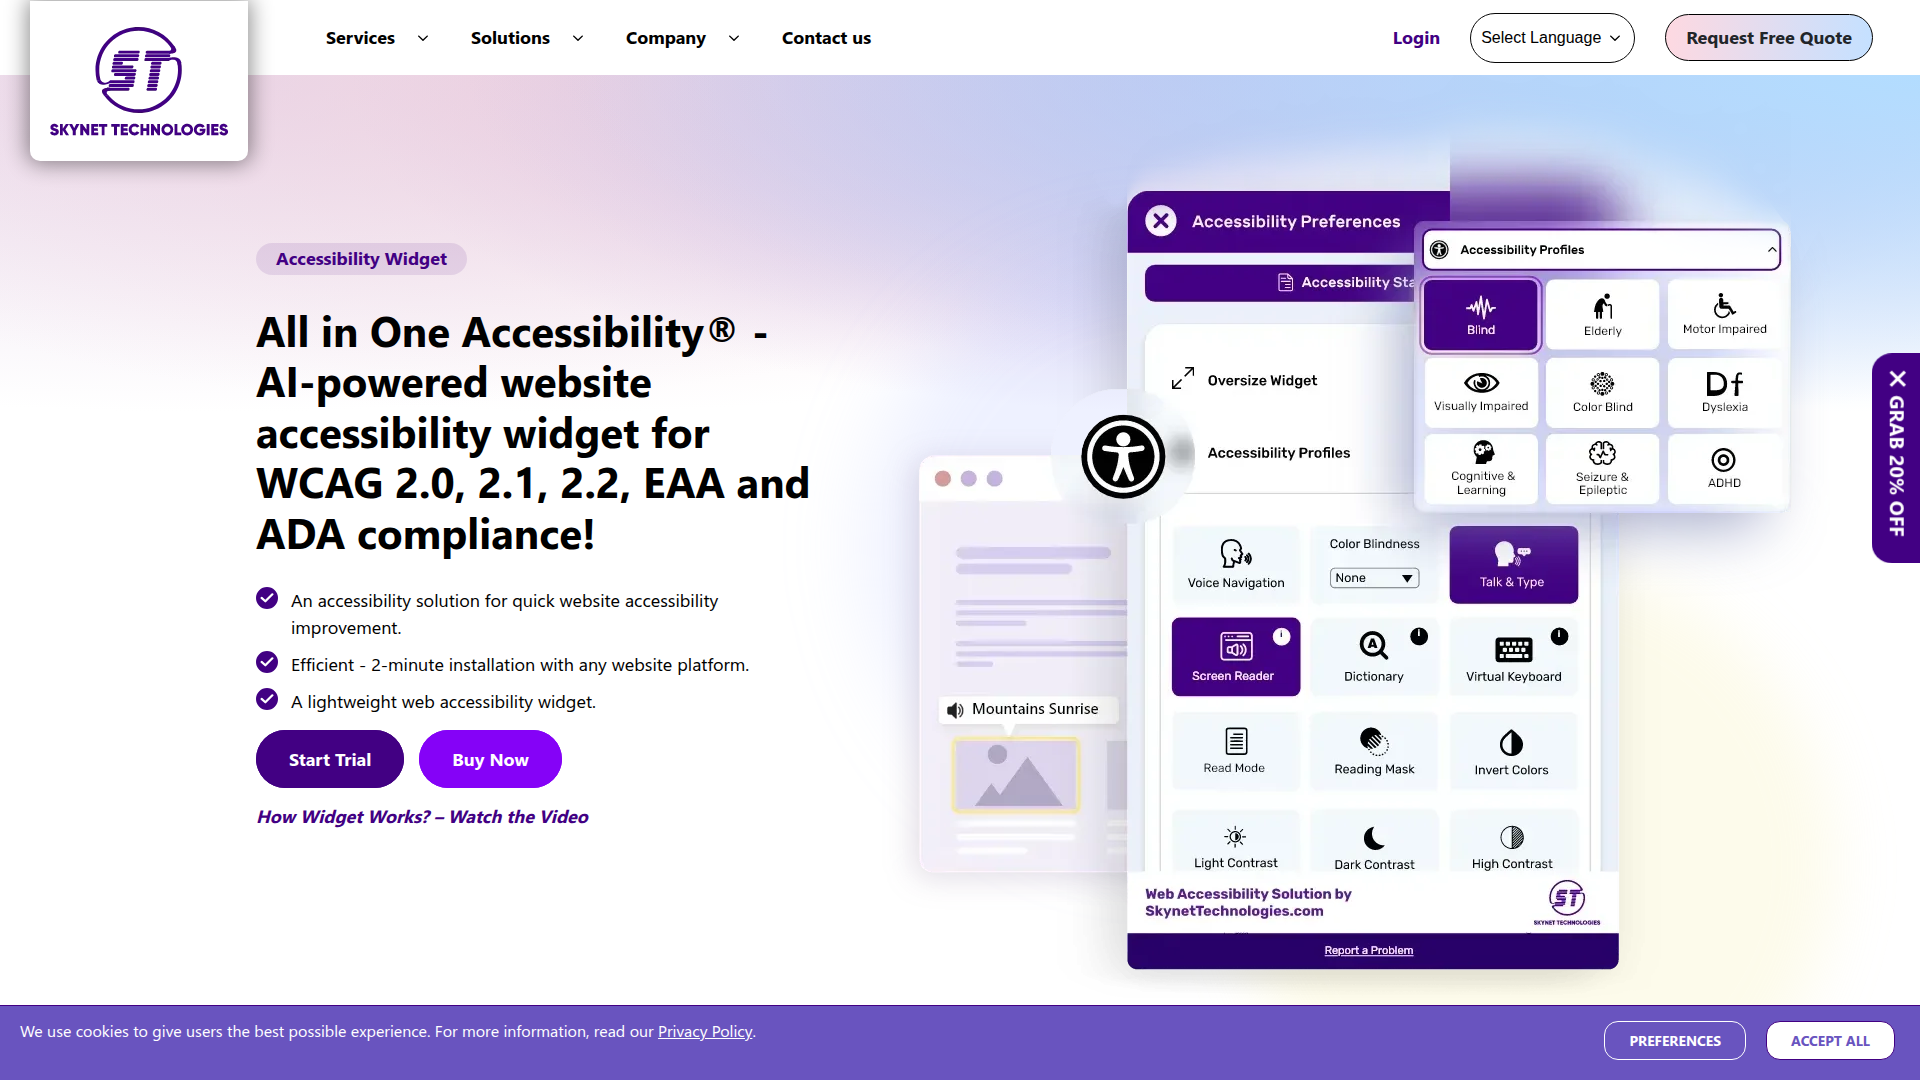
Teams add All-in-One Accessibility when they need to address accessibility requirements without building custom solutions. Common triggers include responding to an audit, preparing for a legal compliance deadline, or scaling accessibility across multiple client sites. The widget handles the visitor-facing accessibility layer while layout, content, and hosting stay managed within the site.

You can add All-in-One Accessibility to a Webflow site in 2 ways:

  • All-in-One Accessibility Marketplace app installs the widget through an OAuth authorization flow without writing code.
  • Custom code embedding lets you paste the widget script directly into site settings for site-wide deployment.

Most implementations use one of these methods depending on whether you prefer a managed app experience or direct control over the script placement.

Install the All-in-One Accessibility app

The All-in-One Accessibility app on the Marketplace is the fastest way to add the widget. It uses an OAuth-based authorization flow that connects your site to Skynet Technologies' platform. This method requires no code editing. A paid site plan is required, and the app offers a 10-day free trial before billing begins.
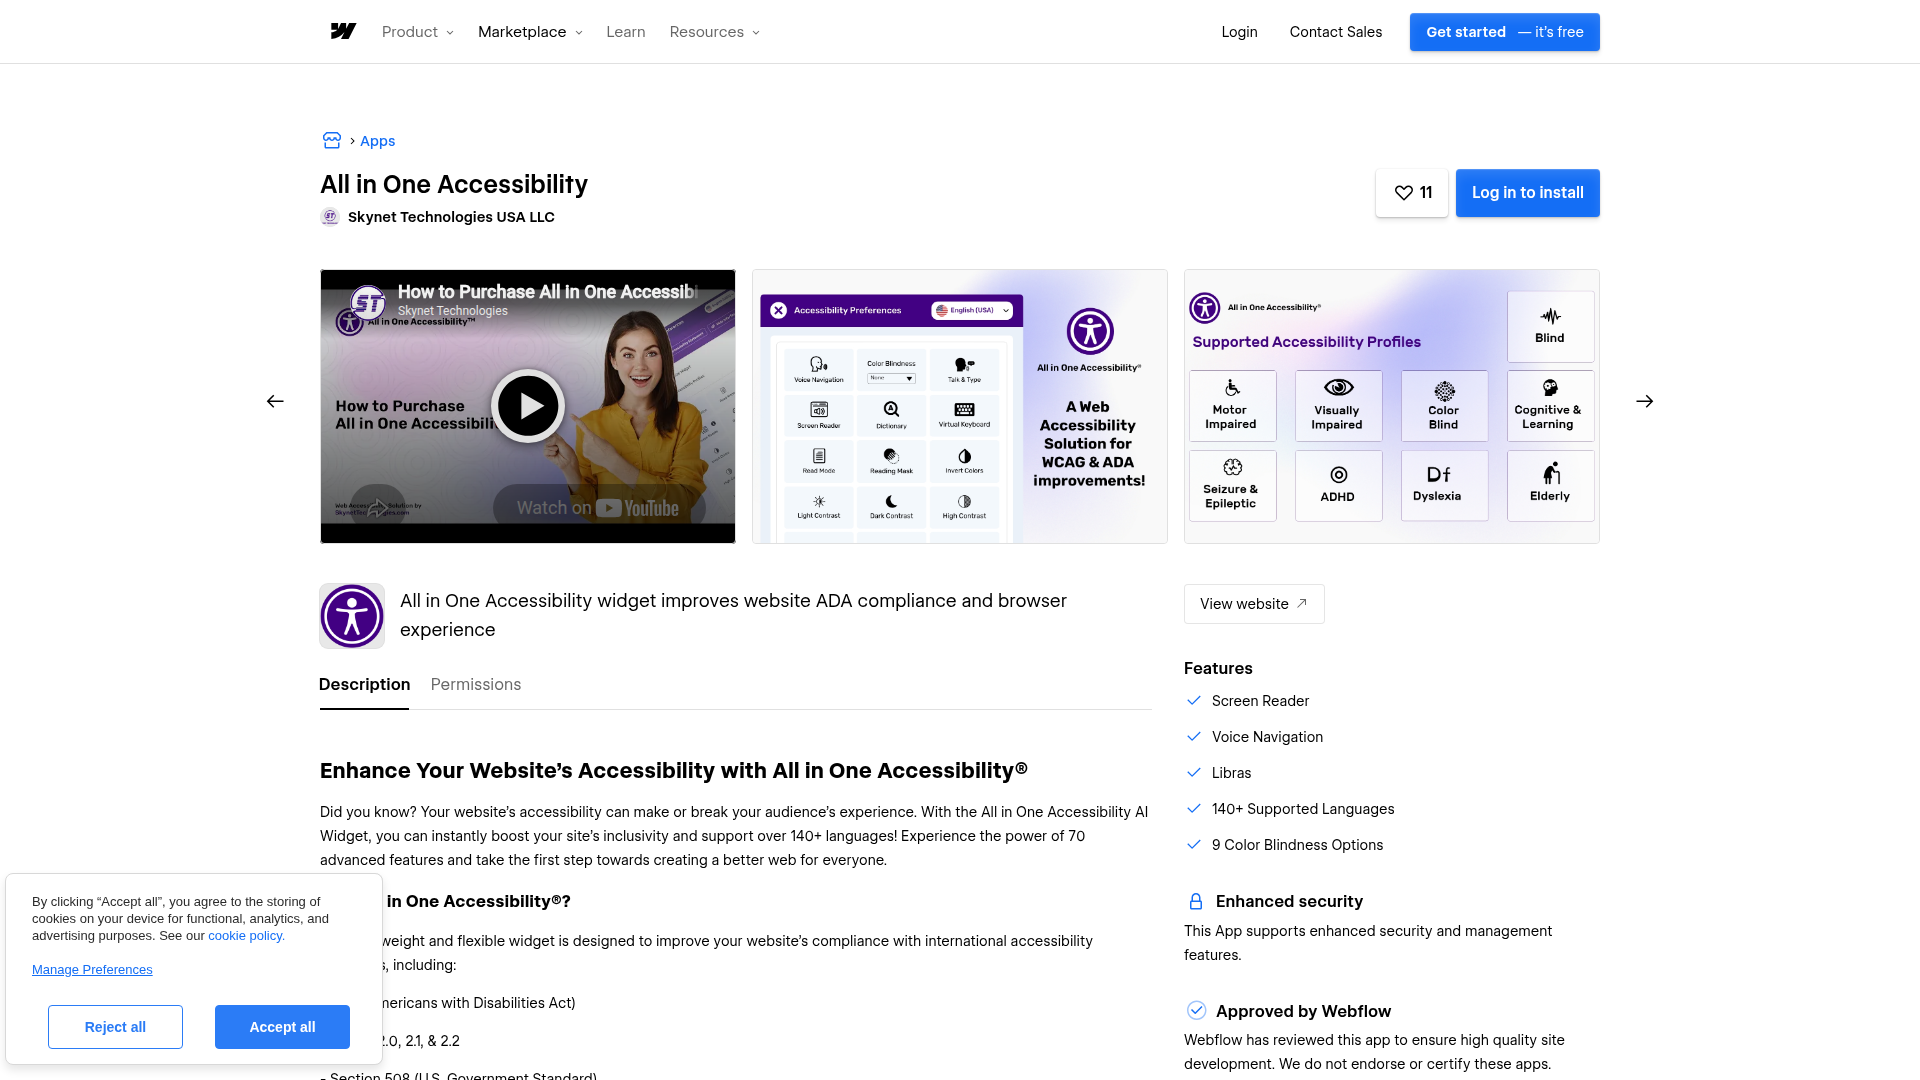
The app handles these tasks after installation:

  • Injects the accessibility widget script across all pages on your site
  • Connects to the Skynet Technologies dashboard for widget configuration
  • Has screen reader, voice navigation, color blindness modes, and 90+ features total

To set up the integration:

  1. Go to the All-in-One Accessibility listing on the Marketplace and click Add to Site.
  2. Click AUTHORIZE W. WEBFLOW on the authorization page.
  3. Select All in One Accessibility Site and click Authorize App.
  4. Complete the registration form with your site and account details.
  5. Select a plan and click Continue.
  6. Submit payment details.

After installation, log in to the Skynet Technologies dashboard to configure widget appearance. You can change the icon type, icon size, color, position, and link a custom accessibility statement. Dashboard changes sync to your site automatically without republishing.

Add the widget with custom code

If you prefer direct control over the script, you can paste the All-in-One Accessibility embed code into the custom code in head and body tags settings, specifically into the Footer Code section. This approach is useful for teams that manage multiple third-party scripts through site settings and want the widget in a predictable location alongside other code. A paid site plan is required. You also need an All-in-One Accessibility account from Skynet Technologies, which sends your unique script tag by email after signup.

Site-wide deployment via footer code

This method places the widget on every page of your site. Skynet Technologies' Webflow installation guide and the integration reference both document this approach.

To add the widget site-wide:

  1. Sign up at skynettechnologies.com and copy the script tag from the email you receive. The script follows this format:```html
  2. Open your site's Dashboard.
  3. Select your Workspace, then click the more icon (⋯) and click Settings.
  4. In the left navigation, click Custom Code.
  5. Scroll to the Footer Code section and paste the complete script tag.
  6. Click Save Changes, then republish your site.

The widget will not appear until you republish. Custom code does not render in the canvas preview. Test on a published staging URL to confirm the widget loads correctly. Scripts with domain-based security controls may fail on preview URLs, which use .canvas.webflow.com subdomains per the external resources documentation.

Single-page deployment

You can limit the widget to a specific page by using page-level custom code instead of site-wide footer code. This is useful if you need to exclude the widget from payment pages to reduce PCI scope exposure.

To add the widget to one page:

  1. Open your site in the Designer.
  2. Click the Pages panel in the left sidebar.
  3. Hover over the target page and click the gear icon.
  4. Scroll to the Custom Code section.
  5. Paste the script into the Before tag field.
  6. Click Save, then publish your site.

For an accessibility widget meant to serve all visitors, site-wide footer code is the recommended approach. Page-level deployment is better suited to specific compliance scenarios where you need to control which pages load the script.

A note on Code Embed elements

The Code Embed element places code at a specific position within a single page's layout. This method is not recommended for an accessibility widget because the widget needs to load consistently across all pages, not at a fixed layout position on one page.

Build with the Webflow API

For agencies managing multiple sites or teams automating deployment workflows, the Data API gives programmatic control over widget injection. This approach requires server-side development and an OAuth token. Site tokens cannot access Custom Code API endpoints per the authentication documentation.

All-in-One Accessibility does not expose a public REST API. The programmatic integration is one-sided: the Data API handles script registration, page targeting, and publishing, while the widget script itself comes from the Skynet Technologies dashboard. Available API resources include:

  • The Custom Code API registers and applies scripts to pages
  • The Sites API handles listing sites and triggering publishes
  • The Pages API lists pages for targeted script injection
  • Webhooks trigger events like site_publish and collection_item_changed for accessibility workflows

Your OAuth token needs these minimum scopes: custom_code:write, sites:read, and pages:read. Refer to the scopes reference for the full list.

Deploy the widget across multiple sites

Agencies with many client sites can automate widget deployment instead of pasting scripts manually into each site's settings.

To deploy the widget programmatically:

  1. Call GET https://api.webflow.com/v2/sites to list all sites in your workspace.
  2. For each site, register the hosted widget script with POST https://api.webflow.com/v2/sites/{site_id}/registered_scripts/hosted. The payload includes the widget's hosted URL and an SRI integrity hash. Per the Custom Code API documentation, scripts must be registered before they can be applied to pages.
  3. Call GET https://api.webflow.com/v2/sites/{site_id}/pages to list the pages where the widget should load.
  4. Apply the registered script to each target page with PUT https://api.webflow.com/v2/pages/{page_id}/custom_code.
  5. Publish each site with POST https://api.webflow.com/v2/sites/{site_id}/publish.

The widget URL and account token must be retrieved manually from the Skynet Technologies dashboard at ada.skynettechnologies.us, as there is no API to fetch these values programmatically.

Inject the widget on specific pages only

For sites where the widget should load only on certain pages, excluding checkout or payment flows for example, use page-level script injection through the API.

To target specific pages:

  1. Call GET https://api.webflow.com/v2/sites/{site_id}/pages to list all pages. Filter by slug to identify your targets.
  2. Apply the registered script to each target page with PUT https://api.webflow.com/v2/pages/{page_id}/custom_code.
  3. Publish the site to make changes live.

The PUT endpoint for page custom code replaces all custom code on that page in a single call. Always retrieve existing scripts first to avoid overwriting other code blocks. Sites using the Localization feature need script injection handled per locale.

What you can build with the All-in-One Accessibility Webflow integration

Integrating All-in-One Accessibility with a Webflow site lets you add visitor-facing accessibility controls without building custom features or modifying your existing design.

  • WCAG-compliant marketing sites: Add screen reader support, keyboard navigation, and contrast controls to a marketing site targeting WCAG 2.2 compliance. The widget covers the interactive accessibility layer while the semantic HTML output gives the structural foundation.
  • Accessible e-commerce stores: Apply the Elderly Accessibility Profile to an Ecommerce store, automatically adjusting font size, contrast, spacing, and animation behavior for older shoppers. The color blindness modes, with eight types supported, address additional visual accessibility needs across product pages.
  • Multi-language accessible portals: Deploy the widget on a site serving international audiences, with the widget interface available in 190+ languages and voice navigation in 15+ languages. This pairs with the Localization feature to cover both content translation and accessibility controls.
  • Agency-wide compliance deployment: Use the Data API to programmatically register the widget script across dozens of client sites in a single workflow. Combine this with the white-label add-on to remove Skynet Technologies branding and present accessibility features under your agency's identity.

If you need more control over page-selective deployment or automated compliance workflows tied to CMS publishing, the API integration path covers those cases with full control.

Preguntas frecuentes

  • Para nada. Ambos métodos de instalación necesitan un plan de sitio de Webflow de pago. La opción de la app del Marketplace requiere un plan de pago para autorizar la integración, y la de código personalizado también, ya que Webflow reserva el código personalizado en las etiquetas head y body para planes de pago. Los usuarios del plan gratuito Starter no pueden publicar código personalizado en un dominio activo.

  • Por lo general, el sitio no se ha vuelto a publicar después de añadir el script. Los cambios en el código personalizado no aparecen en la vista previa del editor de Webflow. Confirma que el script esté en Site Settings > Custom Code > Footer Code, no en Head Code, y luego vuelve a publicar tu sitio. Si el widget sigue sin aparecer, verifica que tu sitio tenga un plan de pago de Webflow y pruébalo en una URL publicada en lugar de en la vista previa.

  • Los planes para un solo sitio cubren únicamente un dominio. Las URLs de prueba de Webflow en .webflow.io subdominios se tratan como dominios independientes. El widget estará inactivo en el entorno de prueba a menos que tengas un plan multi-sitio o empresarial que admita subdominios. Los diferentes dominios requieren licencias separadas o una licencia empresarial.

  • Instalar el widget no garantiza el cumplimiento total de las normas WCAG. El widget mejora el cumplimiento hasta en un 90%, pero esto depende de la estructura de tu sitio, la plataforma y los complementos adicionales. Es solo una pieza del rompecabezas: para una cobertura total, necesitarás auditorías manuales, ajustes de contenido y correcciones estructurales.

  • ¡Sí, aunque solo la parte de Webflow se gestiona mediante API! Según la referencia de integración de Webflow, All-in-One Accessibility no ofrece una API REST pública. Puedes usar la API de código personalizado de Webflow para registrar el script del widget y añadirlo a las páginas de tus sitios. Para esto necesitarás un token OAuth, ya que los tokens de sitio no tienen acceso a los endpoints de código personalizado. Además, la URL del widget y el token de cuenta deben copiarse a mano desde el panel de Skynet Technologies.

All-in-One Accessibility
Joined in

Descripción

All-in-One Accessibility añade un widget de accesibilidad configurable a Webflow mediante una aplicación nativa del marketplace o una etiqueta de script en la configuración del sitio.

→
↗
►
↓
←
↑
Instalar aplicación

Esta página de integración se ofrece únicamente con fines informativos y de conveniencia.


Other Herramientas de accesibilidad integrations

Other Herramientas de accesibilidad integrations

AssetFlow

AssetFlow

Conecta AssetFlow con Webflow para redactar texto alternativo con IA de forma masiva en los recursos estáticos y las imágenes del CMS de tu sitio.

Herramientas de accesibilidad
Más información
GeneradorDeTextoAlternativo

GeneradorDeTextoAlternativo

Conecta AltTextLab con Webflow para generar texto alternativo optimizado con palabras clave para las imágenes de tus páginas y tu biblioteca de activos, y cubre las imágenes del CMS con el fragmento web o la API.

Herramientas de accesibilidad
Más información
Volver arriba

Volver arriba

Conecta la aplicación Back to Top de Flowstar para Webflow y añade botones de «volver arriba» con iconos, texto, colores y controles de posición totalmente configurables.

Herramientas de accesibilidad
Más información
Accessibility Enabler

Accessibility Enabler

Conecta Accessibility Enabler a Webflow y añade herramientas de accesibilidad a tu sitio mediante un widget de JavaScript.

Herramientas de accesibilidad
Más información
UserWay

UserWay

Conecta UserWay, un widget de accesibilidad web basado en la nube, con Webflow para añadir herramientas para visitantes como Contraste Inteligente, Texto Más Grande y Lector de Pantalla mediante código personalizado o la API de Código Personalizado de Webflow.

Herramientas de accesibilidad
Más información

Integraciones relacionadas

No se encontraron elementos.

Empieza gratis

Prueba Webflow todo el tiempo que quieras con nuestro plan Starter gratuito. Compra un plan de sitio de pago para publicar, alojar y desbloquear funciones adicionales.

Empieza, es gratis