


The title attribute gives you a tooltip, but not a good one. It appears after a delay that the browser controls and looks different on every OS and browser. Also, it can't be styled. Tippy.js solves all three without requiring jQuery.
The `title` attribute tooltip in Webflow renders after a browser-controlled delay, looks different in Safari vs. Chrome, and can't be styled. It's one of the most frequently raised tooltip issues, and the most-referenced fix (Tooltipster) requires jQuery, which you shouldn't be adding to new projects.
Tippy.js offers an alternative. It requires no jQuery, the CDN version is stable at v6.3.7, and it can be set up in Webflow in a few minutes. You get full control over placement, animation, and content, including rich HTML inside the tooltip.
In this guide, we explore the complete setup: loading the library, marking up elements, initializing with options, and fixing the four failure modes that catch most developers the first time.
What do you need to add tooltips in Webflow?
You need a paid Webflow plan that allows custom code. That’s the only hard requirement. No external accounts, API keys, or third-party services.
The Custom Code Embed element and the Site Settings custom code sections are available on any paid Site plan (Basic, CMS, Business, or Enterprise) and on Core, Growth, Agency, and Freelancer Workspace plans. Free plans cannot use custom code.
Once you have custom code access, the setup takes two locations in Webflow: Site Settings for loading the library, and Element Settings for marking up individual elements. Here's how each step works.
5 steps to add Tippy.js tooltips to Webflow
The setup consists of two distinct phases: loading Tippy.js globally via Site Settings and configuring it to activate specific elements. The full implementation requires no more than a few blocks of code. Here's what each one does and where it goes.
1. Load Tippy.js in Site Settings
You start by pasting two script tags into Webflow's Footer code section: one for Popper.js (now primarily maintained as Floating UI), the positioning engine Tippy.js requires and one for Tippy.js itself. Navigate to Site Settings → Custom code → Footer code to get there.
Tippy.js depends on Popper.js for positioning logic. You load both via CDN: Popper first, Tippy second.
Now, paste both script tags into the Footer code section (before </body>):
<!-- Popper.js (required by Tippy.js for positioning) -->
<script src="https://unpkg.com/@popperjs/core@2/dist/umd/popper.min.js"></script>

<!-- Tippy.js v6 -->
<script src="https://unpkg.com/tippy.js@6/dist/tippy-bundle.umd.js"></script>
Here’s what that looks like:

The tippy-bundle version packages Popper.js and the Tippy.js CSS together.
If your project has a Content Security Policy that restricts inline styles, load them separately instead:
<link rel="stylesheet" href="https://unpkg.com/tippy.js@6/dist/tippy.css" />Put that CSS link in the Head code section if you're using the separate stylesheet. The script tags still go in the Footer code.
Why footer? Scripts in the head run before the DOM exists, so Tippy.js tries to find elements before your page renders. Putting scripts in the footer ensures the DOM is fully loaded when Tippy.js initializes.
After saving, both libraries load on every published page of your site. They will not execute in the Webflow Designer canvas. Tippy.js only runs on published pages.
2. Add the data-tippy-content attribute to each element
Add a custom attribute named data-tippy-content to each element that should have a tooltip. The value becomes the tooltip text.
Select the target element in the Webflow Designer, open Element Settings (press D, or click the gear icon in the top toolbar), and scroll to the Custom Attributes section.
Then, add the attribute name and its value:
- Attribute name: data-tippy-content
- Value: [the text you want to appear in the tooltip, e.g., "Opens in a new tab" or "Required field"]
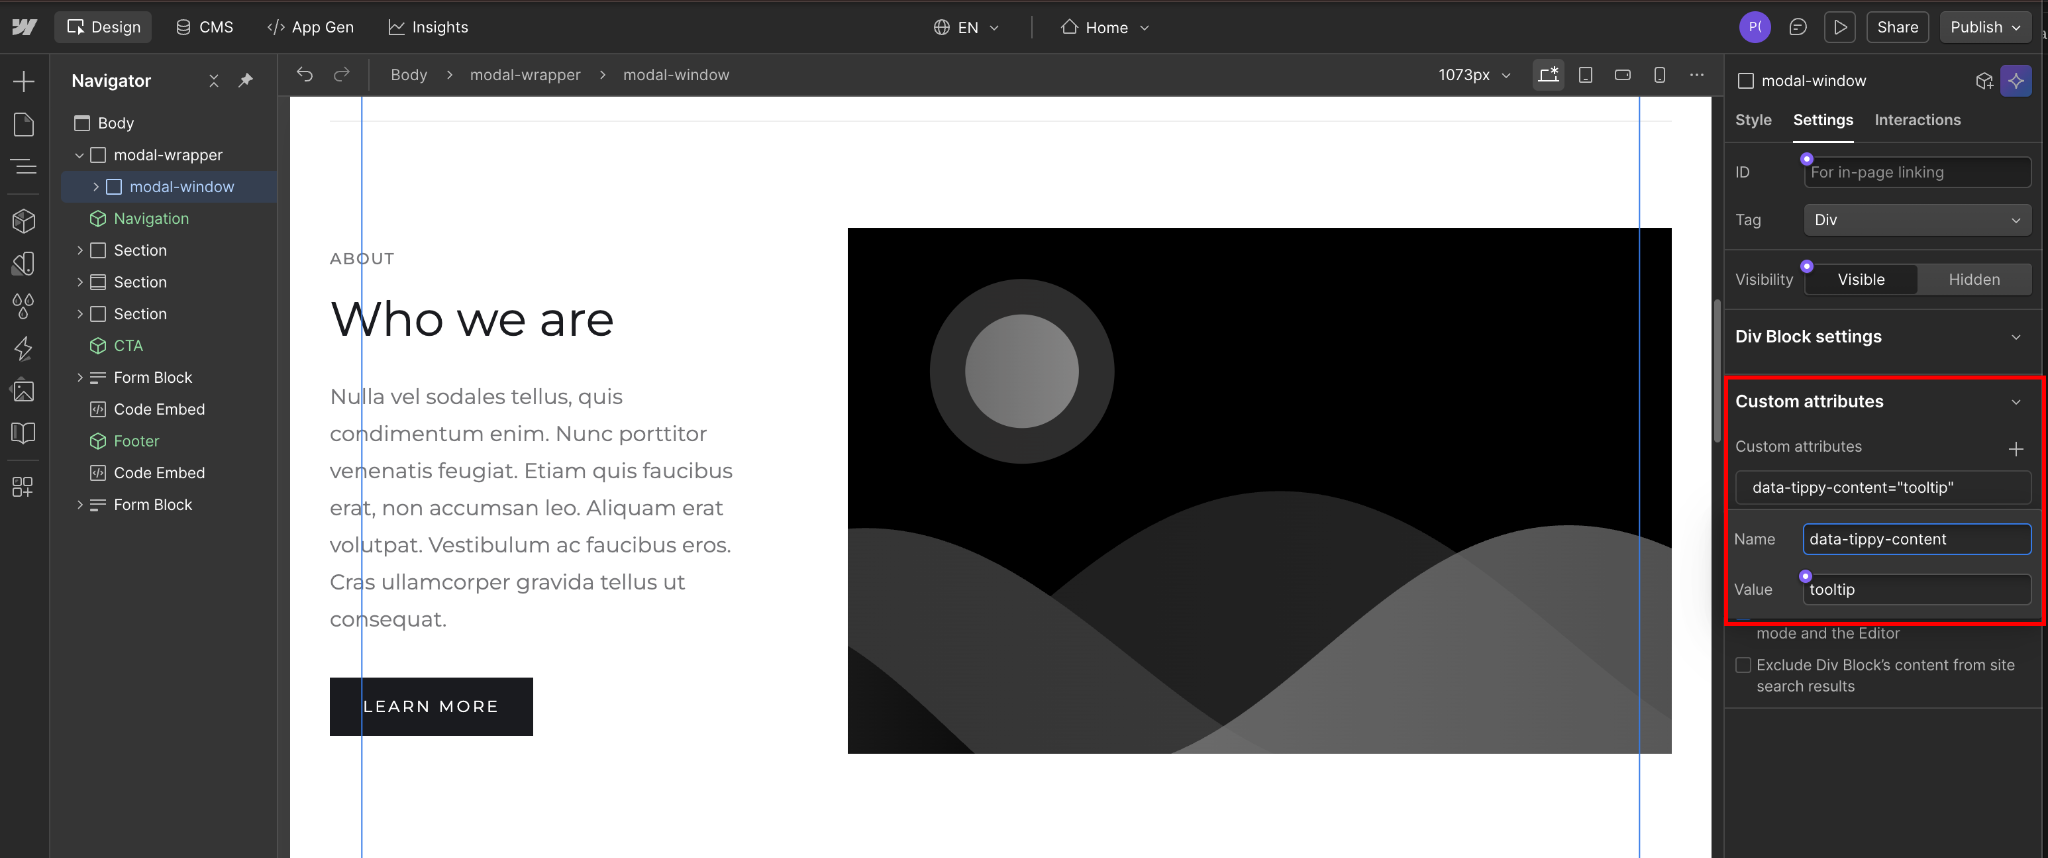
The value you enter here is the tooltip text. Each element gets its own value, and that's exactly what appears in the bubble when someone hovers over it.
Tippy.js reads data-tippy-content on initialization and uses it as the tooltip content. No class name needed. No title attribute required. Repeat this for every element you want a tooltip on. You can use different content values per element. Each one gets its own independent tooltip instance.
One note on interactive elements: if you're adding this to a non-interactive HTML element (a The element is now marked. The tooltip won't appear yet. That requires the initialization call in Step 3. Add the initialization call after your Tippy.js script tags. In Site Settings → Custom code → Footer code, after the two script tags from Step 1, add: This single call selects every element on the page with a To customize behavior (position, animation, delay), pass an options object: Options apply globally to every tooltip on the page. If you use any animation other than 'fade', load the corresponding CSS in Site Settings → Custom code → Head code: Replace If you need different settings per element, say The full list of available options is in the Tippy.js props reference. Save, and your site is ready to publish. Tippy.js will activate on every element with Click Publish in the top right of the Designer. Select your domain and publish. Once publishing finishes, open your live site URL. Custom code does not execute in the Webflow Designer canvas. In preview mode, custom code is turned off by default. You can enable it by clicking the "Enable custom code" toggle in the bottom left of the preview window. Hover over any element you added You should see: On mobile, the tooltip triggers on tap. The element must have By default, Tippy.js treats the To render HTML inside a tooltip (formatted content, icons, links), enable Then set the custom attribute value to an HTML string: A few things to keep in mind here. For complex tooltip content beyond a short string (a card with an image, a formatted definition), you can reference an off-screen DOM element instead of an inline string. Most failures fall into four buckets: testing in the wrong environment, an attribute typo, the iOS tap issue, or a CSS containment conflict. Here's how to identify and fix each. You've published the site and hovered over elements, but nothing happens. Check 1: Are you testing on the live site? Custom code does not execute in the Webflow Designer canvas. If you're viewing the canvas or a share preview URL, Tippy.js isn't executing. Open your published domain or Check 2: Is the initialization script loading after the library? The Check 3: Open the browser console. Right-click on the published page → Inspect → Console. If you see Most elements respond, but a handful do nothing, even though they have Cause: The attribute name has a typo. Tippy.js selects elements using In the Webflow Designer, open Element Settings on the affected element and verify the custom attribute name is One thing that catches people: if the value is empty ( Hover tooltips work on desktop. Tapping the same element on iPhone or iPad in Safari does nothing. Cause: iOS Safari does not fire touch or click events on elements that aren't natively interactive (links, buttons, inputs) unless the element has Since Tippy.js uses the Fix: Select the trigger element in the Webflow Designer. In the Style panel, find the Cursor property under Miscellaneous (or search "cursor" in the search bar) and set it to Pointer. Publish and test on iOS. This is the single most-reported mobile issue for custom JavaScript interactions on non-interactive elements in Webflow. The cursor change is a one-click fix. The tooltip triggers, but part of it is cut off by a container or hidden behind a sticky header. Cause 1: overflow: hidden on a parent container. Tippy.js appends tooltips to Cause 2: z-index conflict. Tippy.js defaults to Set this higher than whatever is covering the tooltip.<span>, a Webflow Text element), also set Cursor to Pointer in the Style panel. Without it, iOS Safari won't recognize the tap, and the tooltip won't fire on touch devices.
3. Initialize Tippy.js in the footer custom code
<script>
tippy('[data-tippy-content]');
</script>data-tippy-content attribute and activates a Tippy.js instance on each one. Tippy.js automatically reads the attribute value as the tooltip content.Customizing behavior
<script>
tippy('[data-tippy-content]', {
placement: 'bottom', // 'top', 'bottom', 'left', 'right', or auto variants
animation: 'scale', // 'fade' (default), 'scale', 'shift-away', 'shift-toward', 'perspective'
delay: [100, 200], // [show delay in ms, hide delay in ms]
arrow: true // show the arrow pointer (default: true)
});
</script><!-- Required for 'scale' animation -->
<link rel="stylesheet" href="https://unpkg.com/tippy.js@6/animations/scale.css" />scale with shift-away, shift-toward, or perspective, depending on which animation you're using. Without this CSS, the animation setting is silently ignored, and the default \fade animation is used instead.Using different settings per element
placement: 'right' on one element and placement: 'top' on another, initialize each set separately with a more specific selector, or use Tippy.js's data-tippy-* props to override per element:<script>
// Global defaults
tippy('[data-tippy-content]', {
placement: 'top',
animation: 'fade'
});
</script>
data-tippy-placement="right" ← set this as a custom attribute on specific elements to override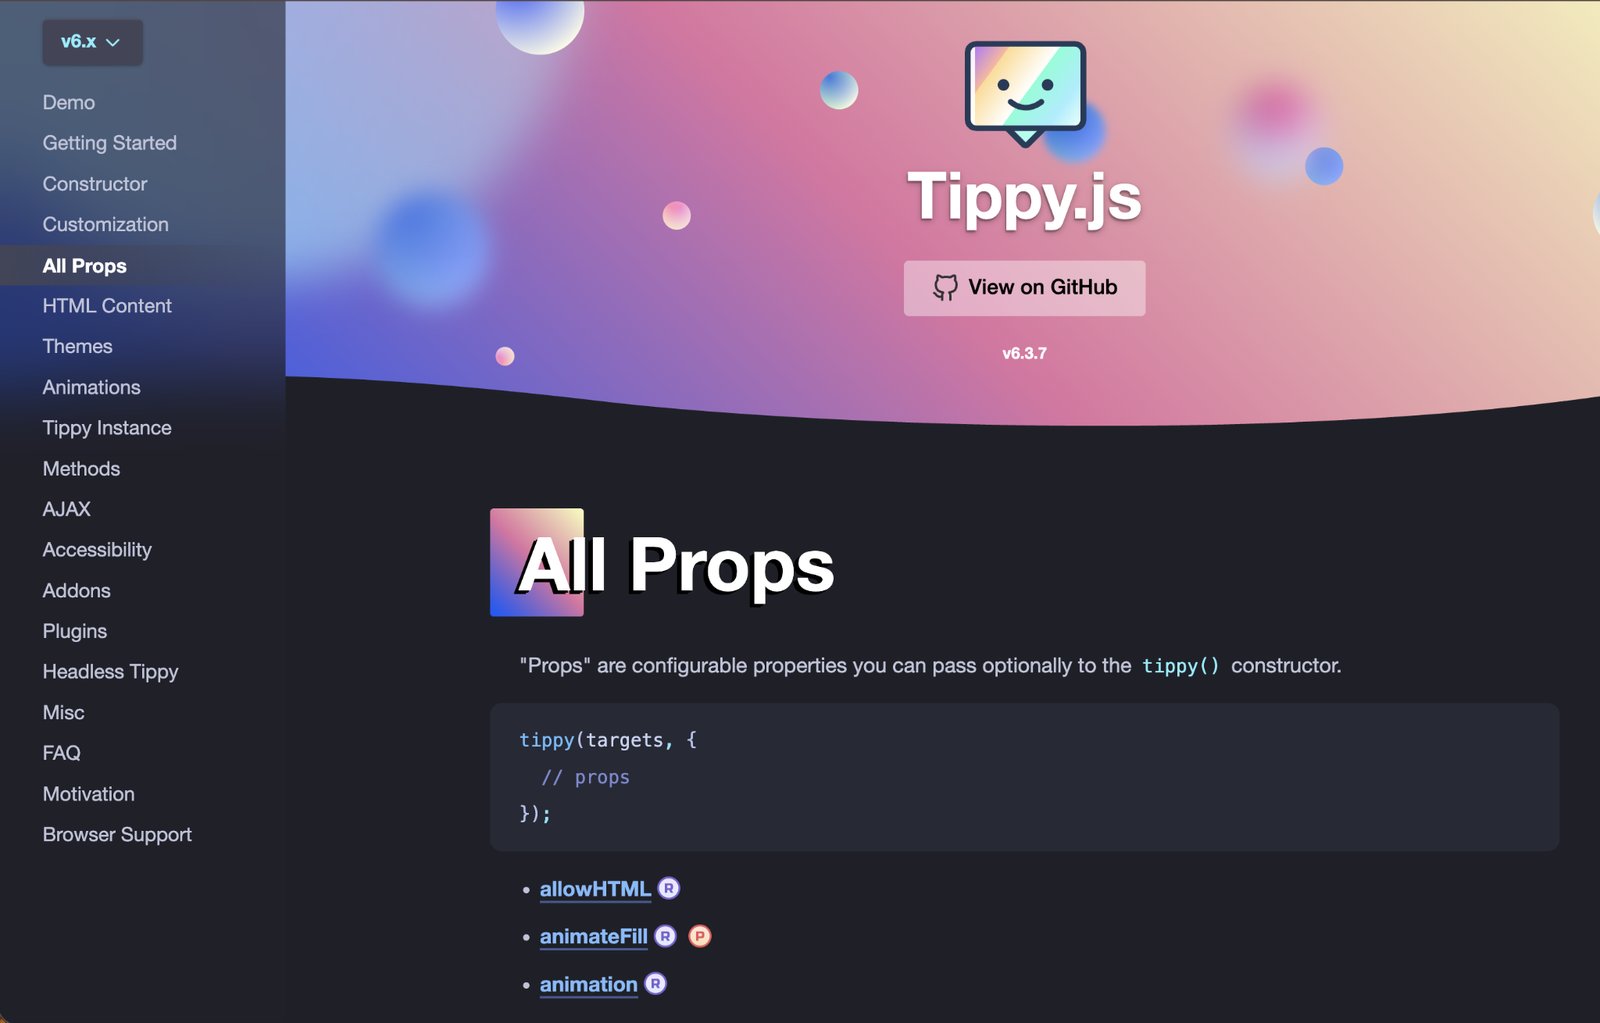
data-tippy-content on page load.4. Publish and test on the live site
data-tippy-content to in Step 2.placement)animation)cursor: pointer in its CSS for this to work on iOS Safari. If tapping does nothing, the troubleshooting section below covers the fix.5. Render HTML content inside tooltips (optional)
data-tippy-content value as plain text.allowHTML:<script>
tippy('[data-tippy-content]', {
allowHTML: true
});
</script>data-tippy-content → <strong>Required field</strong> — must be a valid email addressallowHTML: true only matters if the browser needs to parse markup in the content string. For most tooltip use cases (plain labels, short descriptions), you don't need it. If you're using it, make sure the content is safe. Don't pass unsanitized user-generated strings directly into allowHTML: true tooltips.What causes Tippy.js tooltips to fail in Webflow?
Tooltips don't appear anywhere on the page
.webflow.io subdomain.tippy(...) call must run after both the Popper.js and Tippy.js script tags. All three blocks should be in the Footer code section, in this order: Popper first, Tippy second, your init script third. If the init script is in the Head code section, Tippy.js doesn't exist yet when it fires.tippy is not defined or a 404 on the CDN URLs, one of the scripts didn't load. Check Site Settings → Custom code to confirm that the script tags are in the Footer code and that the URLs are correct.Some elements get tooltips, others don't
data-tippy-content set.'[data-tippy-content]' exactly. One character off, and the element is invisible to the selector.data-tippy-content, all lowercase, with hyphens, not underscores.data-tippy-content with no value set), Tippy.js still initializes on the element but shows a blank tooltip. Make sure every element has a non-empty value.Tooltips don't trigger on iOS when tapping the element
cursor: pointer set in CSS. This is a long-standing Safari behavior, not a Tippy.js limitation.focus event for touch, and focus doesn't fire on non-interactive elements without this CSS property, the tooltip never activates.Tooltip appears but is clipped or hidden behind another element
document.body by default, which should prevent most clipping. If clipping still occurs, a parent with overflow: hidden or overflow: clip is the likely cause. Check parent elements in the Style panel.z-index: 9999. If a fixed header or modal overlay has a higher z-index, the tooltip renders behind it. Override Tippy.js's z-index in the options:<script>
tippy('[data-tippy-content]', {
zIndex: 100000
});
</script>
Frequently asked questions
Do Tippy.js tooltips work inside Webflow CMS collection lists?
Yes. Add data-tippy-content as a custom attribute inside the collection list template. Tippy.js initializes on page load and picks up all matching elements in the rendered DOM, including CMS-generated ones. For dynamic tooltip content per item, bind a CMS field to the attribute value using Webflow's custom attribute binding.
Does Tippy.js conflict with Webflow's native Interactions?
No. Tippy.js runs independently from Webflow's Interactions system, including Interactions with GSAP. Both can target the same element without conflict. If a hover animation and a tooltip compete visually on the same element, add a short delay to the Tippy.js init options to offset the timing.
Do tooltips work on Webflow form inputs and labels?
Yes. Inputs, labels, selects, and textareas all support the data-tippy-content attribute. For form fields, use placement: 'right' so the tooltip doesn't sit above the label, and trigger: 'focus' so it only appears when the user focuses the field, not on hover.
Do tooltips work on the Webflow staging subdomain?
Yes. The .webflow.io staging subdomain runs the same published HTML as your custom domain. Tippy.js functions identically. The Designer canvas does not run custom code. Preview mode doesn't run it by default either, but you can enable it via the "Enable custom code" toggle in the lower-left corner of the preview window.


