



Two MCP connectors, one loose prompt, an empty Webflow site. Here's what happened when Claude did the rest.
How do you get an existing Figma design into Webflow? The honest answer used to be: you rebuild it. One step at a time. You recreate every color and text style, click the components together, and re-upload every single asset. It's a lot of busy work, and in 2026, this busy work should be done by AI somehow.
Thinking about porting a Figma design to Webflow, I initially expected a purpose-built tool with custom skills and scripts. But it turns out that if you pair a strong model with thought-through MCP tooling, you don't need anything custom. Two MCP connections and a single prompt can very well port a full Figma design into an empty Webflow site, with variables, classes, components, and assets all in place.
I recorded the whole run, from prompt to finished canvas. Check it out if you'd rather watch than read.
A loose prompt to kick off the import
I'm a Claude user, so the entire import ran in Claude Desktop, powered by Anthropic's Fable model, with two connectors set up: the official Figma plugin and the official Webflow connector. Both only take a minute to add.
With both connections established, I took a free portfolio template from the Figma community and tasked Claude to port it over to Webflow with a single prompt:
I've got a Figma design here: [Figma URL]. Can you import it into my Webflow site? Please set up CSS variables and components as you see fit. Don't generalize the content; take all the existing text as is, I'll fix it later. Also, don't publish! I want to have the honor.Please appreciate how loose this prompt is. I didn't map layers to elements, define which colors should become tokens, or list the components I wanted. "As you see fit" covers most of it. The only hard rule is to keep the text untouched and to not publish the site.
Our prompt library has a variety of prompts to assist you with your agent.
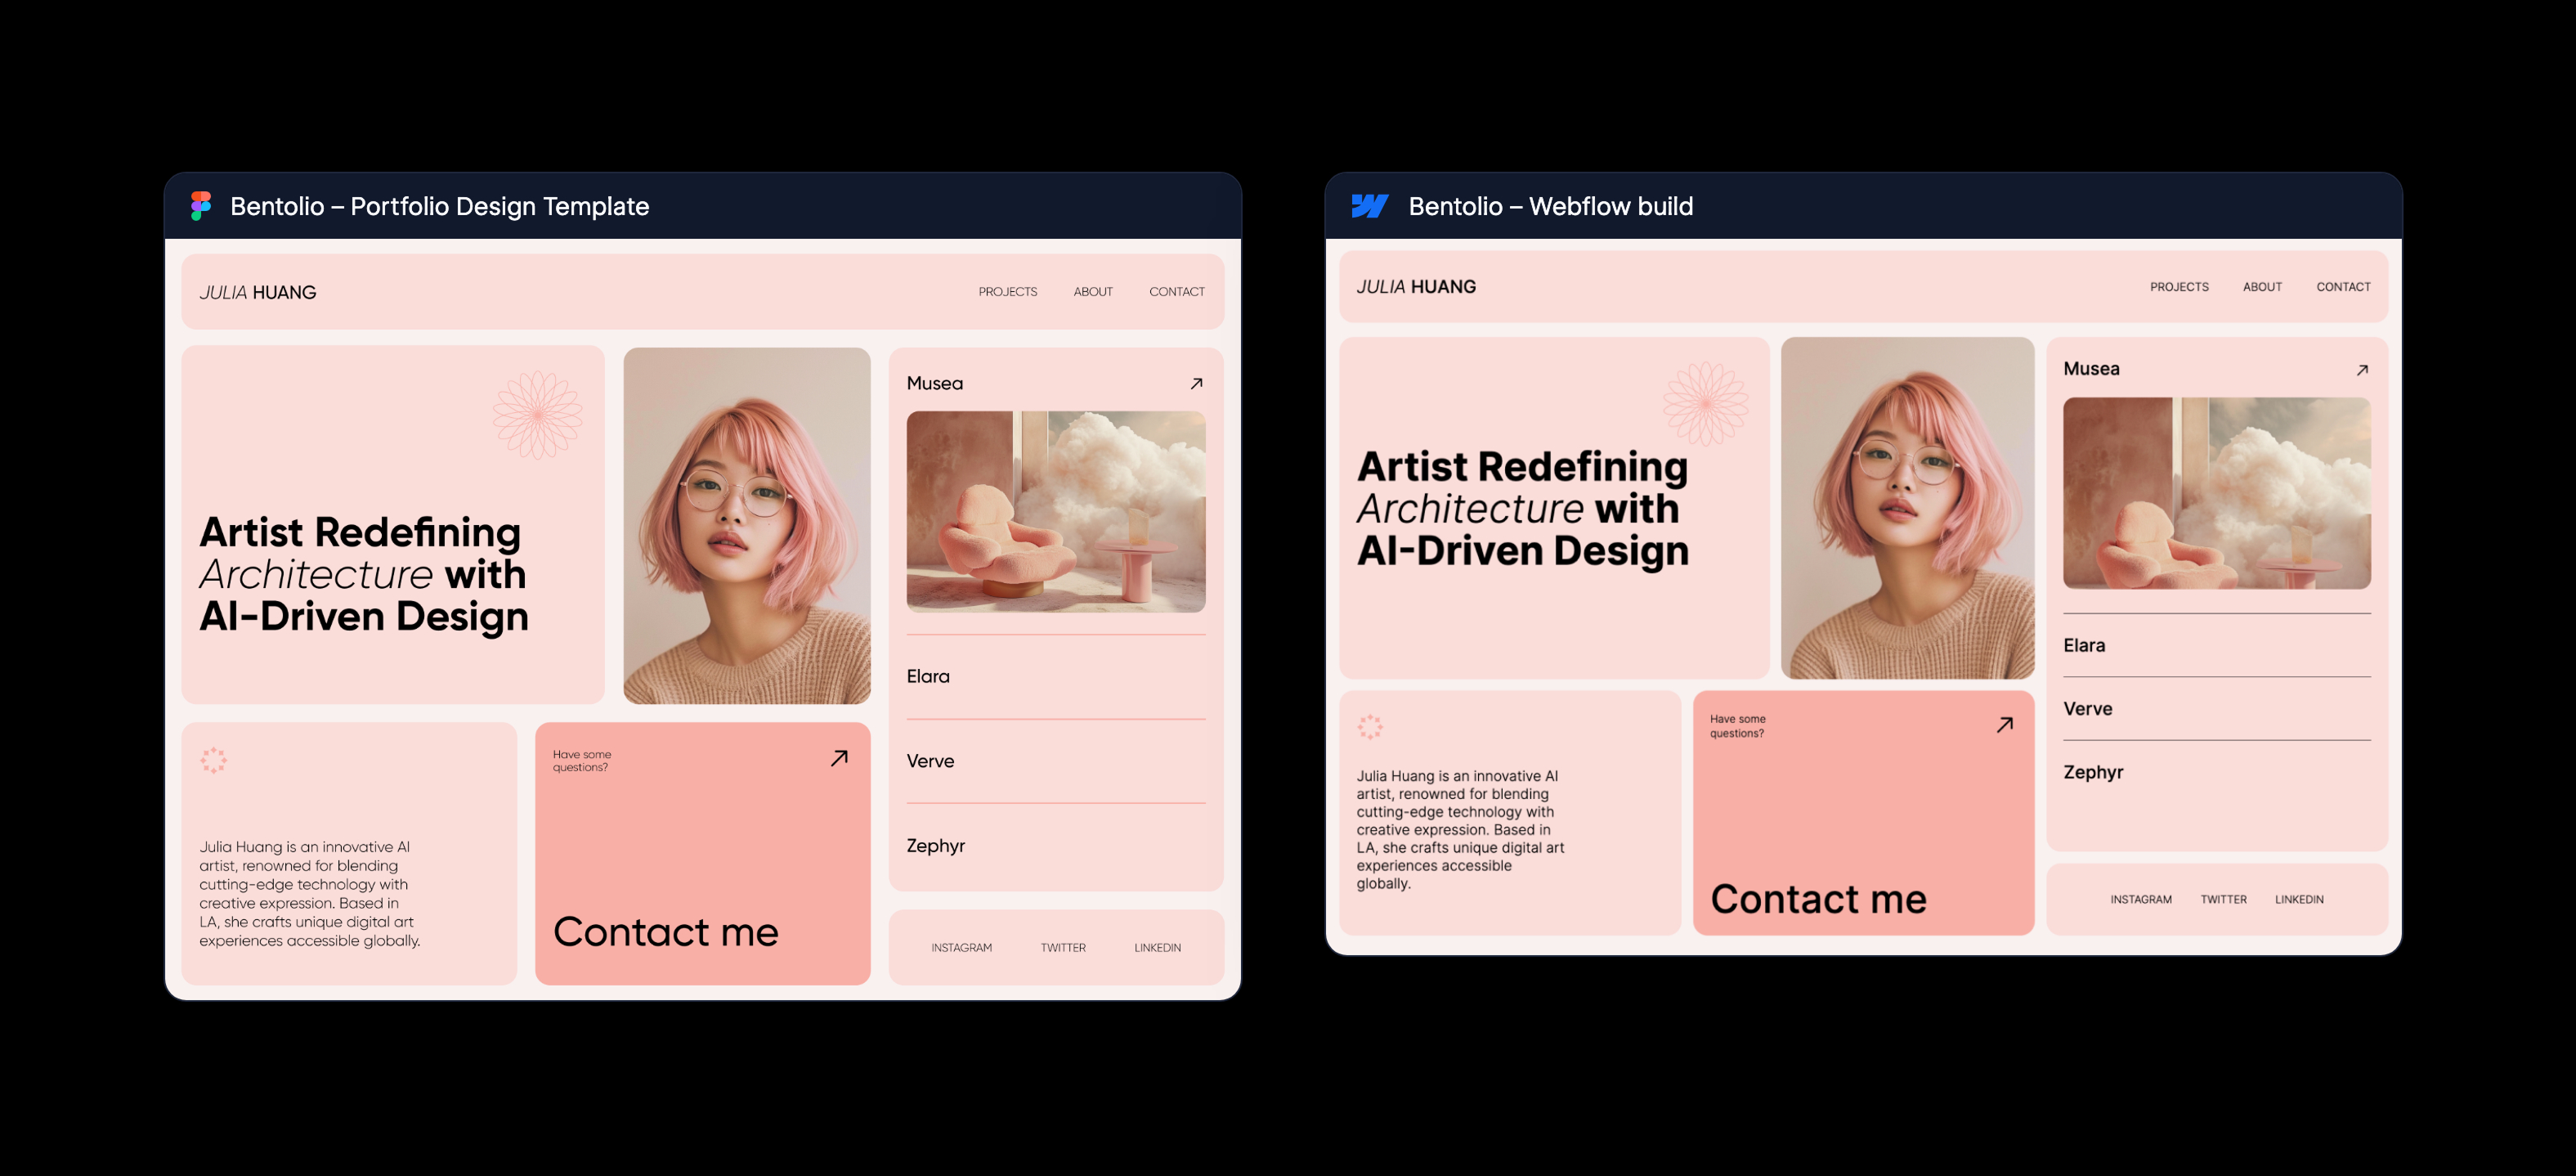
A bit over ten minutes later, the empty Webflow site wasn't empty anymore. It had new design tokens covering colors, sizes, and typography, and around thirty classes pointing to those tokens instead of carrying hardcoded values. Multiple Webflow components were set up, too, and every image and icon from the Figma file was uploaded as a proper Webflow asset. I built none of it by hand, and side by side, the canvas comes impressively close to the design. There's no way that I would have come this far on my own in that time!
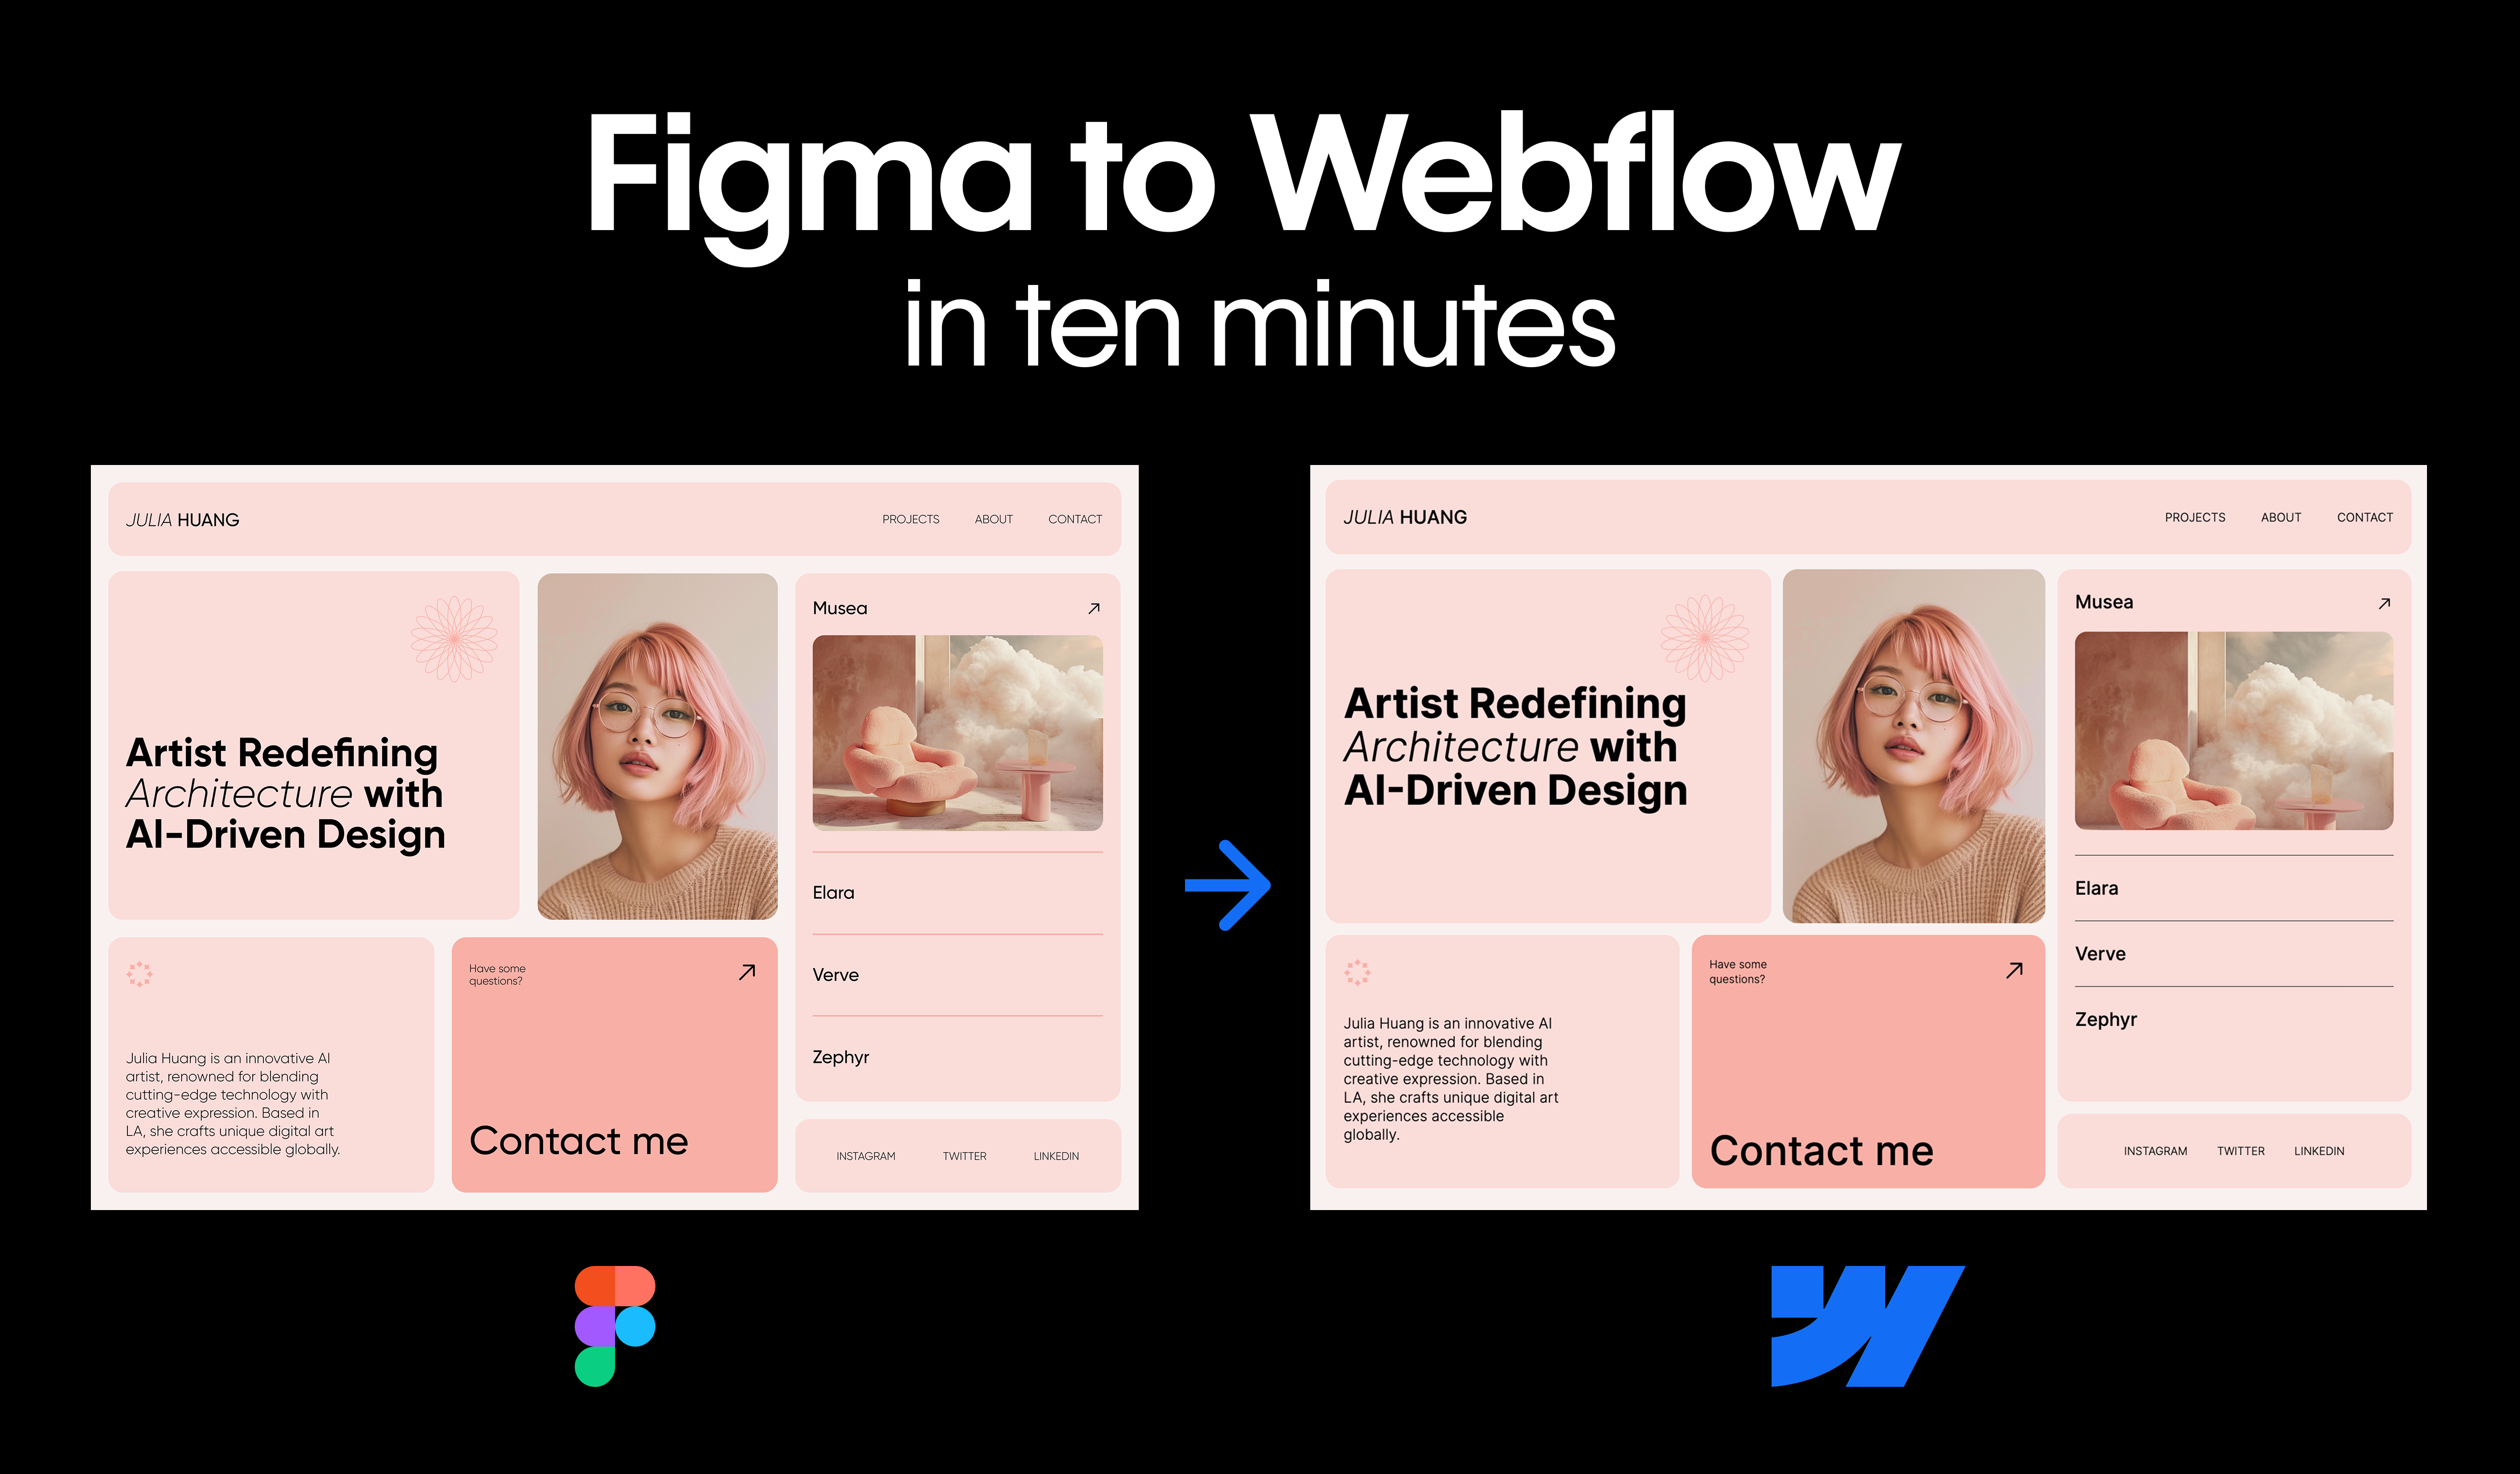
And this is honestly amazing, because there was no "import from Figma" tool anywhere in this chain. So, I got curious. Let me share why and how this flow could pull off the import this quickly.
General tools enable specialized tasks
At the core of this Figma-to-Webflow importer flow is the Figma MCP get_design_context tool. Your agent can point to a design or node in a Figma file, and the MCP server will respond with an actual React implementation of the selected frame, a screenshot for reference, and download URLs for every embedded asset. That's a lot of context in one response: layout, spacing, colors, and the real content. It's all there, and this is what makes it stand out. I doubt the engineers who implemented this were thinking of a Webflow importer, but the response is so detailed that any "Figma to [insert your target]" flow will most likely work with a powerful model. Well done, Figma team!
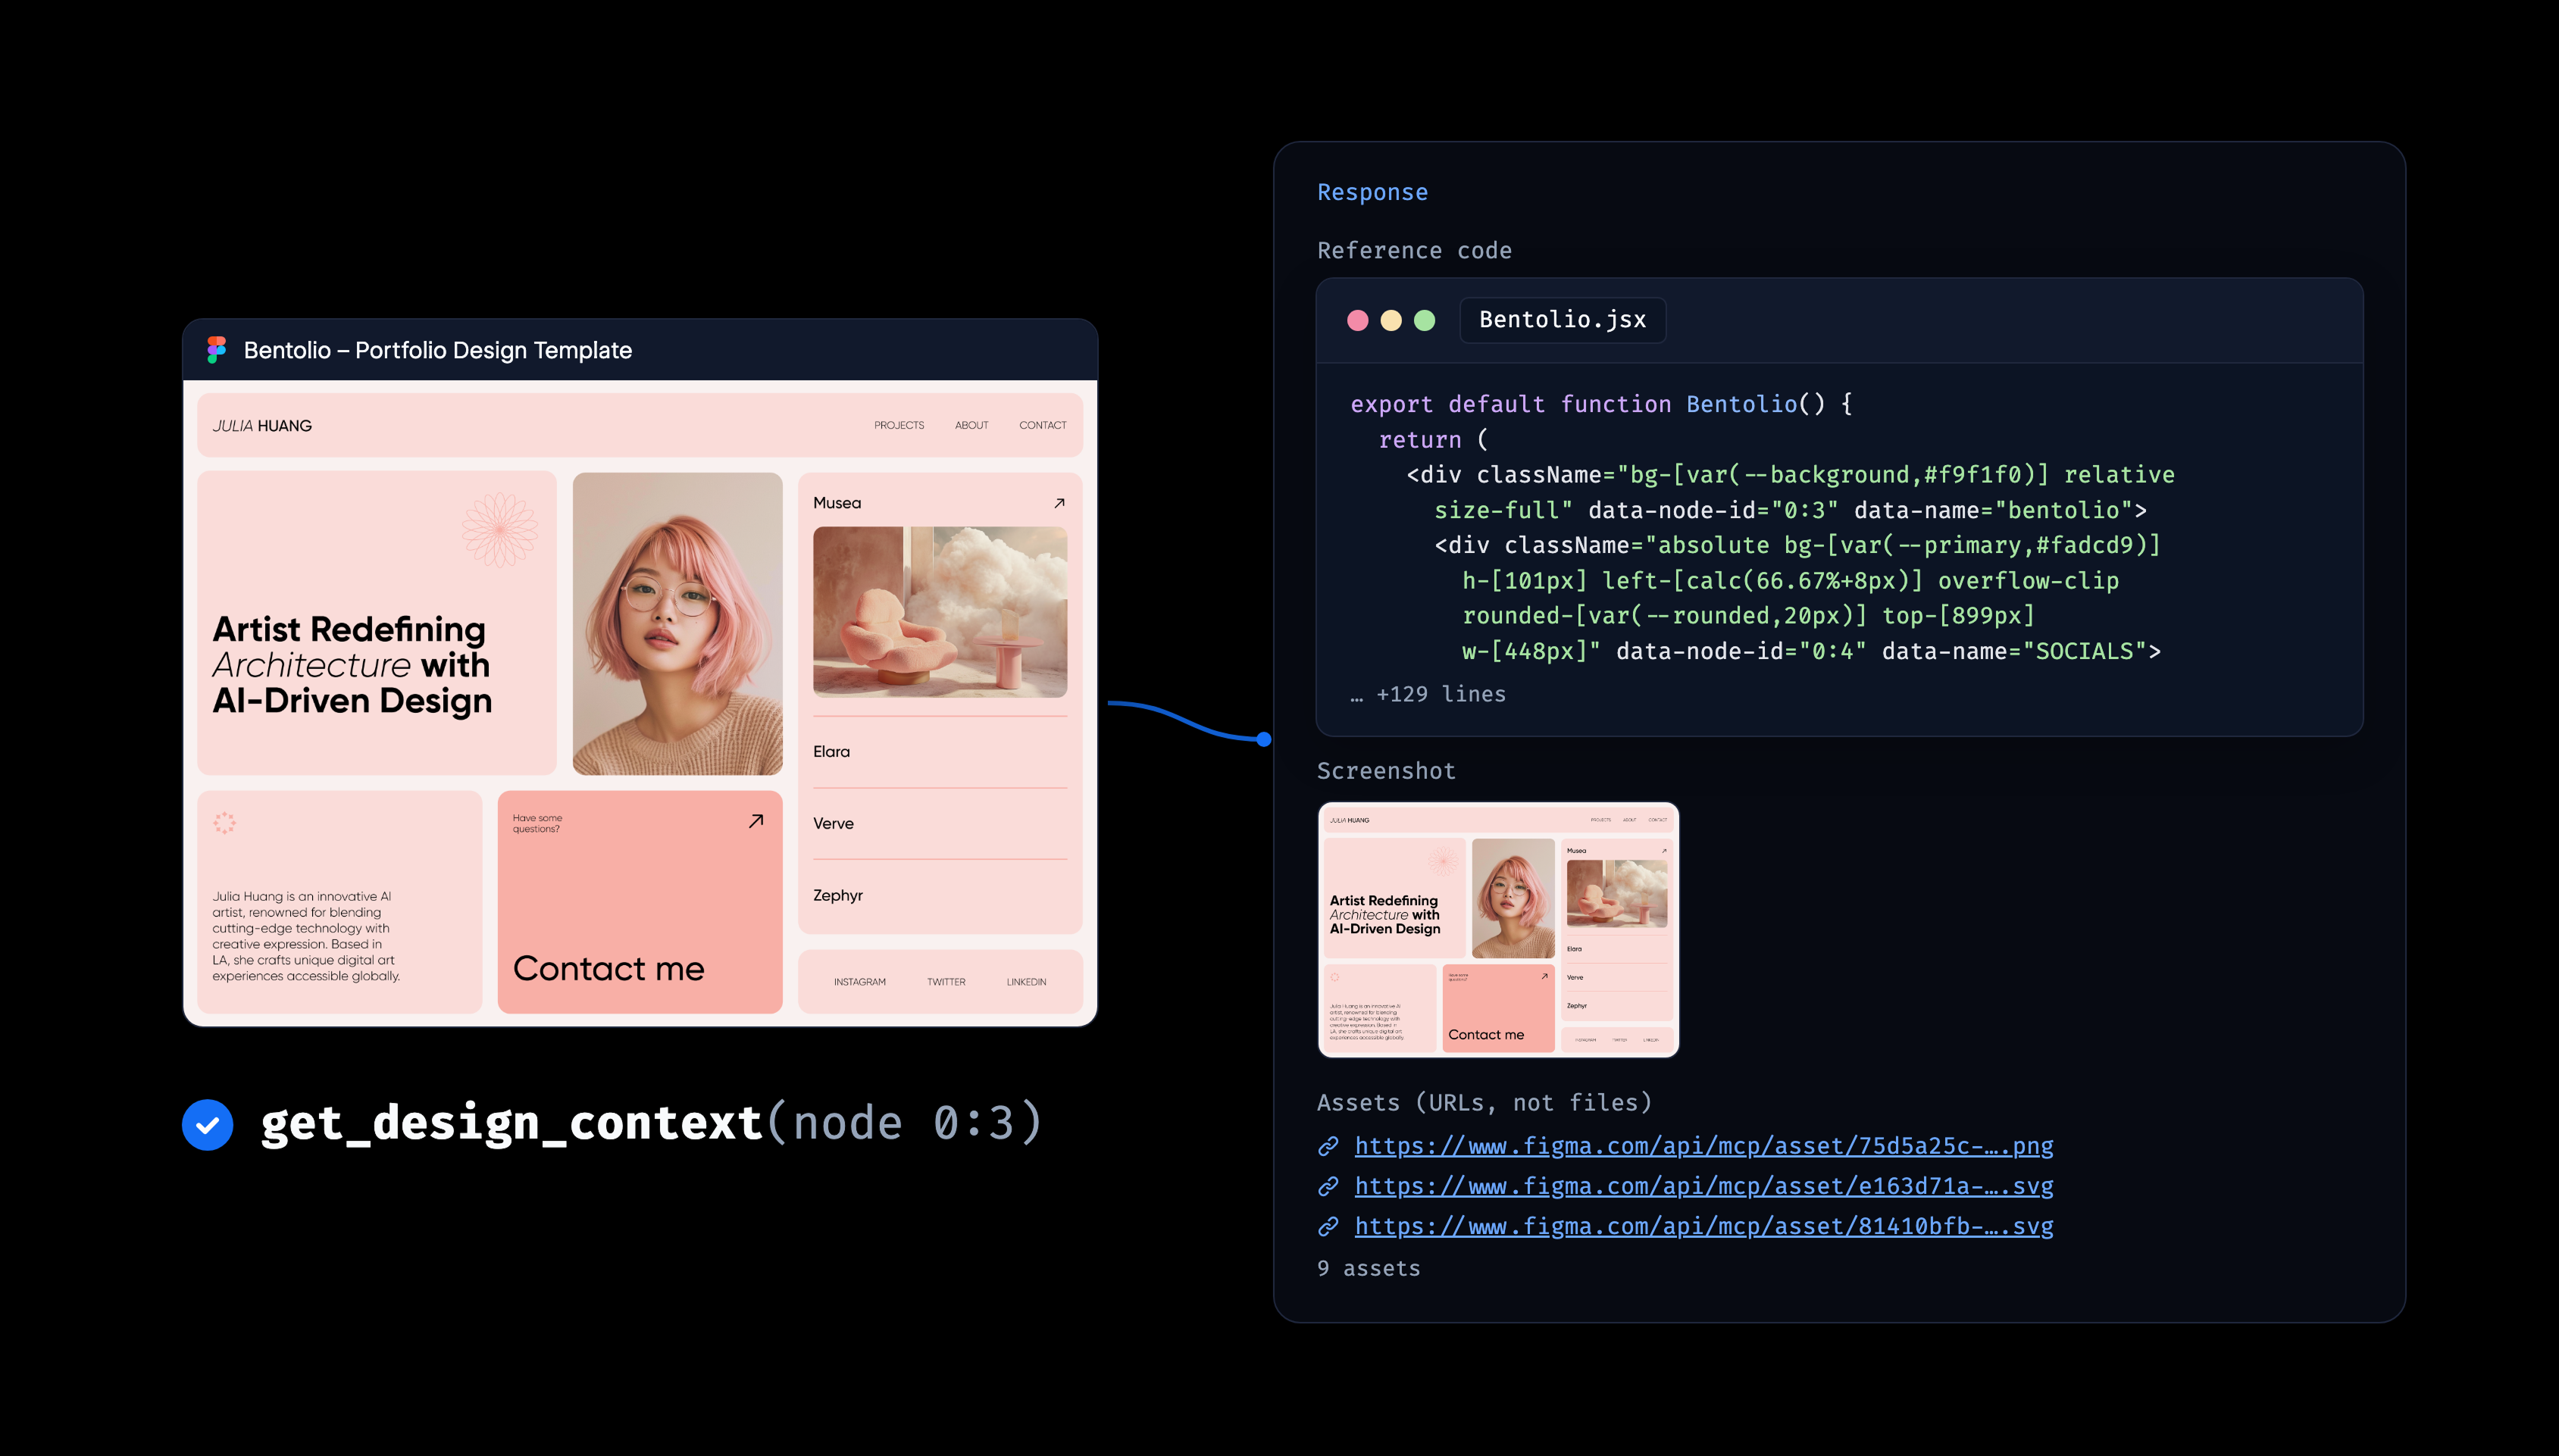
With the React implementation in hand, Claude switched over to the Webflow MCP tools and did what a careful developer would do first: design tokens. Start with the foundation. The data_variable_tool set up a dedicated variable collection and filled it with the color, size, and typography values extracted from the design. These are the same variables you'd set up yourself before styling anything.
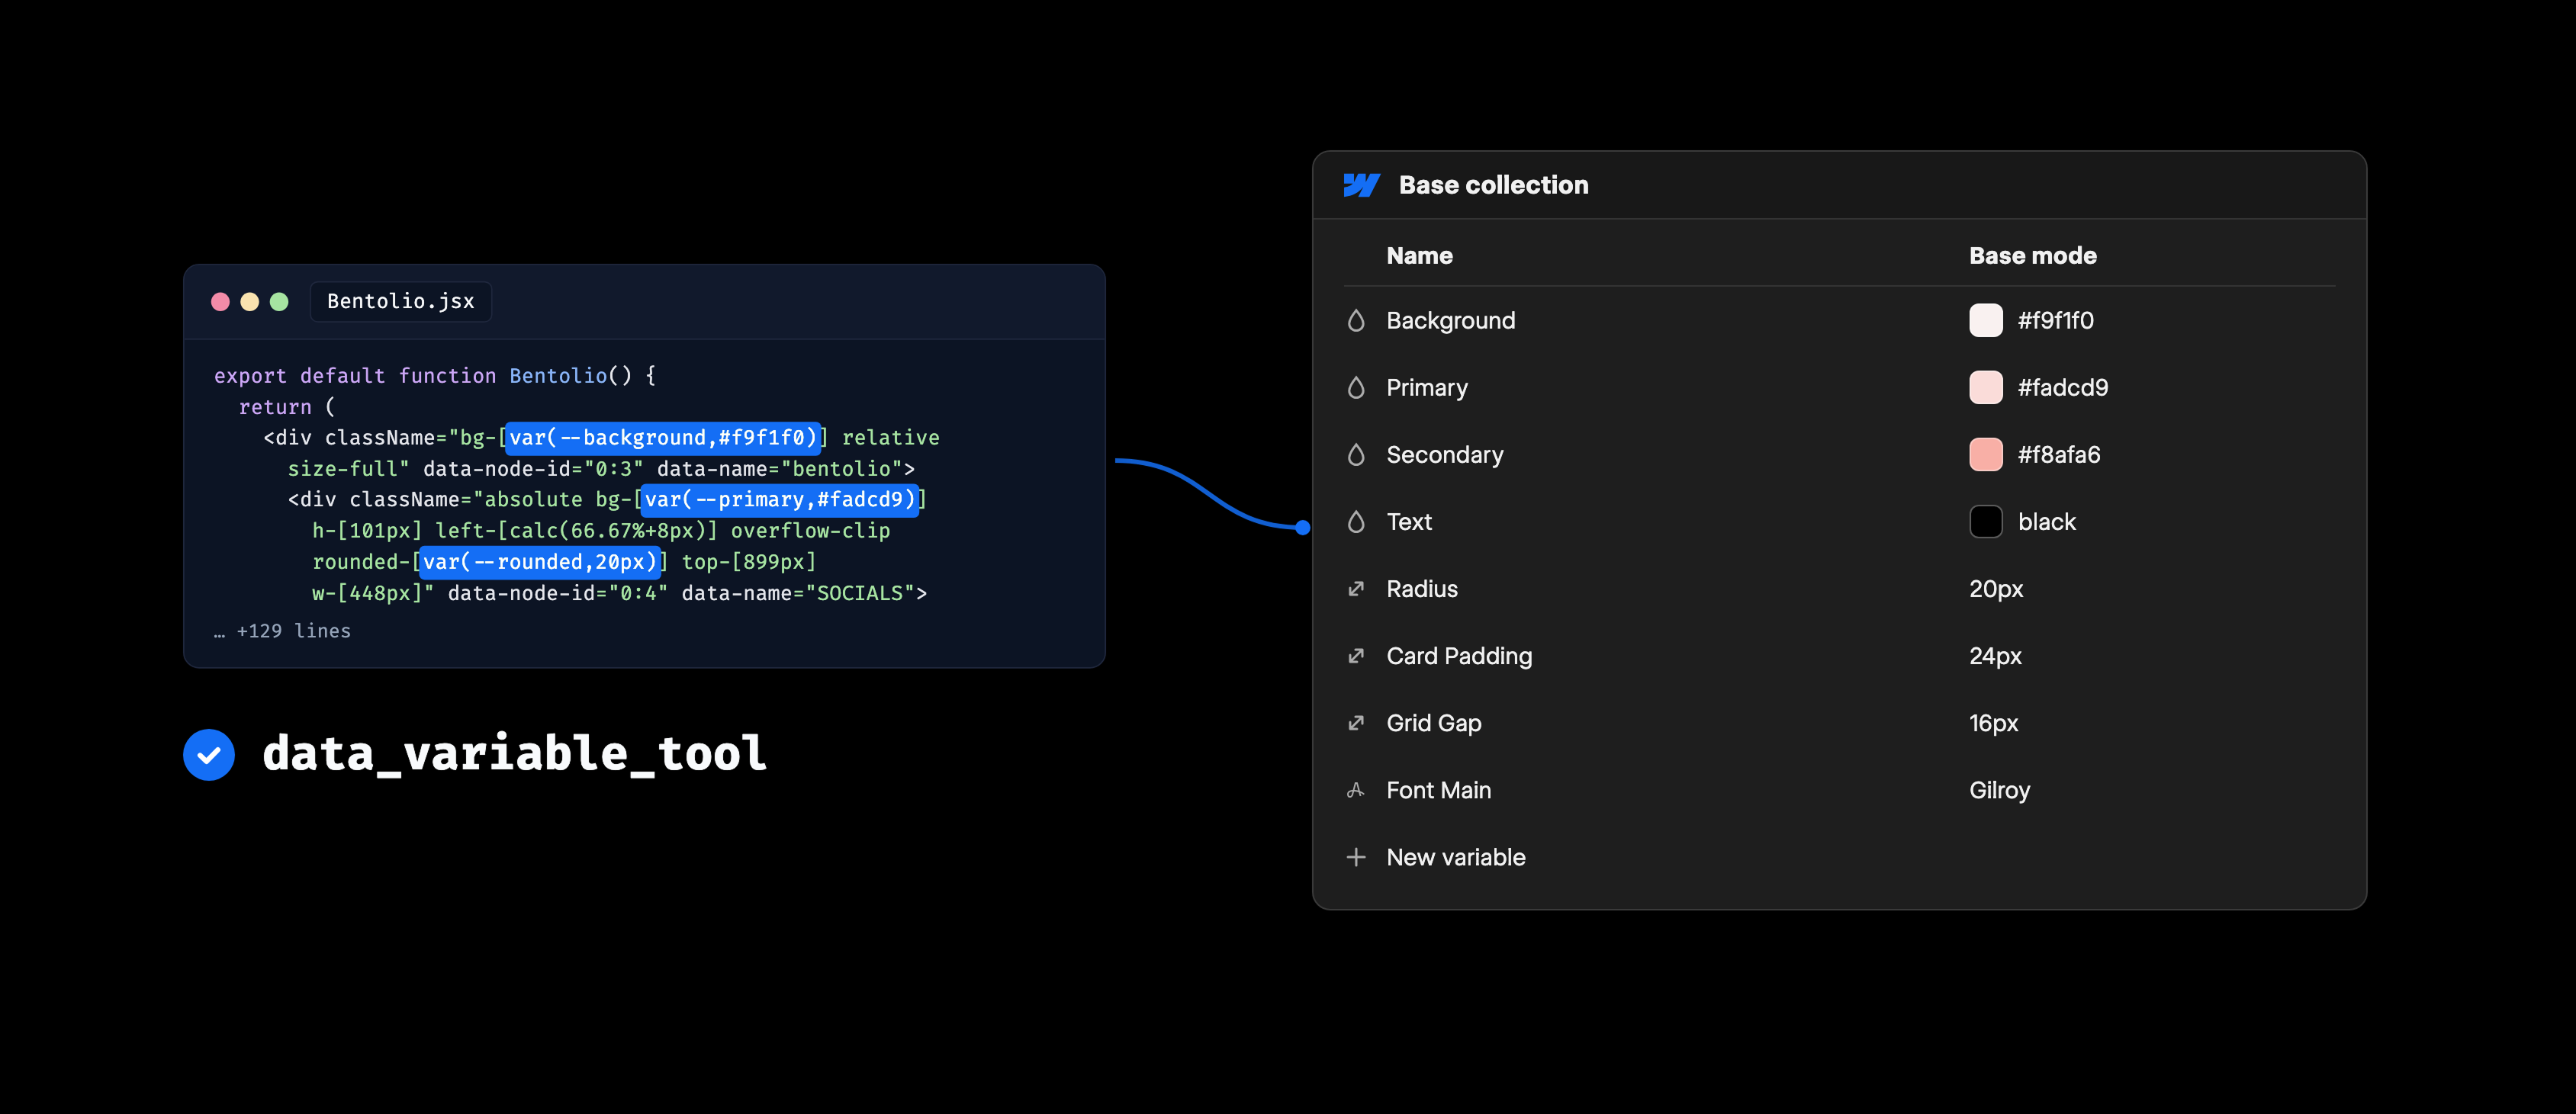
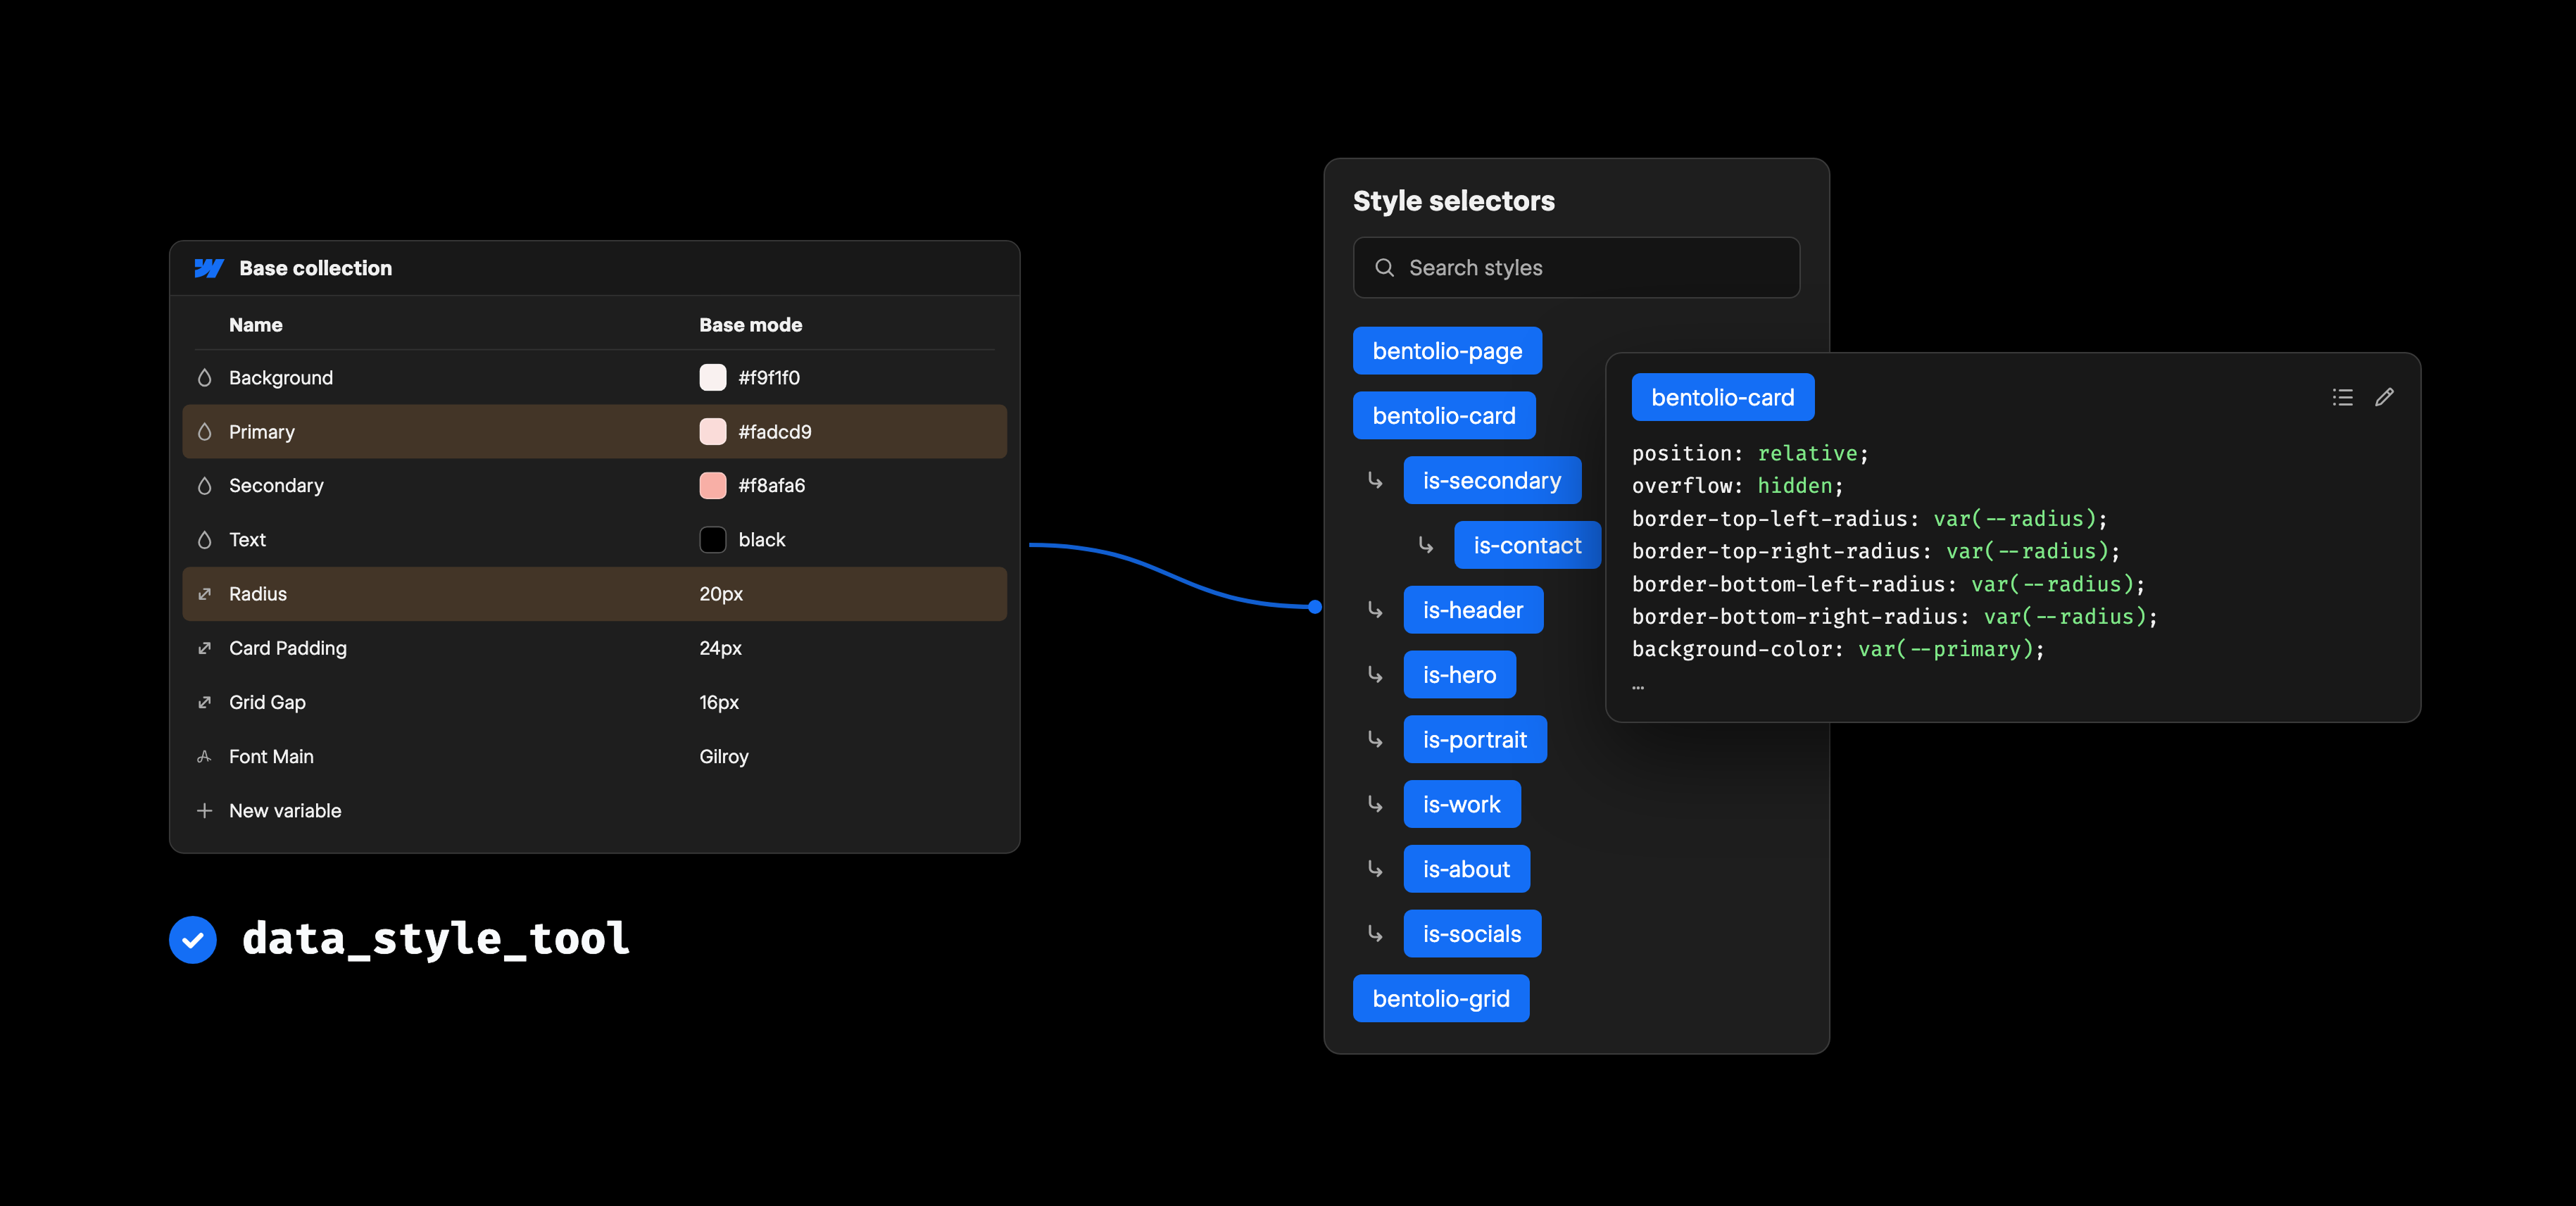
Classes came next via data_style_tool. A page wrapper, a bentolio-card class with combo classes like is-hero and is-work, and the bento grid itself. Wherever it makes sense, the properties reference the variables created a moment earlier instead of raw values.
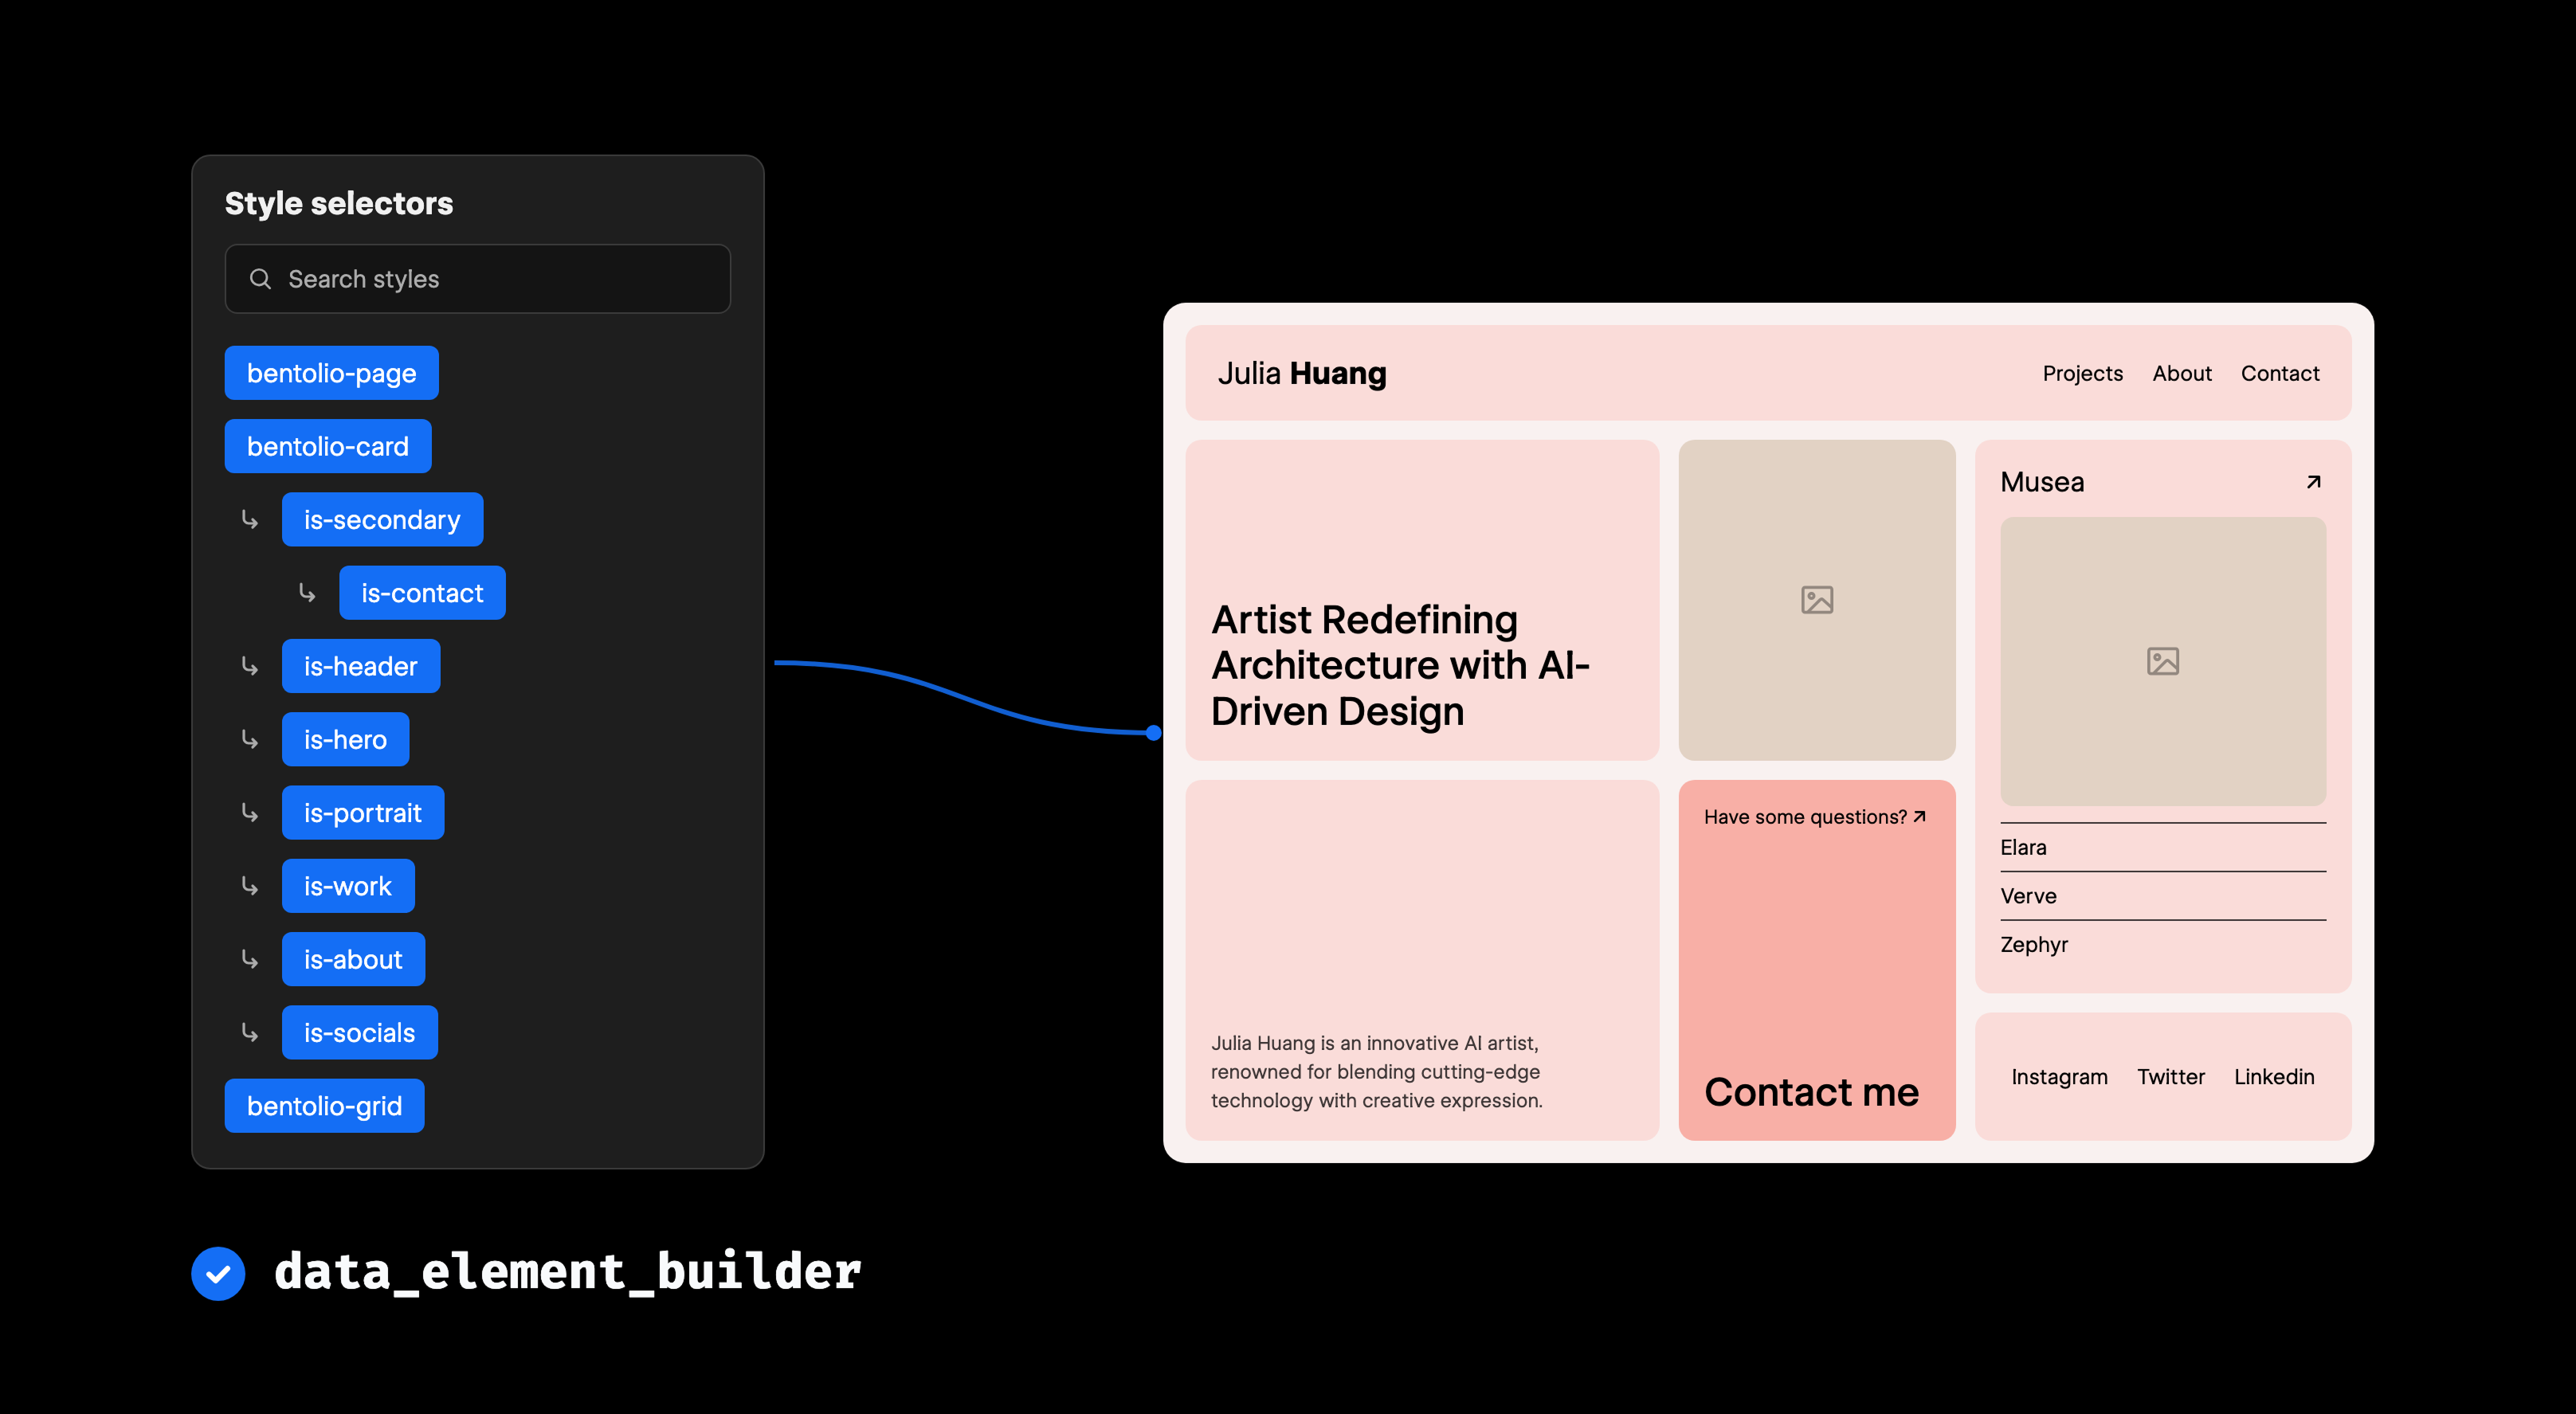
Then Claude set up the structure. The data_element_builder tool accepts whole nested element trees, so Claude dropped in the navigation and the grid container, followed by all six bento cards with headings, copy, links, and images, classes already attached.
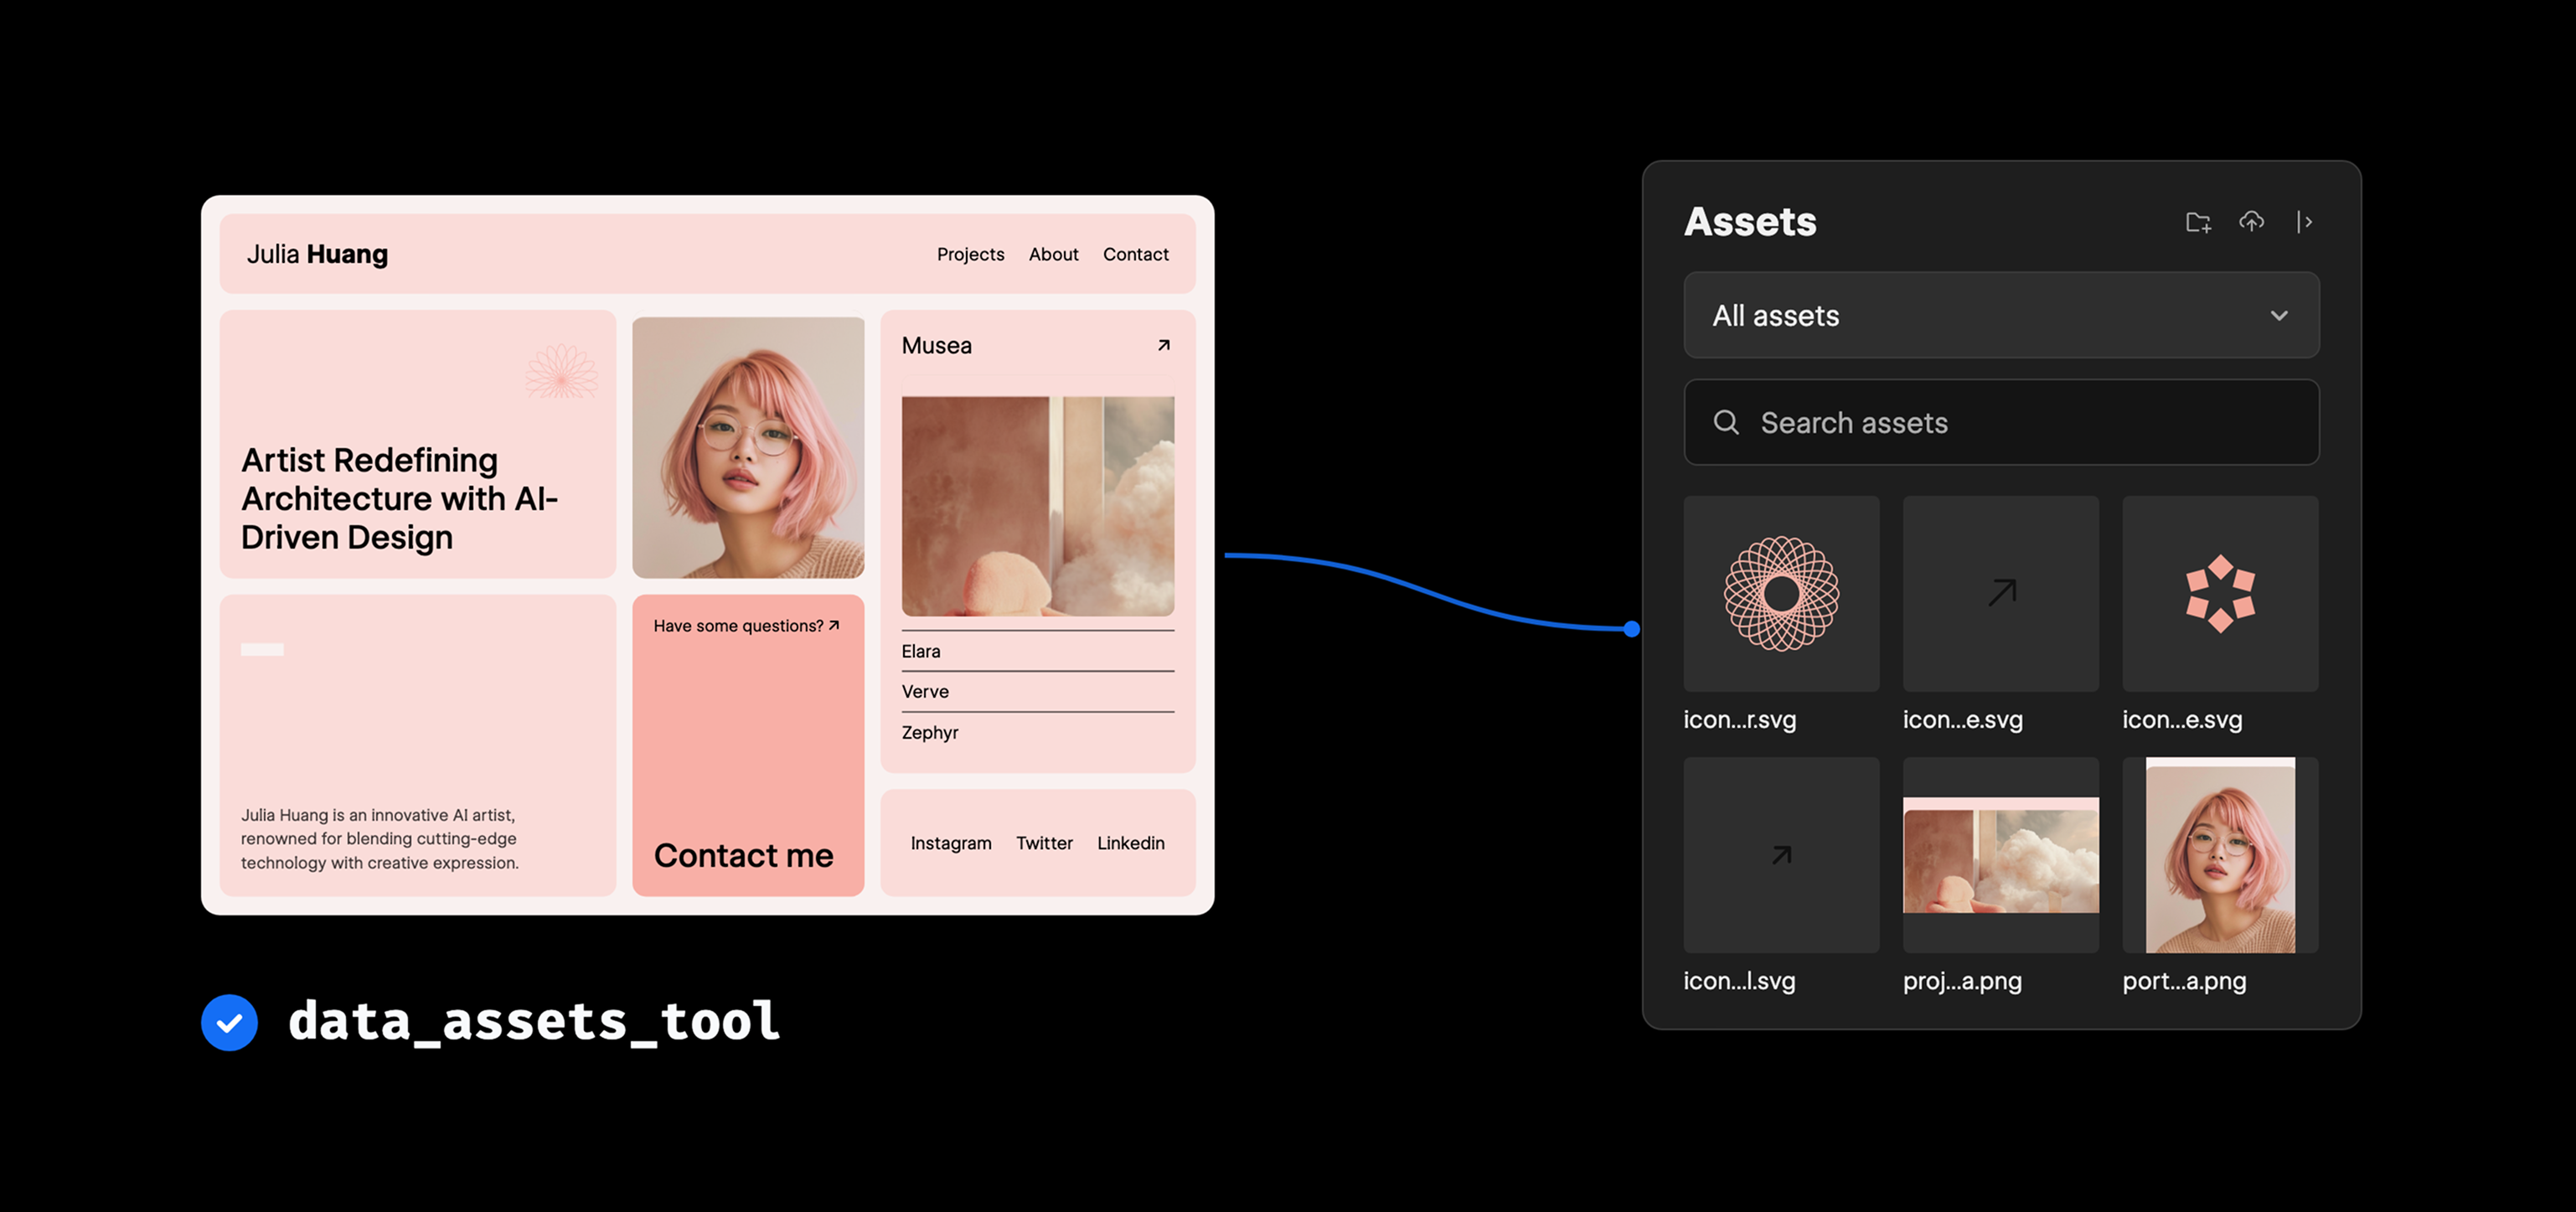
The assets needed no manual export either. Remember the download URLs from the very first Figma tool call? The data_assets_tool pulled the portrait, the project shot, and all the little icons straight from Figma into the Webflow asset library.
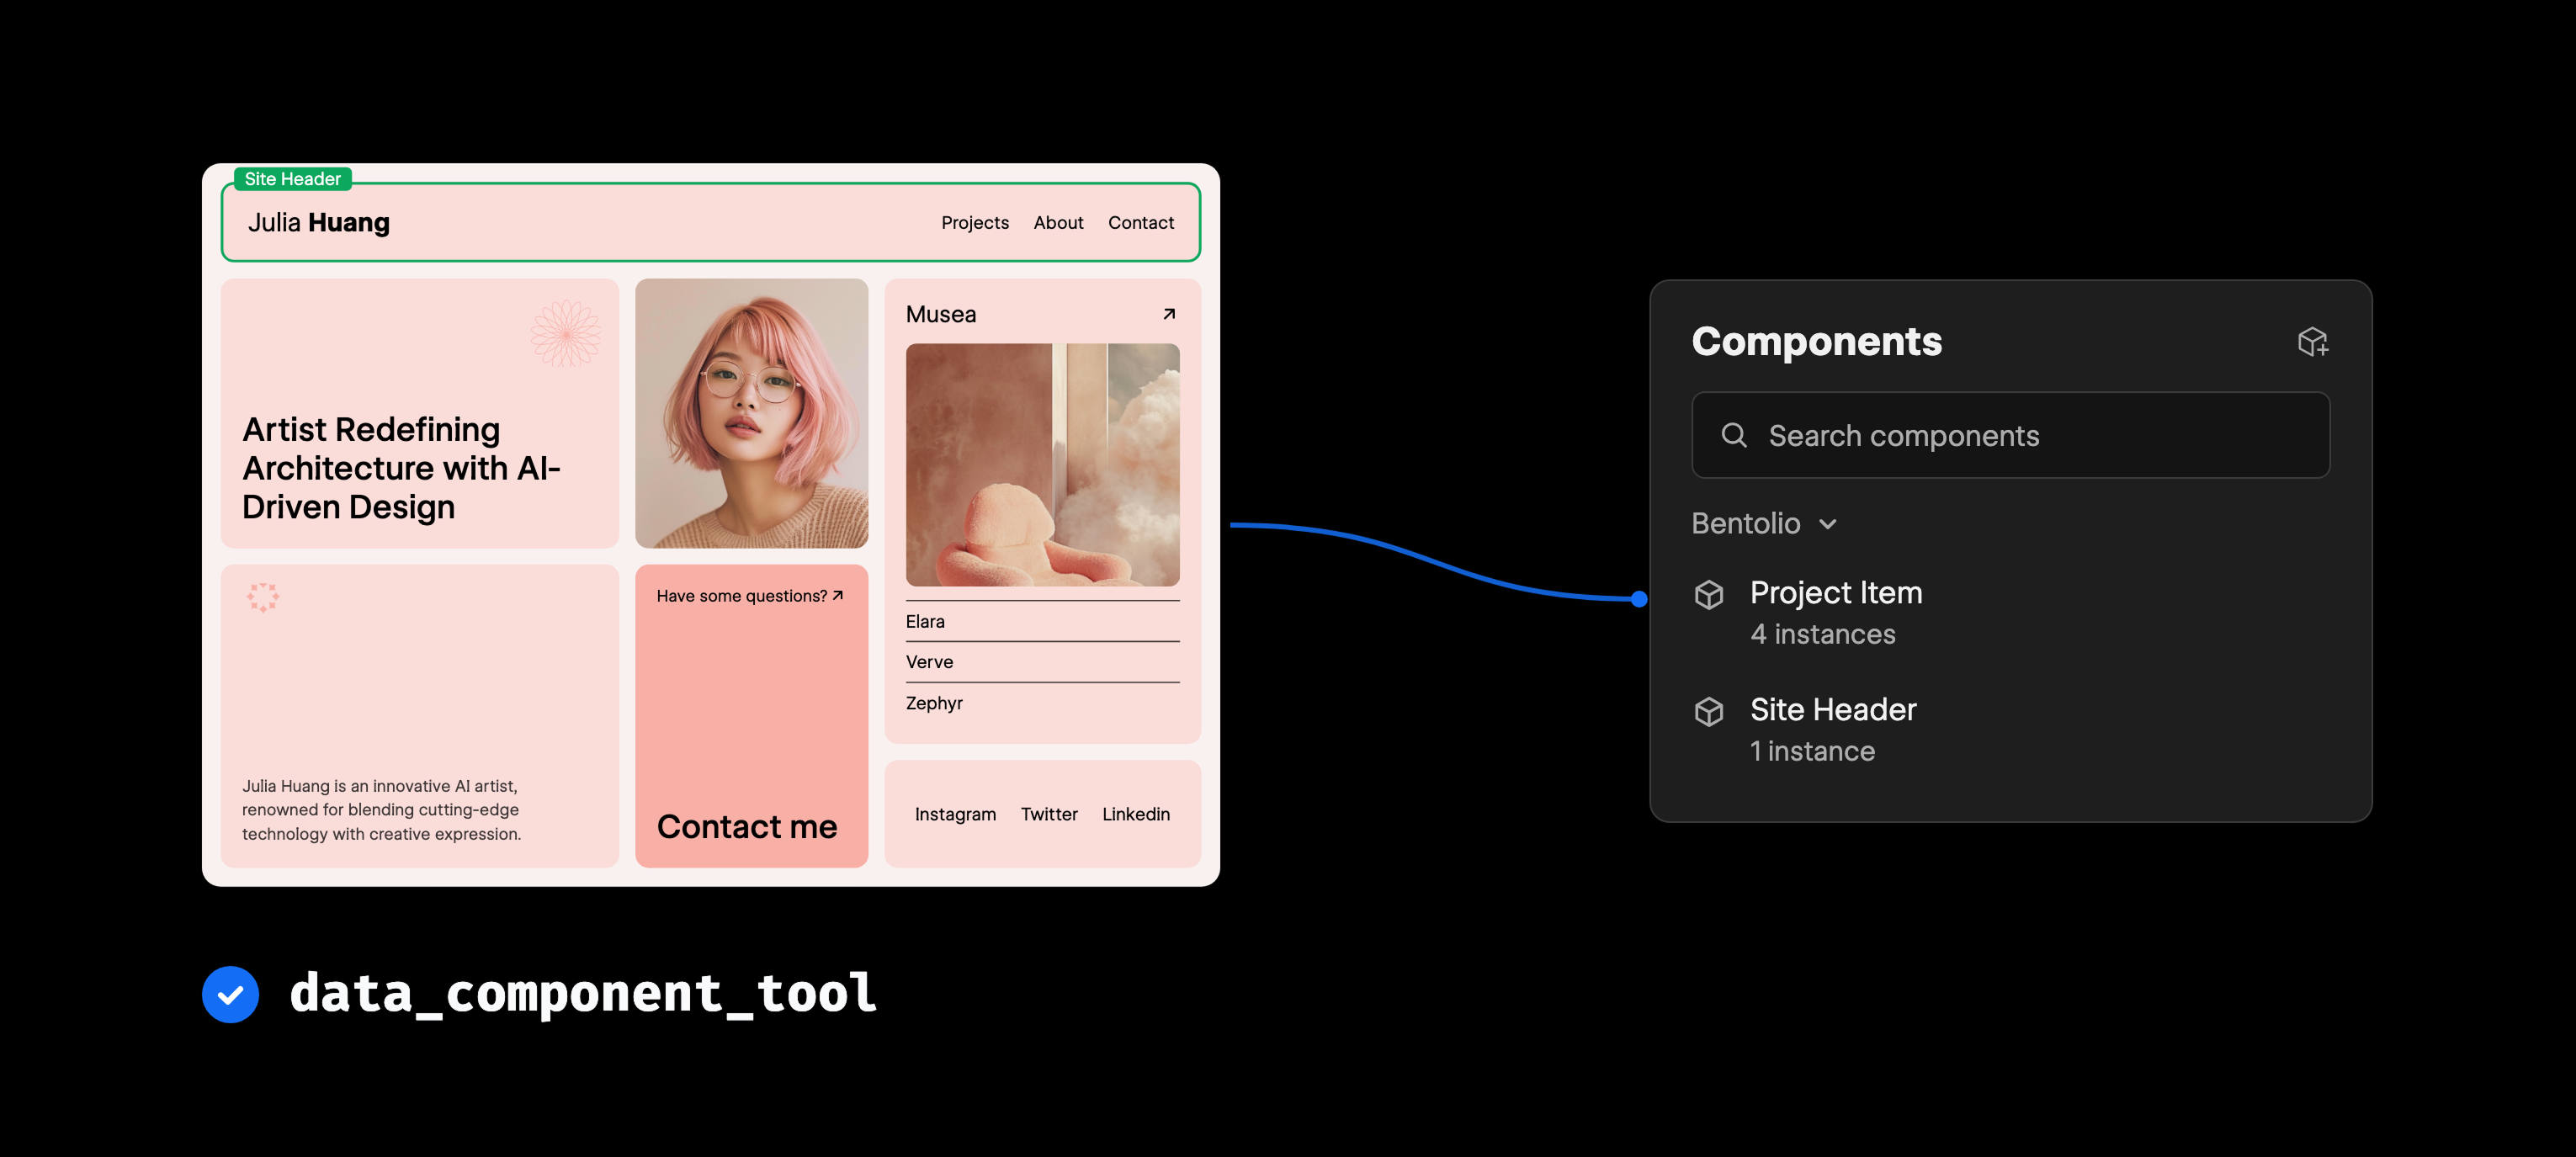
Setting up the components was my favorite step. Claude decided on its own which pieces of the page repeat and turned the navbar and the project item into reusable components with data_component_tool. It even gave the project item props, a text prop for the title and a boolean to toggle the preview image. That's the kind of judgment call I expected to make myself.
And at the very end, Claude used the element_snapshot_tool for a light QA. It took a screenshot of the finished page and compared it against the Figma design, checking its own work before reporting back. It found some major bugs and fixed them automatically. Of course, this design QA wasn't perfect, but I think it's unfair to expect a perfect pipeline from a single prompt.
Claude decided on the entire workflow on its own: tokens first, then styles bound to tokens, then structure, then components, then a review. That order fell out of the tools themselves, because the MCP server exposes Webflow the way you actually work in it.
The whole chain is built from the everyday Webflow primitives: reading and writing variables, styles, elements, components, and assets. The Figma port emerged because an agent had access to all of them and a clear goal. That's what I find kinda beautiful about MCP: workflows don't have to exist as features before you can use them. You describe the outcome, and your agent figures out the rest.
Give Webflow MCP 2.0 a try
The Webflow side of this all runs through the Webflow MCP server, and the recent 2.0 release added a lot more than what you've seen here. I won't walk through everything, but if you haven't tried it yet, you definitely should.
So, connect the Figma and Webflow connectors to your agent, grab a design you like, and hand over a prompt. You'll be amazed by how much can be done these days automatically.