






Supersparks
A Webflow site can publish blog posts and product pages, but visitors have no way to talk back, so readers reach for another tool to leave comments or start discussions. Embedded comment widgets patch that gap while ignoring your classes and layout, and that design tradeoff is what Supersparks removes.

A Webflow site can publish blog posts and product pages, but visitors have no way to talk back, so readers reach for another tool to leave comments or start discussions. Embedded comment widgets patch that gap while ignoring your classes and layout, and that design tradeoff is what Supersparks removes.
Connect Supersparks and Webflow, and your CMS-generated pages gain guest and member commenting, star-rated reviews, community posting, and upvoting. Every component is a native Webflow element, so you restyle it with your existing classes instead of fighting an iframe. Review averages and totals sync into the Webflow CMS for filtering and sorting, and community posts become CMS items with their own pages.
This integration fits no-code builders and client-service teams adding community features across Webflow sites, along with marketers who want blog comments for engagement and SEO. Community managers and membership site operators use it to run forums and review-driven communities. The pattern we see most often on Webflow is directories, ecommerce catalogs, recipe blogs, and review sites modeled on Goodreads or Letterboxd.
How to integrate Supersparks with Webflow
What is Supersparks? Supersparks is a no-code tool and library of power-ups for Webflow that adds user-generated content and community features. It covers comment sections, reviews and ratings, community posting, upvoting and favoriting, and a CMS audio player. Supersparks has no membership system of its own, so it reads member profile data from Memberstack or Outseta when you want member-only posting.
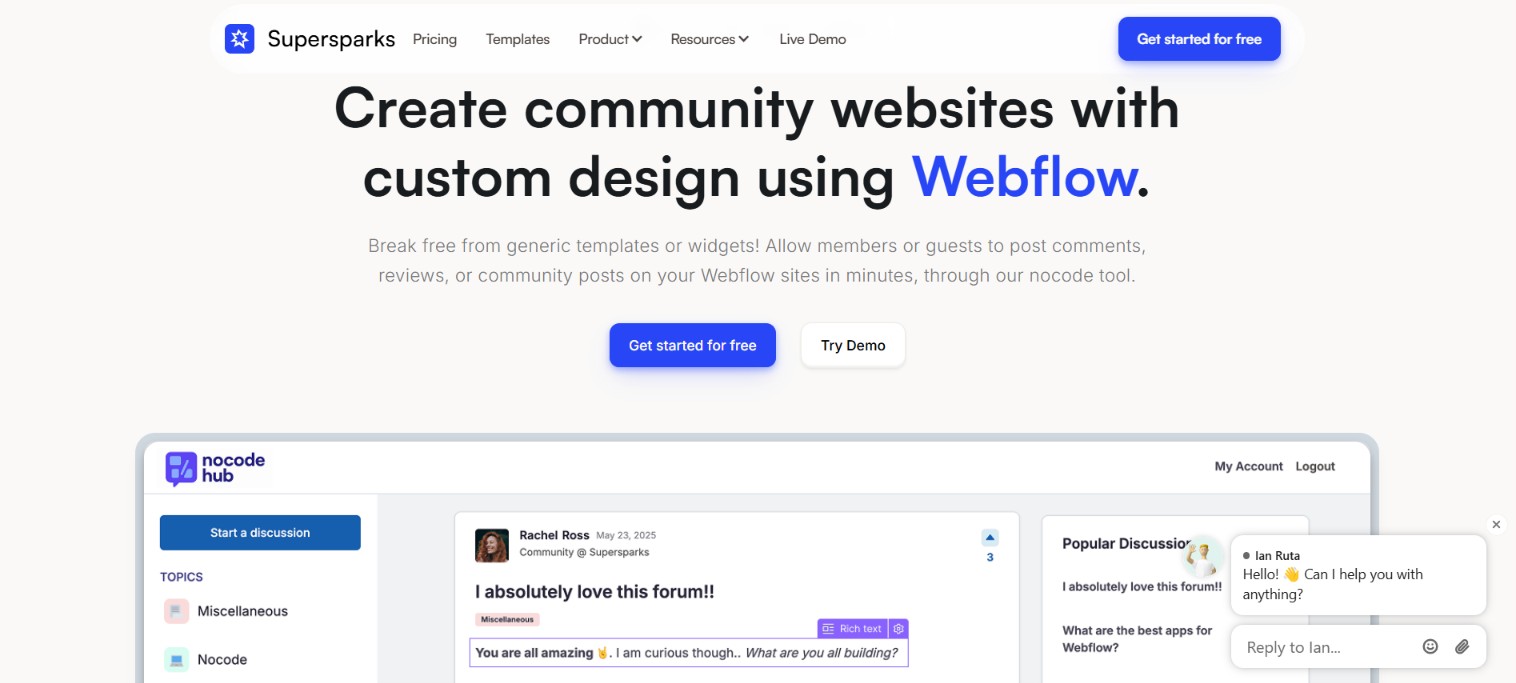
Teams use the integration for blog comments, directory item reviews, ecommerce product reviews, forums, job boards, and Q&A knowledge bases. Setup is copy and paste rather than development, so most sparks go live in minutes.
Three approaches cover almost every Supersparks setup on Webflow. The Supersparks app handles user-generated content features and upvoting without writing code. Custom attributes and CMS Data Sync display member data next to that content and let you sort CMS items by rating. For programmatic control over community post data and event triggers, the Webflow Data API and Supersparks webhooks work together, though that path needs server-side development. Most implementations combine two of these depending on the complexity of the setup.
Install the Supersparks app
The Supersparks app on the Webflow Marketplace covers comment sections, CMS and ecommerce reviews, community posting, and a CMS audio player. Once you authorize the app, installing it means pasting one script and a set of prebuilt components onto your pages. Pasting the script requires custom code in head and body tags, which needs a Core, Growth, Agency, or Freelancer Workspace, or an active Site plan. This method suits anyone who wants community features live without touching an API.
To set up the integration:
- Sign up at supersparks.io, then authorize Supersparks on the Webflow sites you want it to run on.
- Click Add Sparks on the site you want and choose the spark you need. On a brand-new site, start from a template instead.
- For community posting, select the CMS collection and the rich text field that will store posts.
- Copy the Supersparks script and paste it into the Head code field under Site settings > Custom code, then click Save changes.
- Copy your component out of the Supersparks editor and paste it (CMD+V or CTRL+V) into a static page or a CMS Collection template page. Prebuilt components paste as native elements, and for custom HTML snippets you use a Code Embed element instead.
- Adjust the design in Webflow, then publish and test on the live page.
Once installed, the app covers the following without any extra code:
- Guest and member comments: Comment threads support nested replies, and the components ship with guest name and email inputs already in place.
- Star ratings: You can restyle the stars, the average rating, and the review total to match the rest of the page.
- Community posts: Each submitted post becomes a Webflow CMS collection item with rich text and its own page.
- Upvoting and favoriting: Visitors can upvote, favorite, and follow CMS items, comments, and community posts.
- Moderation controls: The Supersparks editor holds pre-moderation, AI spam detection, and email notification settings.
The script only needs to go in once per site, no matter how many sparks you install. Keep every class that starts with supersparks- or sparks- intact when you restyle, because renaming or deleting them breaks the components.
Configure member data and rating sync with custom attributes
Supersparks has no built-in authentication, so displaying member profiles means connecting a supported membership platform and mapping its fields with custom attributes in Webflow. Reviews themselves live in Supersparks' database, so a separate CMS Data Sync setting writes aggregate rating data back into CMS fields. Both paths are configuration work inside Webflow and the Supersparks dashboard, with no code involved.
Display member fields with custom attributes
Supersparks displays up to three custom member fields alongside each member's content, and you can repurpose the username slot for a fourth. The full attribute reference lives in the custom fields help article.
To map a member field:
- In Memberstack, copy the ID of the custom field. In Outseta, copy the property's System Name from the Custom Properties section of the CRM, which is case sensitive.
- Paste that value into Supersparks and save.
- In Webflow, select the target element, open Element settings panel > Custom attributes, and click the plus icon.
- Enter the attribute name and value. Use
supersparks-member-field-1with the spark's unique 5-digit code for comments and reviews,supersparks-op-field-1for community post authors, orsupersparks-profile-member-1with the valuemembe1for public profiles.
The same pattern displays usernames through supersparks-username, supersparks-op-username, and supersparks-profile-username, or you can switch on Username Replace in Supersparks instead. One constraint catches people out: CMS data binds to custom attributes only on Collection pages or inside a Collection List.
Sync ratings into CMS fields
CMS Data Sync writes total comment counts and average ratings into Webflow CMS fields, which is what makes rating-based sorting and filtering work inside Collection Lists. Individual review records stay in Supersparks' database, and only the aggregates sync across.
To turn on rating sync:
- Create the fields for average rating and total reviews in the target CMS collection.
- Switch on the setting in Supersparks and connect it to those collection fields, as described in the average rating sync guide.
- Sort or filter your Collection List by the synced rating or count field in Webflow.
Upvote totals can appear inside Collection List elements too, by adding the supersparks-upvotes-list attribute set to true, per the upvotes and favorites guide.
Build with the Webflow Data API and Supersparks webhooks
Programmatic work here happens on two surfaces, because Supersparks splits its storage. Community posts are standard Webflow CMS items that the Data API v2 can read and write, while comments and reviews sit in Supersparks' own database and stay out of reach of the Data API. Event-driven work runs through webhooks on both sides, so this path needs server-side development and suits teams building custom moderation or event pipelines.
These are the integration points worth knowing before you start:
- Supersparks outbound webhook: The custom webhook posts JSON to a callback URL you choose whenever new Supersparks content arrives.
- Webflow Data API v2: The v2 reference covers collections and collection items, including the community post items Supersparks creates.
- Webflow webhooks: Site webhooks fire real-time events such as
collection_item_createdwhen a community post lands in the CMS. - No public Supersparks REST API: Supersparks publishes no REST API of its own, so comment and review records cannot be queried or migrated programmatically.
Build against v2 endpoints only, since the v1 API was deprecated on March 31, 2025 and no longer receives maintenance or support.
Manage community posts through the Data API
Because Supersparks writes each community post to a Webflow CMS collection, the standard CMS endpoints against https://api.webflow.com can manage those posts directly.
To work with post items:
- Call
GET /v2/sites/{site_id}/collectionsto find the collection that stores community posts (list collections). - Read posts with
GET /v2/collections/{collection_id}/itemsand update them withPATCH /v2/collections/{collection_id}/items(update items). - Push staged changes live with
POST /v2/collections/{collection_id}/items/publish.
Community posts count toward Webflow CMS item limits, so check current plan limits before you launch a forum that gets real traffic.
Trigger workflows with webhooks
Webhooks run in two directions here: Supersparks fires an outbound webhook when new content arrives, and CMS item changes fire Webflow webhooks. Use the outbound webhook to push Supersparks events to any callback URL that can receive JSON.
To wire up event handling:
- Configure a callback URL in the spark's webhook setting so Supersparks sends JSON when new content is added.
- Subscribe to CMS events with
POST /v2/sites/{site_id}/webhooks, using trigger types likecollection_item_createdorcollection_item_changed(create a webhook). - Handle the payloads on your server. A
collection_item_createdpayload includesid,siteId,collectionId, andfieldData(event schema).
Supersparks does not publish event names or payload schemas for its own webhook, so log a few live payloads before you build against them. One trap worth naming: Webflow's comment_created event covers built-in collaboration comments on the canvas, not Supersparks comments on published pages.
What you can build with the Supersparks Webflow integration
Integrating Supersparks with Webflow lets you run user-generated content as native elements of the site, without embedding third-party widgets that ignore your design system.
These are the builds we see most often on Webflow sites:
- Blog comment sections: Guest and member commenting with nested replies on CMS-generated blog pages. Victoria Rudi of SaaS Minds reports adding comments in minutes after months of trying to build it herself.
- Directory and product reviews: Star ratings with averages synced to CMS fields for sorting. Supersparks reports that Stackradar, a directory of 400+ tools, built a branded reviews system in about 30 minutes on Memberstack authentication.
- Branded support forums: A community forum styled entirely in Webflow, where every post, comment, and topic page lives in the CMS. ShipWise built one on Memberstack, which turns support conversations into indexable pages.
- Members-only community portals: Gated forums tied to a membership platform. New Age Artisans runs a plaster training portal forum behind Outseta, so the discussion sits inside the paid subscription.
If you want programmatic control over post data or event-driven moderation, start with the Webflow CMS API guide. And if you are running community content across several sites, connect the Webflow MCP server so an AI client can audit collections, check content, and publish CMS updates for you.
Frequently asked questions
No. Comments and reviews live in Supersparks' database, so they do not count against your Webflow plan's CMS item limit or your form submission totals, per the Supersparks comments page. Community posts are the exception, because Supersparks stores each post as a Webflow CMS item. Budget those against your site's CMS item limit before you launch an active forum.
You need a plan that allows custom code in head and body tags, which means a Core, Growth, Agency, or Freelancer Workspace, or an active Site plan on the site itself. On the Supersparks side, the free tier works only on
.webflow.iostaging domains, and publishing on a custom domain needs a paid Supersparks plan. Community posting sits on the Pro tier and above.Memberstack and Outseta. Both display member profile data next to Supersparks comments, reviews, and community posts, and both are the platforms Webflow named for teams moving off User Accounts, which was sunset on January 29, 2026. Older tutorials that route member commenting through the old native membership feature no longer apply. One real caveat remains on self-hosted (non-Webflow-hosted) sites: commenting and reviews still work, but community posting does not, because it creates CMS pages. Guest posting needs no membership platform at all, since the components include guest name and email inputs by default.
Use the Supersparks content dashboard to review everything visitors submit. Switch on pre-moderation so new content waits for manual approval before it goes live, in the optional comments and reviews settings. The same panel holds AI spam detection and a one-review-per-user limit, plus how often you get email alerts about new content.
Yes. Prebuilt components paste in as native Webflow elements, so you style them with your own classes instead of overriding an iframe you do not control. Keep every class that starts with
supersparks-orsparks-intact, because renaming or deleting one stops the component from working.
Description
Add native user-generated content to Webflow CMS pages using Supersparks components and one script, with average rating data synced back into CMS fields for sorting and filtering.
This integration page is provided for informational and convenience purposes only.

Orimon
Connect Orimon with Webflow to answer visitor questions and capture leads through an AI chatbot trained on your published site.

Chaty
Add a floating Chaty chat widget to your Webflow site that routes visitors to WhatsApp, Messenger, phone, and other channels across 20+ supported platforms.

Social Intents live chat
Connect Social Intents live chat with Webflow to answer visitor questions in real time from Microsoft Teams or Slack, with Google Chat also supported.

Twise
Connect Twise, an AI chat assistant, with Webflow to answer visitor questions, capture leads, and respond in 92 languages using a chat widget that learns from your site content.
Flowstar: Banners
Connect Flowstar: Banners with Webflow to display promotional pop-ups and announcement banners without writing code
Flowstar Urgency Countdown Timer
Add deadline-driven countdown timer bars to any Webflow page using Flowstar's no-code app.

Click to Call
Connect Click to Call with Webflow to add a floating phone button that lets visitors call your business directly from any page.
Quiz Popup
Connect Quiz Popup with Webflow to embed branching quiz popups that collect visitor data, capture emails, and route product recommendations on your site.

Impulse
Connect Impulse with Webflow to add popups, bars, and widgets to your site without writing custom code.
Related integrations
Get started for free
Try Webflow for as long as you like with our free Starter plan. Purchase a paid Site plan to publish, host, and unlock additional features.
