






Smootify
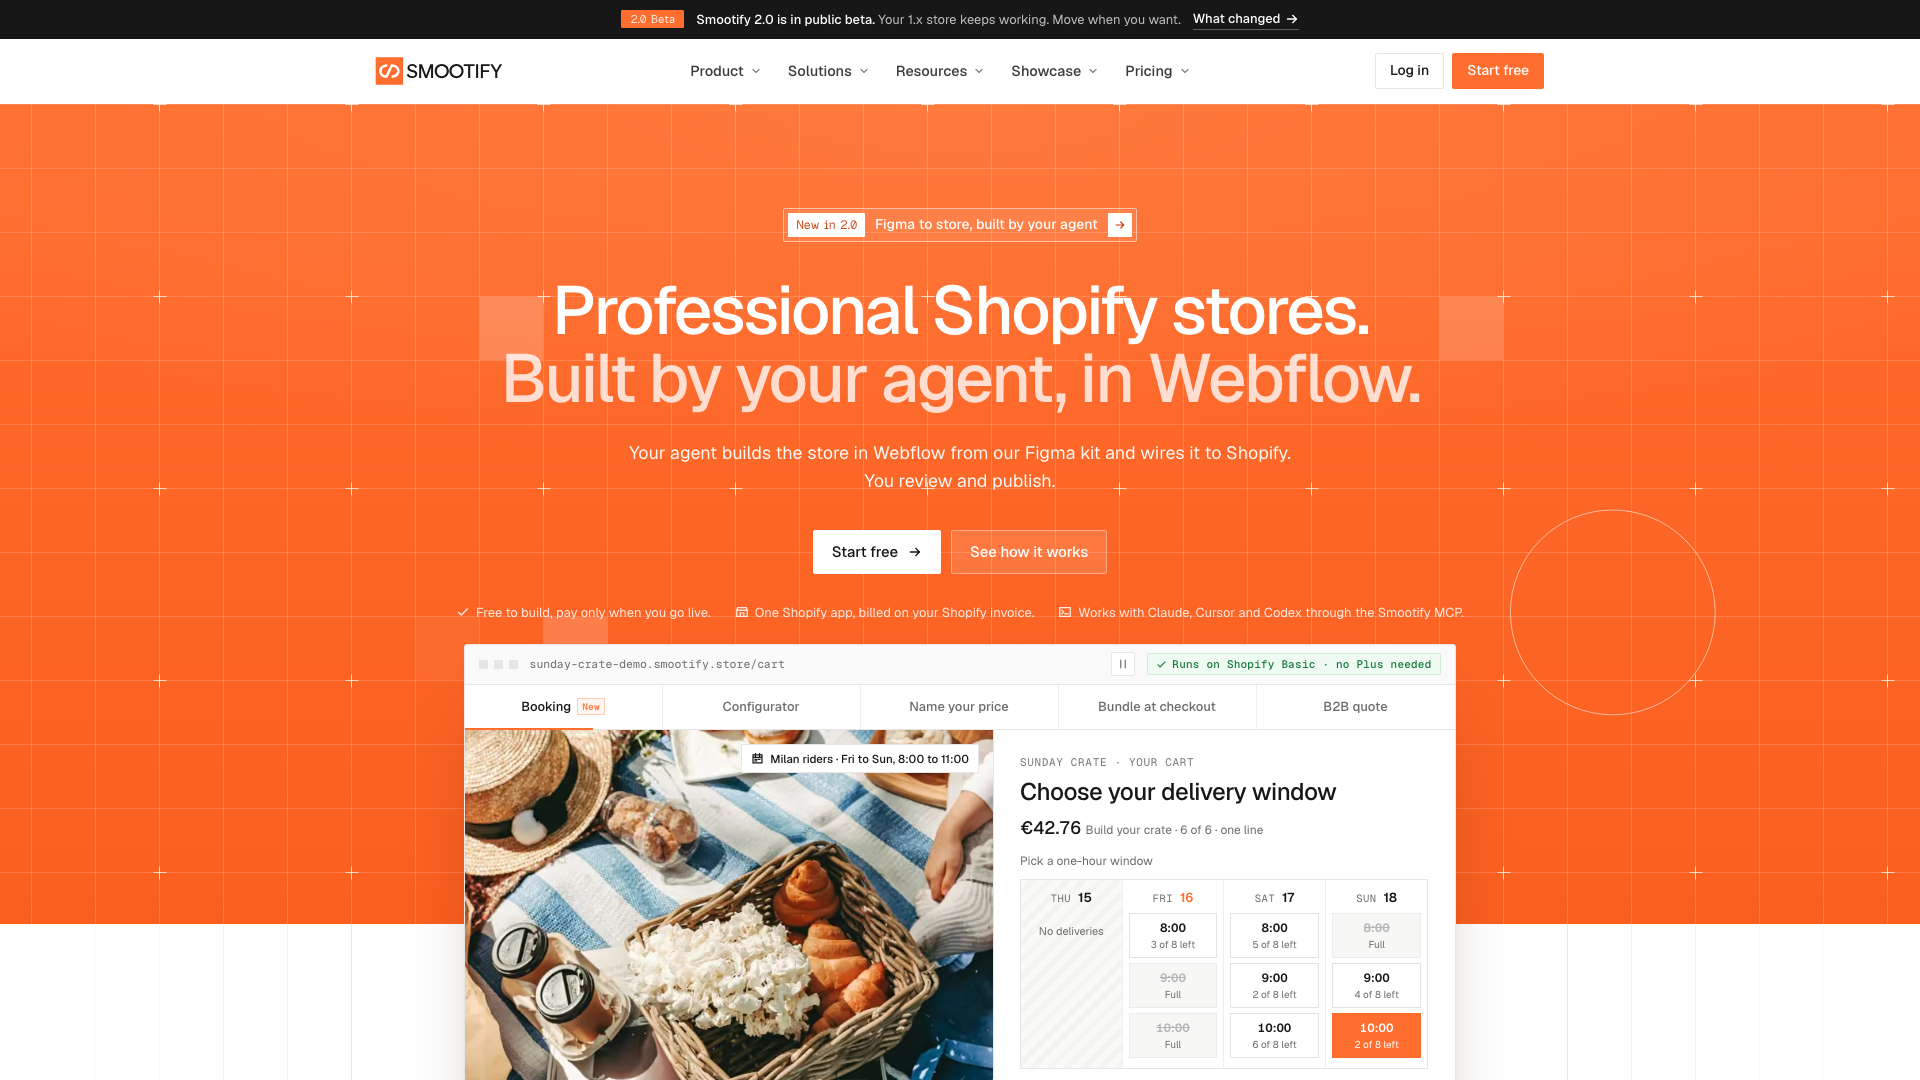
Connect Smootify with Webflow to run a Shopify store on a custom Webflow front end, built by hand or, in the Smootify 2.0 public beta, by an AI agent.

Webflow builds and hosts your storefront design, and Shopify holds the product catalog, variants, inventory, checkout, and customer accounts. Without an integration, pairing the two means dropping in a Shopify Buy Button and living with whatever markup it renders.
Smootify closes that gap by turning a Webflow site into a headless Shopify storefront. Product data, carts, search, and customer account pages render inside Webflow through pre-made components and custom attributes, while checkout stays on Shopify. No payment data reaches your Webflow site, so PCI scope stays with Shopify.
Smootify 2.0 adds a second way to build: an AI agent designs the store from Smootify's Figma kit and writes the Webflow build through the Webflow MCP server, and a person reviews it, connects Shopify, and publishes. Stores on Smootify 1.x keep working, and you move them to 2.0 when you choose.
The integration fits designers and agencies building client stores where the front end has to match a brand no Shopify theme covers. Teams also reach for it when they want Shopify's back end without maintaining a Shopify theme at all. Smootify was a Webflow Awards 2025 finalist for Tech Partner of the Year.
How to integrate Smootify with Webflow
What is Smootify? Smootify is a Shopify app, made by Eclipse SRL in Italy, that turns a site designed in Webflow into a Shopify store. It imports Shopify products, collections, and vendors into the Webflow CMS, then fetches prices, media, variants, metafields, and inventory live from the Shopify Storefront API on every page load.
Version 2.0 ships as three apps:
- The Smootify Shopify app connects the store and carries the plan
- The Smootify Webflow app carries the component library inside Webflow, with its 2.0 version in Webflow Marketplace review while the Marketplace installs the current version
- Smootify Studio, a desktop app for Mac and Windows in beta, syncs products into the CMS
This pairing works when a client needs Shopify checkout, inventory, and subscription support behind a front end a Shopify theme cannot produce. Smootify's own site names two limits: forcing a custom price into Shopify's checkout needs Shopify Plus, so on other plans the configurator and name-your-price add-ons go through a draft order, and Shopify does not let a build-your-own box carry a subscription plan.
Products, collections, and vendors also count as CMS items on your Webflow site plan, so size the plan to the catalog before you scope the build.
The Smootify and Webflow integration supports four approaches:
- An agent build with the Webflow MCP server lets an agent such as Claude, Cursor, or Codex compose the store from Smootify's Figma kit and write the Webflow build, in public beta.
- The Smootify apps connect your Shopify store and drop in pre-made components without writing code.
- Custom elements and attributes bind Shopify data such as prices and stock to your own Webflow layouts, down to variant-level values.
- The Webflow Data API and Smootify JavaScript API give you full control over sync and storefront behavior, at the cost of development work.
Most implementations combine two or more of these, depending on how much of the storefront has to be custom and who does the building.
Build the store with an AI agent
Smootify 2.0 lets an AI agent do the build while a person keeps the decisions. Every file the agent reads is public: a Figma wireframe kit with every page a store needs, the markup contract that names each element and attribute, and five agent skills. The build skill works through the Figma MCP server and the Webflow MCP server, so connect both to your agent first.
To build a store with an agent:
- Install Smootify's skills in Claude Code, Cursor, or Codex, and add the Smootify MCP next to the Figma and Webflow MCP servers.
- Have the agent compose the pages from the wireframe kit or annotate your own Figma design, then review its annotations before anything is built.
- Ask the agent to build the Webflow pages and components from the annotated file. It writes the structure, wires each element to Shopify through the markup contract, and lists the bindings it could not set.
- Set those bindings by hand, connect your Shopify store, and sync the products into the CMS.
- Run the site audit skill, fix what it flags, then choose a plan and publish.
The Smootify MCP is read-only: it looks up elements and attributes, checks markup before it reaches Webflow, and audits published pages, but it never changes your site. It is in beta, like the skills, so review the build the way you would review a junior developer's work.
Install the Smootify apps
The no-code path runs through Smootify's Shopify app and its Webflow Marketplace app, which land in the same dashboard. You need Shopify Basic, Grow, Advanced, or Plus, because Shopify Starter cannot use the Headless channel Smootify relies on. On the Webflow side you need a site plan with the CMS, since Smootify loads through custom head code and writes products into CMS Collections.
The Premium site plan, with 20,000 CMS items, is the practical floor for most catalogs. You do not need a Webflow Ecommerce plan, because checkout never runs in Webflow.
To set up the integration:
- Install the Smootify app from the Shopify App Store and connect your store.
- Install the Smootify app from the Webflow Marketplace or the Apps panel in Webflow. Its 2.0 version is in Marketplace review, so the Marketplace installs the current version until it is released.
- Connect your Webflow site to a project in the Smootify dashboard. The webflow.io address works right away, and you add your custom domain to the project once you have one.
- Paste Smootify's one-line loader into Site settings > Custom code > Head code, then publish.
- Create the Products, Collections, and Vendors collections and import your catalog with Smootify Studio.
Those steps describe 2.0. A store already on 1.x loads Smootify with two lines of head code instead and keeps working on them until you switch. Smootify's migration guide swaps them for the 2.0 loader on your webflow.io address first, so the live domain stays on 1.x while you fix what the debugger reports.
If you start from Smootify's starter project, offered on 1.x and as a 2.0 beta, every page and component comes already wired, so you skip most of the page building.
Once the store is connected, the apps give you:
- Pre-made components: Product pages, carts, search, wishlists, and customer account pages drop in as Webflow components you can restyle with your own classes.
- CMS import and sync: Products, collections, and vendors land in CMS Collections, imported through Smootify Studio on every plan, or synced automatically on Smootify's server on the Server plan.
- Ready-made pages: The starter project ships product, cart, search, and account pages already wired, with a style guide of pre-built classes, so the first store does not start from a blank canvas.
- Live Shopify data: Prices, media, variants, metafields, and inventory come from the Storefront API at runtime instead of sitting in Webflow, so stock and pricing never go stale between syncs.
Before launch, create a storefront in Shopify's Headless channel and paste its public token in the Smootify project settings. Skip it and orders placed with the test token the Smootify app creates get no confirmation email; with the Headless token, orders show your storefront's name as their sales channel.
Add Smootify custom elements and attributes
Most Smootify components are standard Webflow Custom Elements carrying custom attributes, so you build product pages with the same tools as the rest of the site. Version 2.0 keeps the element and attribute names of 1.x, with a short list of exceptions such as the variation attribute and the classic customer account forms, so the steps below apply to both versions.
Custom Elements sit in the Add panel under Custom Code, and you set attributes in the element settings panel without writing code. For snippets that go past what attributes cover, use a Code Embed element. One constraint applies from the first click: binding CMS data to custom attributes only works on Collection pages or inside a Collection List, so settle the page structure before you start styling.
Displaying product data with the smootify-product element
The smootify-product custom element is the container for product data, and everything inside it pulls from the Shopify Storefront API at runtime.
To display a product:
- Add a Custom Element from the Add panel > Custom Code section and set its tag to
smootify-product. - Add a
data-idattribute bound to the Shopify ID field from the Webflow CMS. - Add attributes such as
product="title",product="description", orproduct="vendor"to child elements. - For prices, add a
smootify-priceelement with children carryingdata-propset topriceorcompareAtPrice.
Variant-level attributes such as variant="sku", variant="stock", and variant="barcode" follow the same pattern, documented in Smootify's elements and attributes reference.
Building the add to cart form
The Add to Cart element wraps a native Webflow form, so Shopify's errors, such as a quantity above the stock, show in the form's Error message and are announced to screen readers.
To build it:
- Place a Webflow form inside the Add to Cart Custom Element, within
smootify-product. - Add variant selectors with a
data-optionattribute set to1,2, or3, displayed as a select, dropdown, or swatches. - Add a
quantity-inputelement with nested minus and plus buttons carryingdata-action. - Prefix an extra input's name with an underscore to save it on the line item while hiding it at checkout.
Design all three option pickers even when a product uses only one, because one template page serves every product and a picker removes itself when the product lacks that option. Shopify variants never sync into the Webflow CMS, so nothing renders on the canvas and you have to test variant behavior on a published URL.
Setting up the cart page
The cart component is a Custom Element with the tag smootify-cart wrapping a Webflow form, where the form's Success State doubles as the empty-cart state and the form button is the checkout button.
To set up the cart:
- Add a Custom Element with the tag
smootify-cartand place a Webflow form inside it. - Style the form's Success State, since Smootify shows it whenever the cart is empty.
- Add a
cart-itemelement for line items; Smootify copies it once for each line in the cart. - Name the coupon input
Coupon(2.0 also reads the 1.x namecoupon) and the gift card inputgift-card.
Copying and pasting a form in Webflow renames its fields automatically, which silently breaks coupon inputs, so recheck names after every duplicate. Test the whole store, cart included, on your webflow.io address before you move to a custom domain: Smootify's debugger, opened with Alt+Shift+D, lists the markup it cannot use.
Build with the Webflow Data API and Smootify JavaScript API
Smootify's public API surface is a browser-side JavaScript API that wraps Shopify's Storefront GraphQL API, while server-side work runs through the Webflow Data API and Shopify webhooks.
This path is for developers adding storefront logic or sync pipelines the app does not cover:
- Smootify JavaScript API: The browser-side API handles cart actions, coupon codes, customer data, and raw Storefront GraphQL queries.
- Webflow CMS endpoints: Staged item endpoints write and then publish Collection Items, and the live item endpoints skip staging and go straight to the published site.
- Webflow webhooks: Site-level webhooks fire events such as
collection_item_createdandcollection_item_publishedto your own systems. - Shopify webhooks: Product webhook topics such as
products/createandproducts/updatetell your pipeline when the catalog changes.
Combine the browser API for storefront behavior with the server APIs for data pipelines.
Extending the storefront with the Smootify JavaScript API
A plain script usually runs before Smootify has loaded, when window.Smootify is not ready yet. In 2.0, queue calls with window.Smootify.push.
The 1.x way, a smootify:loaded listener registered in the head code, still works:
document.addEventListener('smootify:loaded', () => {
  Smootify.applyCouponCode('WELCOME10');
});
From there, four groups of methods cover most custom work:
- Cart writes:
Smootify.addToCart(lines, goToCheckout?)adds line items and re-renders the cart, andSmootify.clearCart()empties it. - Cart identity:
Smootify.getCartID()returns the current cart ID, which is what you attach to analytics or abandoned-cart tooling. - Discounts:
Smootify.applyCouponCode()applies a code without the shopper ever touching the coupon field. - Raw Shopify queries:
Smootify.query(query, variables)reaches the whole Storefront GraphQL API, andSmootify.queryCustomer(fields)reads fields for the logged-in customer.
Smootify also fires client-side events such as smootify:cart_updated and smootify:added_to_cart that you can hook for analytics or custom interface updates, and 2.0 adds Smootify.on to listen to them. The 1.x methods keep their names and arguments in 2.0.
Building a custom sync pipeline with webhooks
For pipelines the built-in sync does not cover, pair Shopify's product webhook topics with the Webflow Data API v2 at https://api.webflow.com. Smootify's Server plan already consumes Shopify's webhooks internally, so this only makes sense when the mapping needs code.
To implement a sync:
- Subscribe to Shopify's
products/create,products/update, andproducts/deletetopics. - On each event, write items with
POST /v2/collections/{collection_id}/items/insertor update them withPATCH /v2/collections/{collection_id}/items. - Push staged changes live with
POST /v2/collections/{collection_id}/items/publish, or bypass staging withPOST(create) orPATCH(update) on/v2/collections/{collection_id}/items/live. - Register your own listener with
POST /v2/sites/{site_id}/webhooksto catch CMS changes such ascollection_item_changed.
For standard product data the Server plan's automatic sync is far less work, so reach for a custom pipeline only when you genuinely need to transform data on the way in. If you have not written to Collections over the API before, start with the CMS API walkthrough.
What you can build with the Smootify Webflow integration
Integrating Smootify with Webflow lets you run a Shopify-powered store on a fully custom front end, with no Shopify theme and no Webflow Ecommerce plan. Four patterns come up most often:
- Product configurators with live pricing: Bind variant selectors and line-item-property inputs to your own layout so the price and stock a shopper sees update as they choose options.
- Multi-collection catalogs: Map each Shopify collection to a Webflow CMS Collection so adding a new range means adding products in Shopify rather than rebuilding pages in Webflow.
- Content-led storefronts: Publish editorial pages and landing pages in the CMS alongside product pages, then hand payment and fulfillment to Shopify at the checkout button.
- Pre-launch and limited drops: Ship the Webflow front end before the catalog is finished, then open orders through Shopify checkout the moment products go live.
If a project only needs payments rather than a full catalog, see how to set up Stripe Checkout on a Webflow site instead.
Once the store is live, connect the Webflow MCP server so you can manage CMS content, run content audits, and, with the Analyze add-on, read traffic for the storefront from your own agent.
Frequently asked questions
You need Shopify Basic, Grow, Advanced, or Plus, because Shopify Starter cannot use the Headless channel. On Webflow, you need a site plan with the CMS, and Premium, with 20,000 CMS items, is the practical floor. Smootify's own tiers are Free, Lite, and Server on its pricing page, billed on your Shopify invoice. No Webflow Ecommerce plan is required, because checkout stays in Shopify.
No. Smootify imports products, collections, and vendors into the Webflow CMS, but variants, prices, media, metafields, and inventory are fetched from the Shopify Storefront API at runtime, as its sync documentation sets out. Variants are rendered by JavaScript, so they stay invisible while you design and appear only on the published site. Plan variant QA around published or staging URLs.
No. Everything up to the checkout button is designable in Webflow, including the cart itself, but the checkout button hands the buyer off to Shopify's hosted checkout. Shopify owns payments and PCI scope, so no payment data reaches your Webflow site. Checkout styling is configured on the Shopify side.
The store is most likely missing its Headless storefront token. Orders placed while the project still uses the test token the Smootify app created get no confirmation email. Create a storefront in Shopify's Headless channel, then paste its public token in the Smootify project settings.
Smootify puts Shopify behind a Webflow front end, so you get Shopify's payments, subscriptions, and multi-channel selling, and you skip a Webflow Ecommerce plan. The costs are real: variants do not render on the canvas, every product, collection, and vendor counts as a CMS item on your Webflow plan, and you pay for another app on your Shopify invoice. Native Webflow Ecommerce keeps orders and checkout in one place instead.
Description
Run a Shopify store behind a Webflow front end with Smootify's Shopify and Webflow apps. Products, carts, and customer accounts render in Webflow while Shopify owns checkout, payments, and inventory, and Smootify 2.0, in public beta, lets an AI agent write the build.
This integration page is provided for informational and convenience purposes only.

Teachable
Connect Teachable, an online course platform, with Webflow to sell courses from a custom-designed marketing site and automate student enrollment.

BigCommerce
Connect BigCommerce, an Open SaaS e-commerce platform for B2B and B2C brands, with Webflow to display live products and route orders using Buy Buttons or the API.

WooCommerce
Connect WooCommerce, an open-source e-commerce plugin for WordPress, with Webflow to run a headless storefront with full commerce infrastructure including 140+ payment gateways, subscriptions, and inventory management.

Udesly bigcommerce to webflow-e-commerce
Webflow's integrations directory lists Udesly's BigCommerce to Webflow adapter for migrating your BigCommerce catalog into the Webflow CMS and running your storefront on Webflow-designed pages.

Shopify
Pair Webflow's custom site design with Shopify's commerce backend so you can sell products without rebuilding inventory, checkout, and order management from scratch.

SimpleFunnel
Collect one time, recurring payments and sell your product, accept payments directly into Stripe.

Simple Subscriptions for Webflow Shops
Connect Simple Subscriptions with Webflow to sell recurring products through your store's native cart and checkout.

Shippo
Connect Webflow with Shippo to streamline carrier rate comparison, shipping label creation, and package tracking for ecommerce orders.

Shoprocket
Connect Shoprocket with Webflow to add embeddable product widgets, a shopping cart, and checkout to any Webflow site without a Webflow Ecommerce plan.
Related integrations
Get started for free
Try Webflow for as long as you like with our free Starter plan. Purchase a paid Site plan to publish, host, and unlock additional features.
