






PayPal Payments
Connect PayPal Payments, a global payment platform, with Webflow to accept PayPal, Venmo, Pay Later, and card payments through a marketplace app, native ecommerce settings, or embedded checkout buttons.

Webflow handles layout, content, and hosting, but accepting payments from buyers who prefer PayPal, Venmo, or Pay Later requires a dedicated integration. Webflow Ecommerce supports only two native gateways, and its built-in PayPal option doesn't cover subscription billing or buy buttons on non-ecommerce pages. Connecting PayPal adds wallet-based checkout, card processing, Pay Later, and Venmo (US) to any Webflow site through a first-party marketplace app, native ecommerce settings, embeddable button code, Zapier, or REST APIs.
This integration serves ecommerce stores, freelancers, nonprofits collecting donations, SaaS founders, and agencies building client sites — with the right method depending on whether the site runs Webflow Ecommerce and how much control the implementation requires.
How to integrate PayPal Payments with Webflow
What is PayPal Payments? PayPal is a payment platform that processes transactions across 200+ global markets in multiple currencies. It offers checkout buttons, payment links, subscription billing, invoicing, and REST APIs for building custom payment flows. PayPal supports payments via its wallet, Venmo, Pay Later installments, Apple Pay, and major credit and debit cards.
Teams connect PayPal with Webflow when they need to accept payments beyond direct card entry — particularly for buyers who prefer paying through a trusted wallet rather than entering card details on an unfamiliar site. The integration is especially common for stores expanding into international markets, service providers collecting project deposits, and nonprofits running donation campaigns.
The PayPal Payments-Webflow integration supports 4 approaches:
- The PayPal Payment Links app handles payment link creation and embedding without writing code.
- Native ecommerce settings and Code Embed elements let you add PayPal checkout to ecommerce stores or embed PayPal buttons on any page.
- Zapier supports combinations such as PayPal Payment Sale Webhooks → Webflow Fulfill Order and PayPal Payment Capture Webhooks → Webflow Create Live Item.
- The Webflow Data API v2 and PayPal APIs give you full control over order creation, subscription management, and webhook-driven CMS sync, but require server-side development.
Most implementations combine two or more of these methods depending on the complexity of the setup.
Install the PayPal Payment Links app
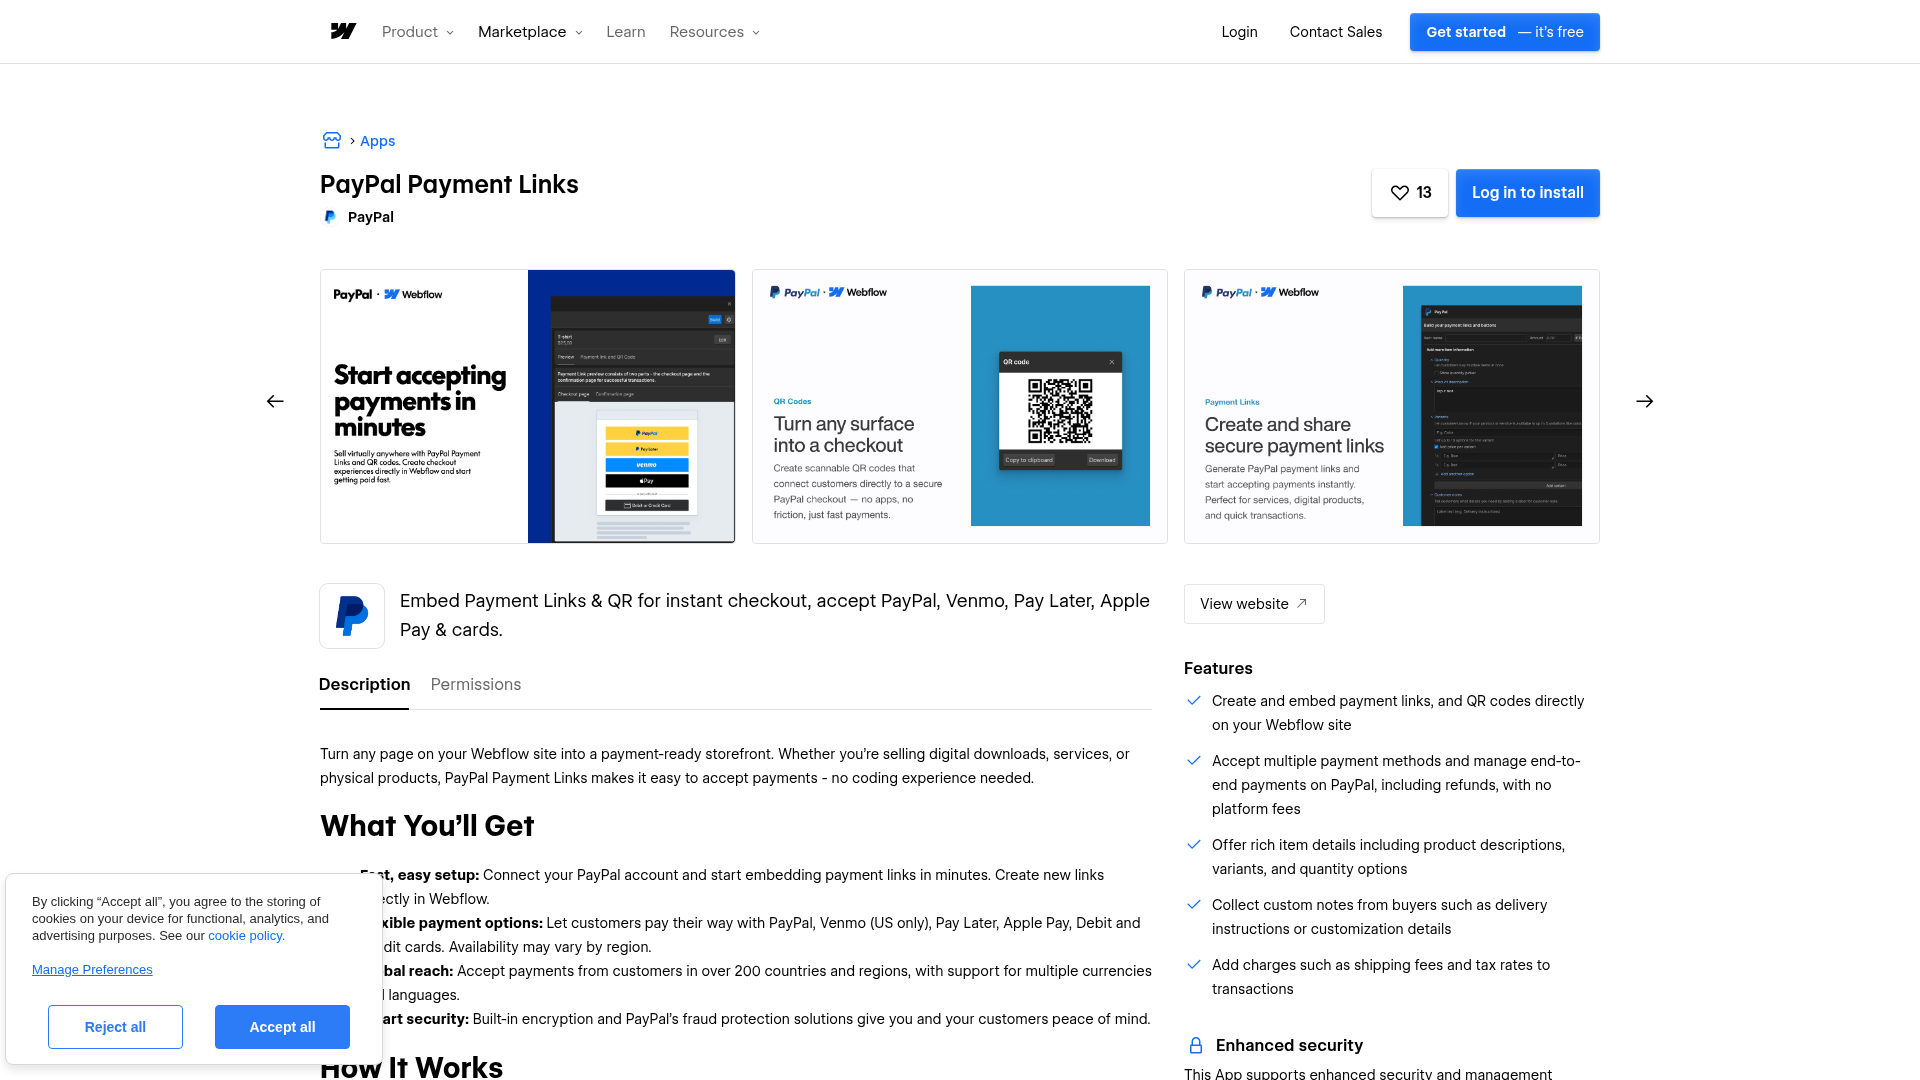
The PayPal Payment Links app is a first-party app built by PayPal, available free on the Webflow Apps Marketplace. It lets you create payment links and embed checkout experiences directly in Webflow. The app accepts PayPal, Venmo (US only), Pay Later, Apple Pay, and debit and credit cards from buyers in 200+ countries. You need a PayPal Business account to get started, and the app works on any Webflow paid site plan.
To set up the integration:
- Go to the PayPal Payment Links app listing and click install.
- Connect your PayPal Business account when prompted.
- Create a new payment link directly in Webflow or select an existing one from your PayPal account.
- Embed the payment link or button on any page in your Webflow site.
- Publish the site.
The app supports these capabilities:
- Embed payment links and QR codes for single-product checkout on any page
- Accept multiple payment methods — PayPal, Venmo, Pay Later, Apple Pay, and cards — through one button
- Create and manage payment links without leaving Webflow
- Use PayPal's built-in fraud protection and encryption
Transactions are tracked in your PayPal dashboard, and refunds are handled through the PayPal Activity page. The app does not create Webflow orders. Order management stays in PayPal. For sites that need Webflow-native order tracking, the native ecommerce connection is the better fit.
Add PayPal checkout with native features and Code Embed elements
Webflow offers several built-in paths for adding PayPal to a site without the marketplace app. These range from a native payment provider toggle in ecommerce settings to pasting PayPal-generated HTML into Code Embed elements. The right option depends on whether the site uses Webflow Ecommerce and whether you need checkout on product pages, service pages, or donation pages.
Connect PayPal in Webflow Ecommerce settings
Webflow Ecommerce natively supports PayPal as a payment provider alongside Stripe. This requires a Webflow Ecommerce plan and a verified PayPal Business account. PayPal appears as a checkout option on cart and checkout pages automatically — no embed code needed.
To connect PayPal as a native payment provider:
- Open your site's Settings panel in Webflow.
- Navigate to Ecommerce > Payment.
- Click Connect PayPal.
- Sign into your PayPal Business account and authorize the connection.
- Add a Webflow Ecommerce site plan (if not already active) and enable checkout.
The native integration supports Visa, Mastercard, American Express, Discover, Diners Club, JCB, UnionPay, and PayPal Pay Later. Button color, shape, and labels are customizable in the ecommerce settings. Stripe and PayPal can run simultaneously — buyers see both options at checkout.
Two important restrictions apply. PayPal buttons only appear on cart and checkout pages, not on product pages. And a single PayPal Business account can only connect to one Webflow Ecommerce site at a time. If the account was previously connected to another Webflow site, you must revoke permissions in PayPal and disconnect it from the old site first. The default currency in Webflow's ecommerce settings must also match the PayPal account's default currency — a mismatch will block the connection.
Embed PayPal buttons with Code Embed elements
For sites that do not use Webflow Ecommerce — or for pages outside the checkout flow — PayPal-generated button code can be pasted directly into a Code Embed element. This method works for Buy Now buttons, Donate buttons, Subscribe buttons, and Shopping Cart buttons.
To embed a PayPal Buy button:
- Log into your PayPal Business account and go to Accept Payments > Payment Links.
- Create a new button by entering the product name, price, and currency, then select Build It.
- Copy the generated HTML button code from the details page.
- In Webflow, open the Elements panel and drag a Code Embed element onto the page.
- Paste the PayPal button code into the code editor and click Save & Close.
- Publish the site.
This copy-paste flow gives you a simple way to place checkout on pages that sit outside Webflow Ecommerce.
The same embed process applies to Donate buttons (generated at paypal.com/donate/buttons/manage) and Subscribe buttons (created under Payment Links and Buttons > Subscription Button in the PayPal dashboard). Shopping Cart buttons use two separate embeds — an Add to Cart button next to each product and a View Cart button in a persistent location like the site header.
Any updates made to buttons in the PayPal dashboard sync automatically to the embedded code on your site — re-embedding is not required. The Code Embed element requires a Webflow paid site plan and supports up to 50,000 characters per embed.
Link to PayPal.me from any element
The simplest approach requires no embed code at all. Create a PayPal.me link and add it to any button or text element in Webflow as an external URL. Pre-fill a specific amount by appending it to the URL — for example, https://paypal.me/yourbusiness/99.99. This method works with personal PayPal accounts and does not require a Business account. The tradeoff is that buyers leave your site and complete payment on PayPal's hosted page.
Connect PayPal and Webflow with Zapier
Zapier provides a direct PayPal + Webflow integration page listing PayPal triggers, PayPal actions, Webflow triggers, and Webflow actions. This section focuses on combinations where Webflow is named directly in the trigger or action.
Verified trigger-action combinations include:
- PayPal Payment Sale Webhooks → Webflow Fulfill Order (auto-fulfill on payment)
- PayPal Payment Capture Webhooks → Webflow Create Live Item (log payments in Webflow CMS)
- Webflow New Form Submission → PayPal Create Invoice and Send Invoice
- PayPal Canceled Recurring Payment Webhooks → Webflow Update Live Item (flag canceled subscriptions)
- PayPal Payment Refund Webhooks → Webflow Create Item (log refunds as CMS records)
To set up a Zapier automation:
- Create a Zap at zapier.com/apps/paypal/integrations/webflow.
- Choose a PayPal trigger (such as Payment Capture Webhooks) and connect your PayPal Business account.
- Choose a Webflow action (such as Create Live Item) and connect your Webflow site.
- Map PayPal fields — order ID, amount, currency, payer email — to Webflow CMS fields.
- Test and activate the Zap.
For teams that need these listed trigger-action pairs without building a backend, Zapier is a practical option.
Build with the Webflow and PayPal APIs
For full control over checkout flows, subscription management, and real-time data sync, you can build a custom integration using both platforms' REST APIs. This path requires server-side development — Webflow's Code Embed element runs only client-side HTML, CSS, and JavaScript and cannot protect API secret keys. A serverless function on Netlify, Vercel, or a similar platform handles the server-side calls.
The relevant APIs include:
- PayPal Orders API v2 handles order creation, authorization, and payment capture
- PayPal Subscriptions API v1 handles recurring billing plan and subscription management
- PayPal Webhooks API v1 registers webhook listeners and verifies event signatures
- Webflow Data API v2 handles CMS collection items, ecommerce orders, and inventory updates
- Webflow webhooks trigger events on form submissions, new orders, and order updates
PayPal uses OAuth 2.0 authentication. A Client ID alone works for rendering the PayPal JavaScript SDK on the frontend. A Client Secret is required for all server-side API calls. Webflow uses Bearer token authentication for its Data API.
Create a custom checkout flow
The standard API-based checkout uses PayPal's JavaScript SDK on the Webflow frontend and a serverless function for server-side order creation and capture.
To implement a custom checkout:
- Add the PayPal JavaScript SDK to your site by placing the script tag in custom code in head and body tags (site-wide, before
</body>):
<script src="https://www.paypal.com/sdk/js?client-id=YOUR_CLIENT_ID¤cy=USD"></script>
- Add a Code Embed element to your page with a container div and the button render script:
<div id="paypal-button-container"></div>
<script>
  paypal.Buttons({
    createOrder: function(data, actions) {
      return fetch('/api/orders', { method: 'POST' })
        .then(res => res.json())
        .then(order => order.id);
    },
    onApprove: function(data, actions) {
      return fetch('/api/orders/' + data.orderID + '/capture', { method: 'POST' })
        .then(res => res.json())
        .then(details => {
          alert('Transaction completed by ' + details.payer.name.given_name);
        });
    }
  }).render('#paypal-button-container');
</script>
- Deploy a serverless function at
/api/ordersthat callsPOST /v2/checkout/orderswith your PayPal credentials and returns the order ID. A separate function at/api/orders/:id/capturecallsPOST /v2/checkout/orders/{id}/captureto complete the payment.
The createOrder function initiates the checkout, and onApprove fires after the buyer authorizes payment. Orders created with intent: CAPTURE charge immediately. Orders with intent: AUTHORIZE reserve funds for up to 29 days before capture.
Sync PayPal events to Webflow CMS with webhooks
PayPal webhooks send HTTPS POST notifications to your listener when payment events occur. You can use these to create or update CMS items in Webflow automatically — logging orders, tracking subscription status, or flagging refunds.
To set up webhook-driven CMS sync:
- Deploy an HTTPS listener endpoint on your backend (for example, a Vercel serverless function at
/webhook). - Register the webhook with PayPal by calling
POST /v1/notifications/webhookswith your listener URL and the event types you want to receive. - On each incoming event, verify the webhook signature using
POST /v1/notifications/verify-webhook-signature— this confirms the event is from PayPal. - Route events by
event_typeto the appropriate Webflow CMS action:
PAYMENT.CAPTURE.COMPLETED→POST /collections/{collection_id}/items/liveto create an order recordPAYMENT.CAPTURE.REFUNDED→PATCH /collections/{collection_id}/items/{item_id}/liveto update the refund statusBILLING.SUBSCRIPTION.ACTIVATED→ update the subscriber CMS item status to activeBILLING.SUBSCRIPTION.CANCELLED→ update the subscriber CMS item status to canceled
This pattern keeps PayPal as the payment source while Webflow CMS stays aligned with payment and subscription status changes.
PayPal retries failed webhook deliveries up to 25 times over 3 days. Your listener must return an HTTP 2xx response to acknowledge receipt. The Webflow Data API requires CMS:write scope for creating and updating live items.
What can you build with the PayPal Payments Webflow integration?
Integrating PayPal Payments with Webflow lets you accept global payments across any page type without building a custom payment backend from scratch.
- Product store with multi-payment checkout: Build a Webflow Ecommerce store where buyers choose between PayPal, card, and Pay Later at checkout. Connect both Stripe and PayPal as native providers so customers see their preferred method. PayPal's availability in 119 countries through the native integration expands your store's buyer reach beyond card-only checkout.
- Service page with embedded payment buttons: Add PayPal Buy buttons or payment links to freelancer portfolio pages, consulting service pages, or project deposit forms — without an ecommerce plan. Generate the button in PayPal, paste it into a Code Embed element, and accept payments from a services page that doubles as a checkout.
- Nonprofit donation page with recurring giving: Embed a PayPal Donate button or Subscribe button on a Webflow-built campaign page. Donors can give one-time or recurring amounts using PayPal, Venmo, or a card. Pair this with Zapier to log each donation as a CMS item for public donor recognition or internal tracking.
- SaaS landing page with subscription billing: Use the PayPal Subscriptions API and JavaScript SDK to present plan-based checkout on a Webflow marketing page. A serverless function handles plan creation and subscription enrollment, while webhooks update a Collection List of active subscribers in the CMS as payments succeed, fail, or cancel.
If you need more control over order orchestration, inventory sync, or multi-step checkout flows, the API integration path covers those cases with full flexibility.
Frequently asked questions
No. The Webflow Ecommerce plan is only required for the native PayPal checkout integration within Webflow's built-in cart and checkout pages. For all other methods — the PayPal Payment Links app, embedded PayPal buttons via Code Embed elements, and PayPal.me links — any Webflow paid site plan works. The Code Embed element is not available on the free Starter plan, so a paid plan is the minimum requirement for embed-based methods.
The native Webflow Ecommerce PayPal integration does not support subscription payments. Two workarounds exist. First, generate a PayPal Subscribe button from your PayPal Business dashboard and embed it on any Webflow page using a Code Embed element. Second, use the PayPal Subscriptions API with the JavaScript SDK and a serverless backend for full control over plan creation, billing cycles, and subscriber management.
The most common cause is a currency mismatch. The default currency in Webflow's ecommerce settings must match your PayPal account's default currency. Other requirements include using a Business (not personal) PayPal account, verifying the PayPal account email, and connecting the PayPal account to only one Webflow Ecommerce site at a time. If a previous connection attempt failed, log into PayPal, revoke Webflow's permissions under connected apps, and reconnect from scratch. The full troubleshooting checklist is in Webflow's payment provider documentation.
Through the native ecommerce integration, PayPal adds Visa, Mastercard, American Express, Discover, Diners Club, JCB, UnionPay, and PayPal Pay Later to the checkout page. Through the PayPal Payment Links app or embedded buttons, buyers can also pay with Venmo (US only), Apple Pay, and debit or credit cards. Availability varies by region. Apple Pay and Google Pay are not available through Webflow's native PayPal ecommerce integration. Those wallet methods require Stripe. PayPal's full country and currency availability is listed on the PayPal worldwide page.
For embedded PayPal buttons using the JavaScript SDK, pass a sandbox
client-idin the SDK script tag to simulate transactions without real charges. PayPal's developer dashboard provides sandbox credentials and test accounts for this purpose. When switching to production, use credentials generated in PayPal's Live mode, not Sandbox mode.
Description
PayPal Payments adds wallet-based checkout, Pay Later, and card processing to Webflow through a first-party marketplace app or native ecommerce settings.
This integration page is provided for informational and convenience purposes only.

Flowstar: Payment Button
Connect Flowstar Payment Button with Webflow to add PayPal-based checkout, donation, and subscription buttons to any page without a full e-commerce store setup.

Form Payments
Connect Form Payments, a Stripe payments app, with Webflow to collect card and wallet payments inside the forms you already build.

Quickbooks
Send Webflow form submissions and Ecommerce orders to QuickBooks Online through Zapier, Make, or n8n, add QuickBooks Buy buttons, or build on both APIs.

Revolut for Business
Connect Revolut for Business with Webflow to accept online payments on your site.

Mollie
Accept iDEAL, Bancontact, SEPA Direct Debit, and card payments on a Webflow site with Mollie Payment Links, Zapier automations, or the Mollie API.
Metamask
Connect MetaMask with Webflow to add wallet authentication, NFT galleries, and token-gated content.
GoCardless
Connect GoCardless with Webflow to collect recurring Direct Debit payments without backend development.

Razorpay
Connect Razorpay with Webflow to accept Indian payment methods like UPI, netbanking, and cards on your site.

Givebutter
Connect Givebutter, an all-in-one fundraising and donor management platform, with Webflow to embed donation forms, goal bars, and signup widgets using Code Embed.
Related integrations
Get started for free
Try Webflow for as long as you like with our free Starter plan. Purchase a paid Site plan to publish, host, and unlock additional features.
