

Modulo
Connect Modulo with Webflow to add pre-built, customizable UI components directly to your canvas and bind them to CMS data.
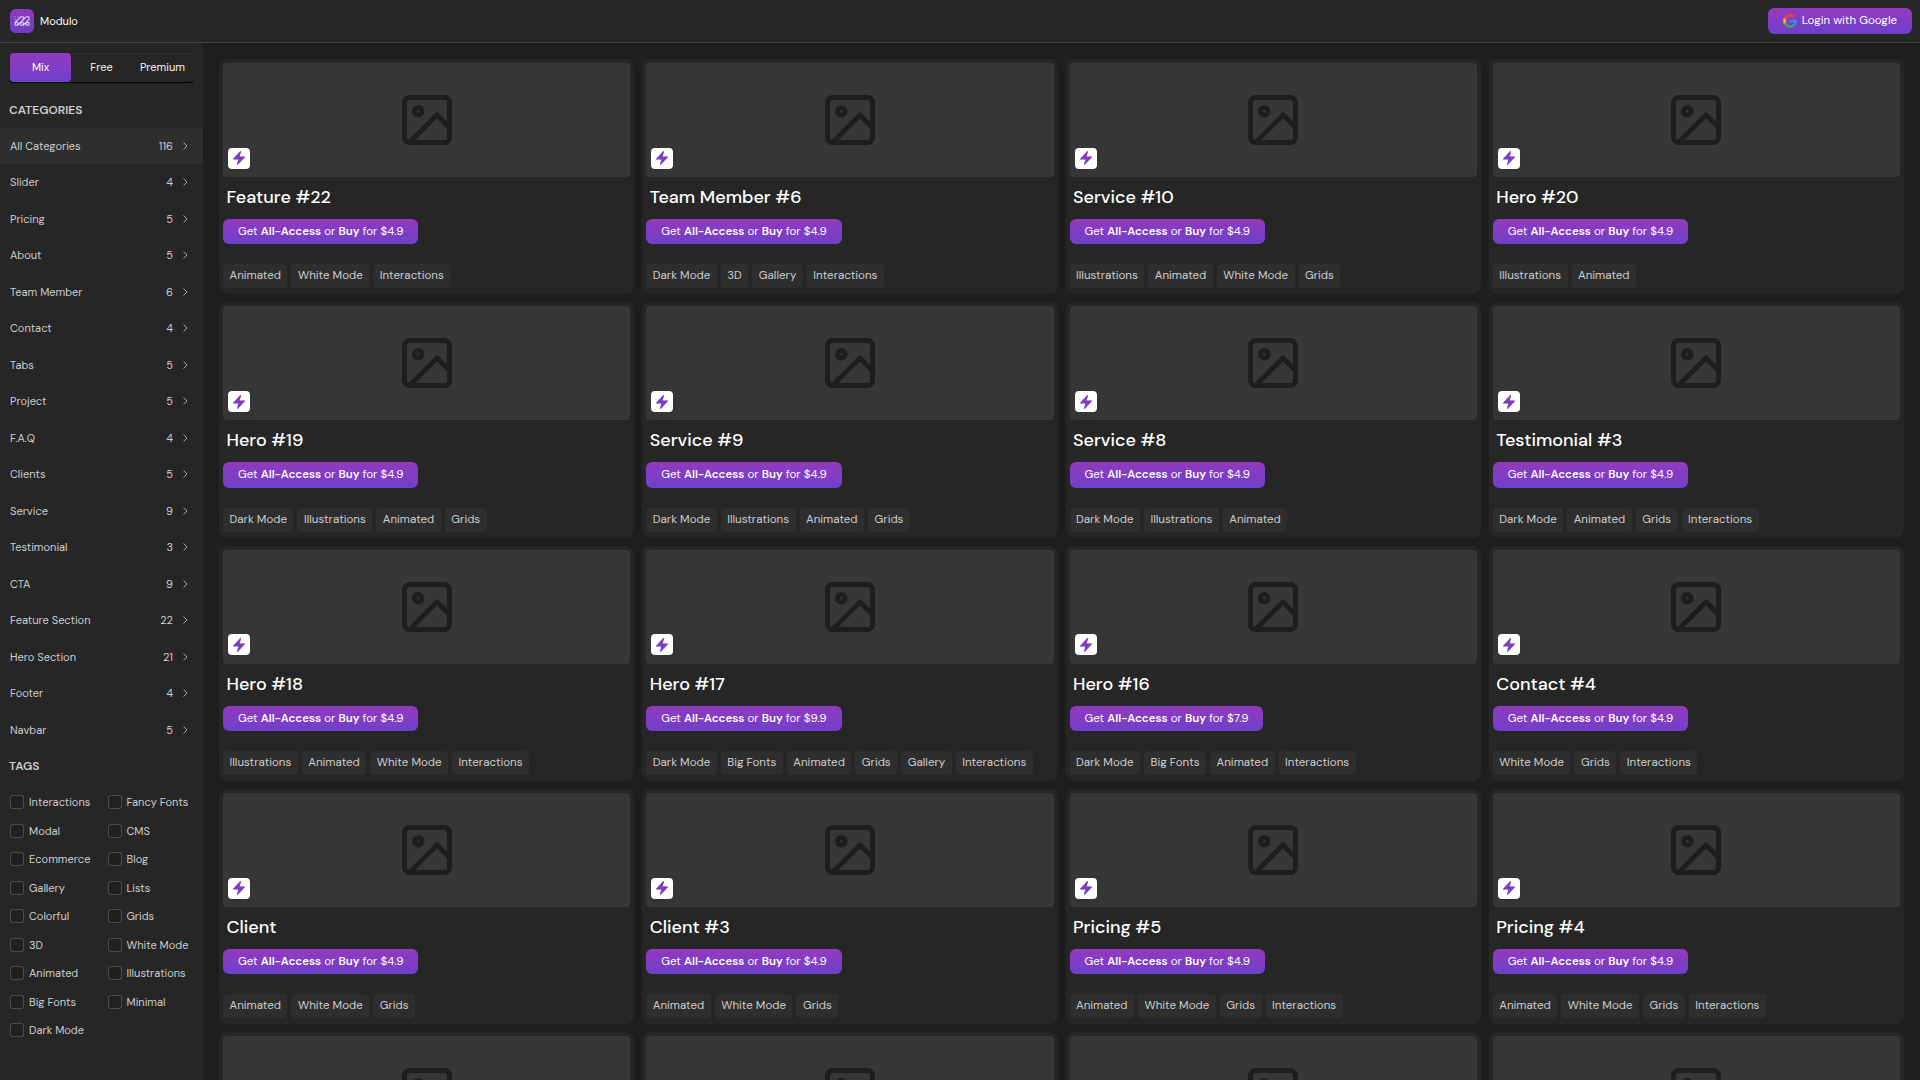
Modulo drops 116 ready-to-use UI components across 16 categories straight onto your Webflow canvas, like hero layouts, feature grids, pricing tables, testimonials, navbars, and footers you'd otherwise build from scratch. Each inserted component becomes a standard Webflow element you can restyle with native design tools and bind to Webflow CMS collection fields.
This integration fits designers and agencies shipping client or campaign pages on tight deadlines, SaaS marketers who want CMS-bound feature pages content editors can update independently, and developers pairing Modulo layouts with API-managed data for CMS-driven directories and content hubs.
How to integrate Modulo with Webflow
What is Modulo? Modulo is a Webflow UI component marketplace with pre-built, production-ready sections you can use inside Webflow. It has 16 categories including hero sections, feature grids, CTAs, pricing tables, navbars, footers, testimonials, and FAQ blocks. Components carry filter tags like CMS, Ecommerce, Blog, Interactions, and Dark Mode so you can find static marketing layouts or interactive UI patterns.
You'll typically reach for Modulo when you need to ship pages quickly without rebuilding common layout patterns from scratch. If you're a freelancer starting a new client project, you can drop in a hero, feature grid, and CTA section in minutes, then spend more time on brand-specific customization and CMS architecture rather than structural layout work.
You can use Modulo with Webflow in 3 ways:
- The Modulo app lets you browse and insert components directly in Webflow without writing code.
- Webflow CMS binding lets you connect inserted Modulo components to CMS content from collections.
- The Webflow Data API lets you control CMS content that Modulo components display programmatically, though you'll need server-side development to use it.
Most implementations start with the Modulo app for component insertion, then add CMS binding or API integration depending on whether the site needs CMS content.
Install the Modulo app
The Modulo app lives on the Webflow Apps Marketplace and is the main way to browse, preview, and insert components. It carries the Approved by Webflow label on the Marketplace, meaning it has been reviewed to ensure high quality site development, though that review isn't an endorsement or certification. Modulo offers free components and paid options. You can purchase individual components or subscribe to PRO for full library access.
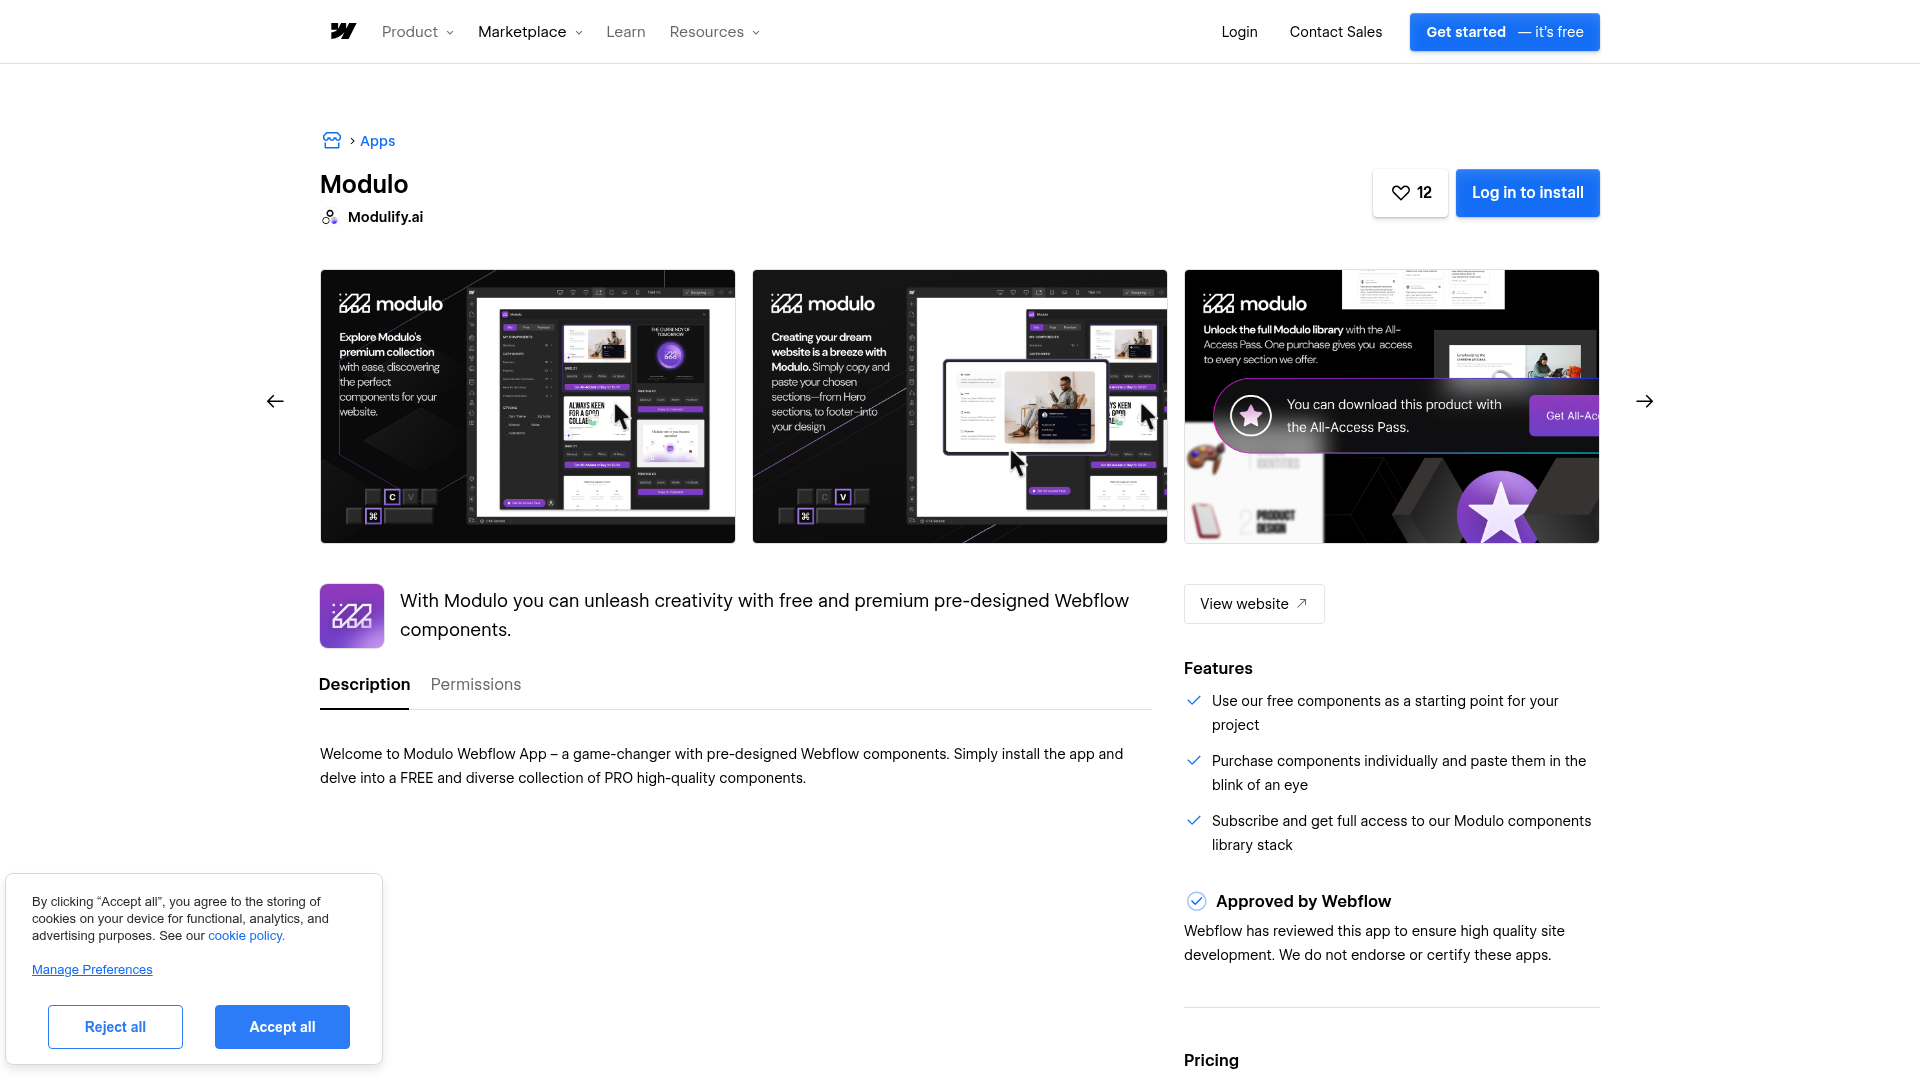
The app lists two capabilities: accessing site data and integrating into your design workflow. After installation, you can browse all 16 component categories directly inside Webflow and add sections to your canvas with a single click.
To install from the Webflow Apps Marketplace:
- Go to webflow.com/apps/detail/modulo and click Log in to install (if not signed in) or Add to site (if signed in).
- Select your workspace and site from the prompt.
- Authorize the requested permissions.
- Open your site in Webflow. The Modulo app appears in the Apps panel immediately.
To install from inside Webflow:
- Open your site in Webflow.
- Press E on your keyboard, or click the Apps panel icon in the left toolbar.
- Search for Modulo in the app search field.
- Click Install and authorize the permissions.
After installation, you can access the Modulo library through the Apps panel. From there you can:
- Browse 116 components across 16 categories (hero, feature, CTA, pricing, navbar, footer, and more)
- Filter by style tags like Interactions, Animated, Dark Mode, CMS, and Ecommerce
- Preview any component before inserting it
- Add components to your canvas and customize them with native Webflow design tools
Once you place a component on your canvas, it becomes a standard Webflow element with no ongoing dependency on Modulo. You can edit every property, rearrange child elements, adjust responsive breakpoints, and add interactions exactly as you would with any element you built yourself. You can also copy components between pages and projects using standard keyboard shortcuts (Cmd+C / Ctrl+C to copy, Cmd+V / Ctrl+V to paste).
Connect Modulo components to Webflow CMS
Inserting a Modulo component gives you the layout and visual design. Connecting that component to Webflow CMS turns it into a CMS-driven section that content editors can update without opening the design tools. You separate the visual structure — built once with Modulo — from the content your team manages in the CMS Editor.
You need Webflow CMS access to use this method. Starter includes limited CMS capacity, and larger CMS-driven implementations may need a plan with higher CMS limits. Any Modulo component with text, image, or link elements can bind to CMS collection fields using native data binding.
Bind components to CMS collection fields
After inserting a Modulo component, you can connect its elements to a CMS collection so content pulls from your database. A feature grid component, for example, can display product capabilities from a "Features" collection, with each card populated by CMS data instead of static text.
To bind a Modulo component to CMS data:
- Create a CMS collection with the fields your component needs (text, images, links, rich text).
- Add a Collection List to your page and connect it to that collection.
- Place the Modulo component's layout structure inside the Collection List item.
- Select individual text, image, or link elements within the component and bind each one to the corresponding CMS field using the settings panel.
- Publish your site to see the content render on the live page.
Content editors can then add, reorder, or update entries in the CMS Editor without touching the design. The component's layout stays consistent while the content changes.
Add custom code alongside Modulo components
Some Modulo components use animations, interactions, or interactive UI patterns that may need custom JavaScript or CSS on the published site. You can add supporting code at the page level or site level using the built-in code tools.
To add code at the site level, go to Site Settings > Custom Code and paste your script into the Head Code or Footer Code section. For syntax and constraints, see the custom code in head and body tags documentation. Each section supports up to 50,000 characters.
To add inline code on a specific page, drag a Code Embed element onto the canvas next to or inside your Modulo component. Paste your HTML, CSS, or JavaScript into the editor and click Save and close. Code Embed elements support up to 50,000 characters and render <iframe> and <style> tags in the design view, but <script> tags only execute on the published site.
You can also bind CMS field values into Code Embed elements using the purple-dot connector. Place your cursor inside the code editor, click the purple dot that appears, and select the CMS field to reference. This is useful when you need to generate per-item structured data or script parameters. See the dynamic data in custom code embeds documentation.
To publish custom code, you need a paid site plan. This route is most useful when a specific Modulo component needs extra behavior on the live site.
Build with the Webflow Data API
If you're populating Modulo CMS-bound components programmatically, the Webflow Data API gives you full read and write access to CMS collections, items, forms, and site publishing. Use this path when content comes from an external system like a PIM, spreadsheet, or headless CMS and needs to flow into the Webflow CMS collections your Modulo components display.
Modulo itself has no API or webhooks — it's a design-time tool only. All programmatic integration runs through the Webflow API infrastructure:
- The Webflow Data API v2 handles CMS collections, items, pages, and forms
- Webflow webhooks trigger real-time events for form submissions, CMS item changes, and site publishes
You'll need server-side development for this approach. All endpoints use Authorization: Bearer <token> authentication with Site tokens, OAuth tokens, or Workspace tokens depending on your setup.
Sync external data to CMS-bound components
If you've built a feature grid, team directory, or blog listing using Modulo components bound to a CMS collection, you can push content into that collection from an external source using the CMS Items endpoints.
To sync data programmatically:
- Retrieve your collection schema with
GET /v2/collections/{collection_id}to confirm field names and types. - Create new items with
POST /v2/collections/{collection_id}/items, or update existing items in bulk (up to 100 per request) withPATCH /v2/collections/{collection_id}/items. - Publish staged items with
POST /v2/collections/{collection_id}/items/publishto make them visible on the live site.
A bulk update request looks like this:
curl -X PATCH "https://api.webflow.com/v2/collections/{collection_id}/items" \
  -H "Authorization: Bearer <token>" \
  -H "Content-Type: application/json" \
  -d '{
    "items": [
      {
        "id": "66f6ed9576ddacf3149d5ea6",
        "fieldData": {
          "name": "Feature Name",
          "slug": "feature-name",
          "featured": false
        }
      }
    ]
  }'
For details on item creation and field mapping, see the create items and update items documentation.
React to CMS and form events with webhooks
Webhooks let you trigger external workflows when something changes on your site. If a Modulo contact form component collects submissions, or if a content editor updates a CMS item that a Modulo component displays, webhooks send that event data to any endpoint you specify.
To register a webhook:
- Send a
POSTrequest to/v2/sites/{site_id}/webhookswith thetriggerTypeand destination URL. - A JSON payload is delivered to your endpoint each time the event fires.
- Validate incoming payloads using the
x-webflow-signatureHMAC header.
Relevant webhook events for Modulo-powered sites include:
form_submissionfor contact forms, lead capture, and newsletter signupscollection_item_createdandcollection_item_changedfor CMS content updatescollection_item_publishedandcollection_item_unpublishedfor content lifecycle changes
These events cover common automation triggers for CMS-bound pages and forms built with Modulo components.
Failed webhook deliveries retry automatically. After repeated failures, the webhook deactivates and you'll need to reactivate it manually. See the webhooks documentation for retry behavior and payload schemas.
What can you build with the Modulo Webflow integration?
Integrating Modulo with Webflow lets you assemble production-ready pages from pre-built components and connect them to CMS content without rebuilding common layout patterns from scratch.
- Agency landing page system: Build a reusable library of campaign page templates using Modulo hero, CTA, and feature components. Bind text and image elements to CMS collections so each client gets a unique page through content swaps in the CMS Editor rather than layout redesign. If you're running campaigns across multiple SaaS clients, you can produce new landing pages by swapping CMS content rather than rebuilding layouts.
- SaaS feature page with CMS-driven sections: Insert Modulo feature grid components and connect them to a "Features" CMS collection. Product marketers add, reorder, or update feature descriptions directly in the CMS Editor without opening the design tools. The page stays current as the product evolves.
- Blog grid or content hub: Use Modulo card and grid components bound to a blog post collection to create a content listing page. Each card pulls its title, thumbnail, excerpt, and link from the CMS automatically. New posts appear on the page as soon as you publish them in the CMS.
- Team directory or service listing: Combine Modulo team member or service components with a CMS collection of people, locations, or service offerings. Each card links to an auto-generated CMS detail page. Scaling from 10 entries to 100 takes zero layout changes.
For external CMS synchronization, the API integration path covers those cases.
Frequently asked questions
The free Starter plan has restrictions that limit Modulo component functionality. Starter includes limited CMS capacity, but it does not support custom code, which can affect animated and interactive Modulo components after publish. It also restricts form submissions and static pages. For many Modulo workflows, a paid site plan is more practical. See the Webflow pricing page for current plan details.
No. Modulo is a design-time component library with no API endpoints, webhooks, or backend infrastructure. Once a component is inserted into your site, it becomes a standard Webflow element. All programmatic integration, including CMS content management and form submission handling, runs through the Webflow Data API v2.
Yes. After inserting a Modulo component, select any text, image, or link element inside it and bind it to a CMS collection field using the settings panel. This turns static layout components into CMS-driven sections. You need Webflow CMS access for this workflow. For setup details, see the dynamic data in custom code embeds documentation.
No. Components become standard Webflow elements after insertion. There is no ongoing connection to Modulo's servers, no external scripts loaded, and no runtime dependency. You can edit, move, or delete inserted components freely using native Webflow tools.
You need Webflow CMS access. Starter includes limited CMS capacity, while larger CMS-driven builds may require a plan with higher CMS limits. Check the Webflow pricing page for the current plan tiers, CMS item limits, and pricing.
That plan requirement is the main gating factor for turning Modulo layouts into CMS-driven sections rather than static page elements.
Description
Add production-ready UI sections to any Webflow site through the Modulo app, then bind components to CMS collections for dynamic content.
This integration page is provided for informational and convenience purposes only.
YouTube
Connect YouTube, a video hosting platform, with Webflow to embed videos, display channel feeds, and sync video metadata to CMS collections.
Hugeicons
Connect Hugeicons, an icon library with 51,000+ icons across 10 styles, with Webflow to add scalable iconography to pages, CMS templates, and design systems through an app, CDN font, or inline SVG.
Vectary 3D & AR
Connect Vectary's browser-based 3D and AR platform with Webflow to create interactive product visualizations, AR experiences, and immersive web content without complex coding.
AI Image Enhancer
Connect AI Image Enhancer by OLAI to your Webflow site to upgrade image quality and generate custom visuals without leaving your workspace.
Vimeo
Connect Vimeo's professional video hosting platform with Webflow to create engaging websites with high-quality video content, custom players, and seamless CMS integration. Display portfolio reels, educational content, or background videos while maintaining complete control over playback and design.
Videezy
Connect Videezy, a stock video platform, with Webflow to add HD and 4K video backgrounds, embed externally hosted footage, and build CMS-driven video libraries.
Unsplash
Connect Unsplash with Webflow to search, insert, and manage free stock photography without leaving your design environment.
SVGator
Connect SVGator with Webflow to generate and embed interactive SVG animations on any page without writing animation code from scratch.
StickPNG
Connect StickPNG, a free transparent PNG library, with Webflow to add pre-cut product images, logo overlays, and decorative elements to page compositions without manual background removal.
Related integrations
Get started for free
Try Webflow for as long as you like with our free Starter plan. Purchase a paid Site plan to publish, host, and unlock additional features.
