






Lummi
Connect Lummi, an AI visual asset library, with Webflow to source and insert commercial-use images inside the canvas.

Every image on a Webflow site has to come from somewhere. Sourcing images usually means leaving the canvas and browsing a stock library in another tab, checking license terms, then uploading files one by one. Generic stock photography often flattens an otherwise distinct design.
Lummi shortens that loop. Its free Webflow app puts an AI-generated image library next to the layout you are building, so you can search, filter, and insert a picture without switching tabs. Images from Lummi carry a free commercial license with no credit required, which is the part that usually slows a client project down.
The fit is strongest for freelance Webflow designers replacing placeholders before a client review, agencies holding one visual language across several projects, and marketing teams that need a banner image without booking a photo studio. Founders building without a designer get distinctive images without a stock subscription.
How to integrate Lummi with Webflow
What is Lummi? Lummi is a free AI visual asset library of photos, illustrations, and 3D images, all free for personal and commercial use under Lummi's license. It also has an AI image generator and editing tools, including Reframe, Restyle, and background removal. You can filter the library by color, orientation, focal point, luminance, and the number of people in an image.

Teams reach for it when a project needs images and no photography exists yet, or when placeholder churn is slowing early design. In a case study on Lummi's blog, Allie Vogel, founder and head of design at the studio Flexxi, says Lummi is now part of the studio's daily client workflow across websites, pitch decks, and marketing materials. The Webflow app moves that sourcing step inside the canvas, so it happens where the layout lives.
Three routes get Lummi images into a Webflow site, and they differ mainly in how much of the work you hand off to code. The Lummi app covers search, filtering, and one-click insertion with no code at all. The Assets panel and CMS CSV import take images you have already downloaded, or image URLs you want the CMS to hold. The Webflow and Lummi APIs give you bulk asset uploads and CMS population, at the cost of server-side development. Most builds end up combining two of the three.
Install the Lummi app
The Lummi app on the Webflow Marketplace is the fastest path and the right starting point for most sites. The listing is free, published under the developer name Blush (Udemy), and carries the Approved by Webflow badge, which means we reviewed it for quality rather than endorsing or certifying it. Installed, it brings the library into Webflow so you can find and place an image without leaving your site.
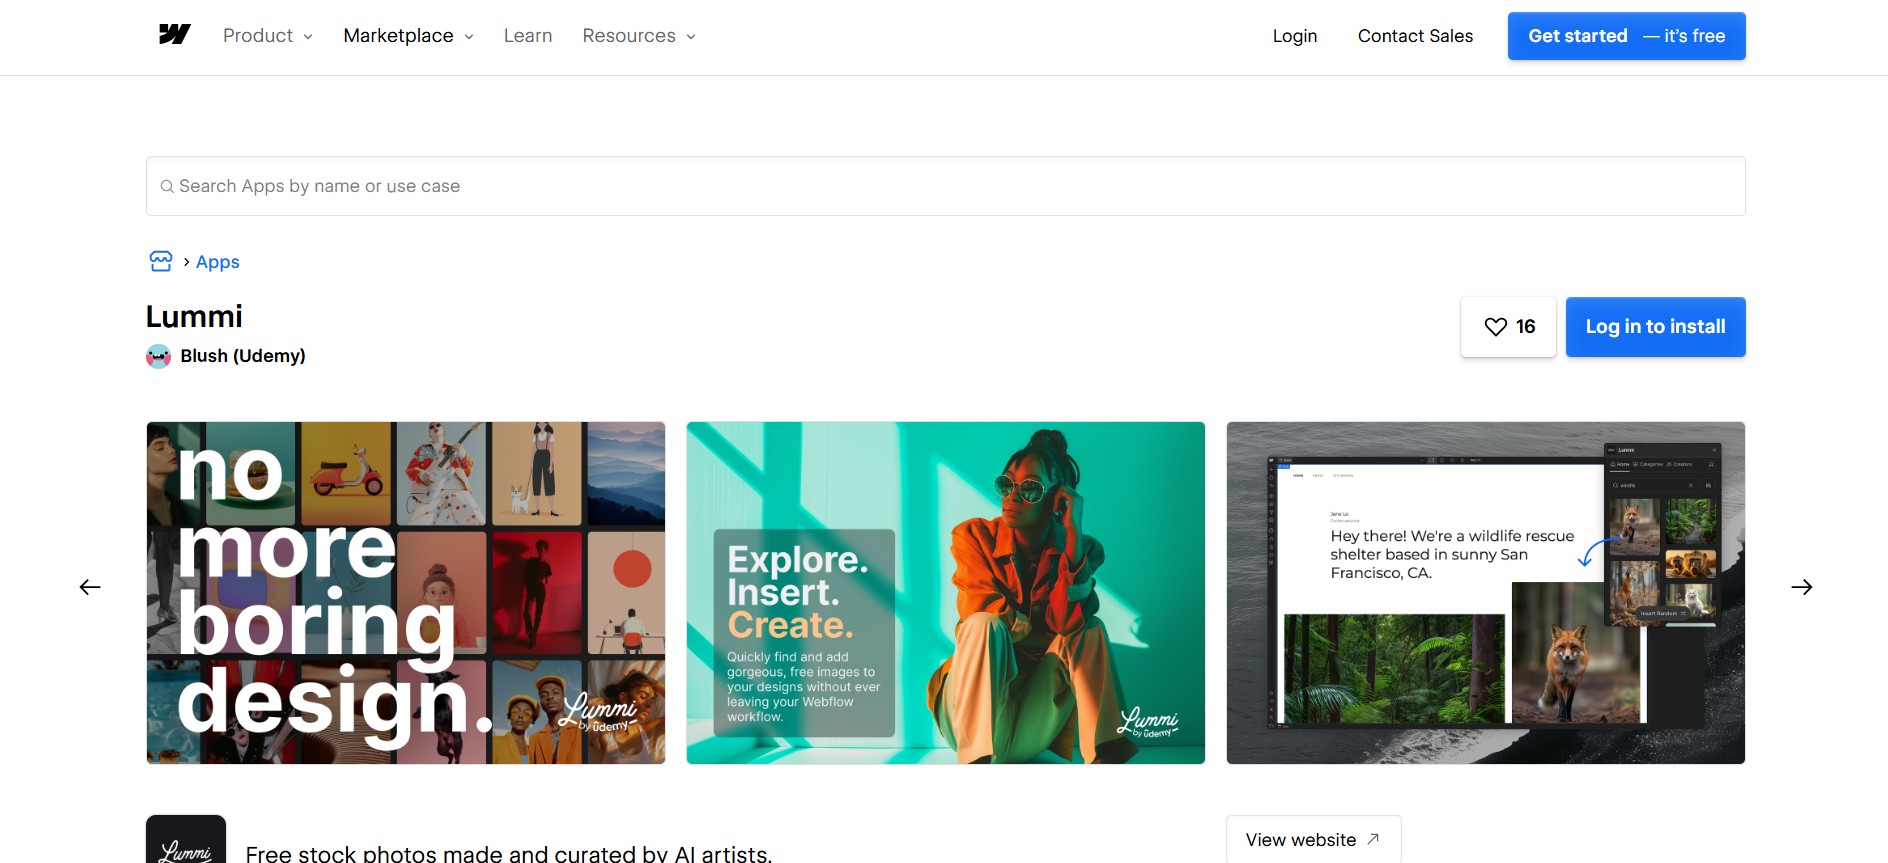
To set up the integration:
- Open the app's Marketplace listing and click Add to site. You can also open the Apps panel in Webflow, search for Lummi, and click Install.
- Select the Workspaces or sites where you want the app, then click Authorize app.
- Click Go to Lummi on the pop-up banner and follow the app's own instructions.
Once installed, the app lets you:
- Search and filter: You browse the whole library from inside Webflow and narrow it by color, orientation, luminance, and the number of people in the shot.
- Sort: Results order by newest or by relevancy, which is the difference between finding fresh work and finding the closest match.
- Filter before insert: You can apply a filter to an image in the app before it lands on the canvas.
- Random insert: A single click drops a real library image into a layout, which is the feature that earns its place during prototyping.
Know where the editing actually happens. Lummi's own Webflow app page still answers no to editing images inside Webflow, and says effects such as Duotone are coming rather than shipped, so treat the app as a fast way in and Lummi's site as the place you retouch. Reframe, background removal, and the largest download sizes are paid features on Lummi's side: Lummi Pro is $15 per month, or $10 per month billed yearly, and includes 60 AI credits per month. Installing the app itself costs nothing.
The listing declares access to site data, which is worth reading before you authorize it. Per the Webflow Apps overview, you cannot change an app's permissions, though you can scope the authorization to a single site or Workspace at install time. You can see what a site has authorized at Site settings > Integrations > Authorized apps, and you revoke on a different tab, at Site settings > Apps and integrations. After revoking, images and elements the app placed stay on the page, while any custom code it added is removed at your next publish.
Add Lummi images with the Assets panel and CMS imports
If you would rather manage the files yourself, two native features cover it without the app. Download from Lummi, then either upload in the Assets panel or point a CMS image field at an image URL. The panel suits hand-picked one-off images, while a CSV import fills many CMS items at once.
Upload downloaded images to the Assets panel
Build a shortlist in a Lummi collection before you download anything, so you are not hunting the same image twice. This path suits one-off images and teams that keep their asset library outside Webflow.
To upload Lummi images:
- Download your images from Lummi. Its API reference marks large, xlarge, and ultra as Pro resolutions, with original, small, and medium below that line.
- In Webflow, open the Assets panel from the left toolbar.
- Click the cloud upload icon, select your files, and click Open. Dragging files onto the canvas also adds them to the panel.
Images max out at 4 MB each, in PNG, JPEG or JPG, GIF, SVG, WebP, or AVIF format, and documents cap at 10 MB. Direct uploads get automatic responsive variants, which is the quiet reason this route beats an imported URL for Core Web Vitals. Ultra downloads are built for large prints, so check the file size before you upload one. The image conversion tool converts assets already in the panel to AVIF or WebP in place, replacing the original file.
Import Lummi image URLs through a CMS CSV import
A CSV import can fill a CMS collection with Lummi images in bulk, which fits content-heavy sites where every item needs its own picture. An image field accepts a direct URL, and the link has to end in a supported image file extension.
To import Lummi images into the CMS:
- Add direct Lummi image URLs to a column in your CSV. For a multi-image field, separate the URLs with semicolons.
- Import the CSV into your collection, keeping the file under 4 MB, and map the column to an image field.
- Bind the image field to a Collection List to show the images on your pages.
Images that arrive through a CSV or the API do not get responsive variants, so size and compress them first. Plan for capacity too: the free Starter Site plan runs a limited Webflow CMS at 20 Collections and 50 items, Basic has no CMS at all, and Premium is where the published limits reach 40 Collections and 20,000 items. Test your Lummi URLs before a production launch to confirm the images are still served.
Build with the Webflow and Lummi APIs
Bulk CMS population, scheduled image syncs, and deduplication across a large site need the API path, which is the only fully automated option. The app does not automate CMS work. Lummi gates its API, so you request Lummi API access through a form and wait for approval.
Four pieces do the work once you have a key:
- The Lummi API: Lummi's API reference covers image search, downloads with optional effects, similar-image lookups, and listing the images in a collection.
- Webflow asset uploads: the Data API issues a signed upload for each file, which is how a Lummi download becomes a Webflow asset.
- Webflow CMS endpoints: you read your CMS collections to find the right schema, then create or update items against it.
- Webflow webhooks: a registered webhook tells your code when something happens on the site, such as an editor creating an item.
One asymmetry shapes every design here: Lummi's API reference documents no webhooks, so Lummi cannot start a workflow on its own and every sync polls it from your code. Authentication is a Bearer API key, and it belongs server-side. A fetch call sitting in a Code Embed element hands that key to every visitor. Run the calls from your own backend, or from Webflow Cloud, which hosts full-stack apps built with frameworks such as Next.js and Astro. Mounting a Webflow Cloud app to a custom domain needs a Premium Site plan or higher.
Populate CMS collections with Lummi images
This flow searches Lummi, uploads the result as a Webflow asset, and creates CMS items in bulk. It needs the assets:write and cms:write scopes on the Webflow side.
To implement the sync:
- Search Lummi with
GEThttps://api.lummi.ai/v1/images/search?query=portrait, sendingAuthorization: Bearer YOUR_API_KEY. - Request the file with
POST https://api.lummi.ai/v1/images/{id}/download, which returns a JSON body containing adownloadUrl, then fetch that URL for the binary. - Request an upload with
POST https://api.webflow.com/v2/sites/{site_id}/assets, sendingfileNameand an MD5fileHash. The response carriesuploadUrlanduploadDetails. POSTthe image binary to the returned S3uploadUrlwith theuploadDetailsform fields.- Create items with
POST https://api.webflow.com/v2/collections/{collection_id}/items/bulk, up to 100 items in a request, then publish withPOST https://api.webflow.com/v2/collections/{collection_id}/items/publish.
Items created this way are staged, so the publish call is what puts them on the live site. Two limits will shape your retry logic. Lummi's default rate limit is 10 requests per minute, rising to 100 for approved applications, and going over returns HTTP 429. Large, xlarge, and ultra resolutions are Pro features, as are Reframe, background removal, and the variant effects, and asking for one without access returns HTTP 402. Every image you display through the API must carry clickable links to the image's attributionUrl and the author's attributionUrl, which is stricter than the standard download license. Lummi links a code examples repo from its API page, whose README warns that many of the examples were generated with AI help and may not reflect good practice.
React to new CMS items with webhooks
Because Lummi can only be polled, Webflow webhooks supply the event side of any automation. A common pattern fetches a matching Lummi image whenever an editor creates a CMS item.
To set this up:
- Register a webhook with
POST https://api.webflow.com/v2/sites/{site_id}/webhooks, sendingtriggerType: collection_item_createdand an HTTPS endpoint as the url. Creating one needs thesites:writescope, and a site allows 75 webhooks per trigger type. - In your endpoint, validate the request using the
x-webflow-timestampandx-webflow-signatureheaders, which carry a SHA-256 HMAC. Reject anything older than five minutes. - Query the Lummi search endpoint with the item's
fieldData.name, then attach the image withPATCH https://api.webflow.com/v2/collections/{collection_id}/items.
Webflow retries a failed delivery three more times at ten minute intervals, then deactivates the webhook and emails you, so return 200 quickly and write the handler to tolerate duplicate deliveries.
What you can build with the Lummi Webflow integration
With Lummi connected, you source and place commercial-use images from inside the canvas, without a stock subscription or photoshoot logistics behind every layout.
The builds below span client work, portfolios, prototyping, and templates sold on the Marketplace. Here is what teams put together with this integration:
- Client sites without photography: Designers who need images before a client has produced any can search and insert straight onto the canvas. Webflow Expert Timothy Ricks, quoted on Lummi's app page, says he sources free photos there because it shows the prompt behind each image.
- Portfolios with one color treatment: The color and luminance filters let you pull a set of images that already share a palette, which is most of the work in making a case-study grid look deliberate.
- Wireframes that skip the placeholder phase: A one-click random insert drops real library images into early layouts, so a SaaS homepage, an about page, or an ecommerce draft reads as finished during review. Lummi names those project types for its Webflow app.
- Marketplace templates: The Pivoter and E-Lab templates both source their images from Lummi, whose license lists templates among the allowed uses.
If your ambitions run past sourcing into generating images on demand, follow our guide to building an AI image generator app on Webflow Cloud. Otherwise, start with the app and reach for the API only once bulk CMS population or scheduled syncs justify the server-side work.
Frequently asked questions
Yes. The Marketplace listing prices the Lummi app at free, and Lummi's own Webflow page says the same. A paid Lummi plan changes what you can do to an image rather than whether you can use the app, because Reframe, background removal, and the largest download sizes are Pro features on Lummi's side.
Yes. Lummi's license covers personal and commercial projects with no limits, including client work and templates, and a standard download needs no credit to the creator or to Lummi. Reselling the images or bundling them into a competing stock library is not allowed. The API path is stricter: Lummi's API reference requires a clickable attribution link for every image you display and for its author.
Only when the image is uploaded directly, through the Assets panel or a CMS image field. Per Webflow's responsive images documentation, images added by CSV import or through the API get no variants, so size and compress those yourself. A direct upload wider than 3,200px gets 7 variants: 3200, 2600, 2000, 1600, 1080, 800, and 500px.
Compress anything over the ceiling before you upload it, since Webflow caps images at 4 MB each. Lummi's ultra size is meant for large prints, so those files are the ones most likely to exceed it, and an external compressor is the fix before upload. For assets already in your site, the image conversion tool in the Assets panel converts a selection to AVIF or WebP in place: open the expanded panel, select the assets, choose a format, and click Compress. It replaces the original file, so keep a copy if you need it.
No. The app inserts images into the site you are building, and the Marketplace listing describes it in exactly those terms. Filling a CMS collection in bulk is a separate job: either map Lummi image URLs to an image field through a CSV import, or call the Lummi and Webflow APIs from your own backend and create the items programmatically.
Description
Install the free Lummi app to search and filter AI-generated images, then insert them inside Webflow or bulk-populate CMS image fields through the Lummi and Webflow APIs.
This integration page is provided for informational and convenience purposes only.

Dropbox
Connect Dropbox, a cloud storage and collaboration platform, with Webflow to host media via shared links and sync folder changes to the CMS using Zapier or APIs.

Cloudinary
Connect Cloudinary, an image and video API platform, with Webflow to deliver transformed media through URL parameters, embed upload and gallery widgets, and automate CMS population from processed assets.

YouTube
Connect YouTube, a video hosting platform, with Webflow to embed videos, display channel feeds, and sync video metadata to CMS collections.

Hugeicons
Connect Hugeicons, an icon library with 51,000+ icons across 10 styles, with Webflow to add scalable iconography to pages, CMS templates, and design systems through an app, CDN font, or inline SVG.

Vectary 3D & AR
Embed Vectary's browser-based 3D scenes in Webflow as an iframe, with native mobile AR and a Model API for variant-driven product configurators.

AI Image Enhancer
Connect AI Image Enhancer with Webflow to improve and generate site images with AI prompts without leaving the canvas.

Vimeo
Connect Vimeo with Webflow to embed ad-free video and keep CMS-driven galleries in sync automatically.

Videezy
Connect Videezy, a stock video platform, with Webflow to add HD and 4K video backgrounds, embed externally hosted footage, and build CMS-driven video libraries.

Unsplash
Connect Unsplash with Webflow to search, insert, and manage free stock photography without leaving your design environment.
Related integrations
Get started for free
Try Webflow for as long as you like with our free Starter plan. Purchase a paid Site plan to publish, host, and unlock additional features.
