






Humblytics
Connect Humblytics with Webflow for cookie-free visitor tracking and revenue attribution, with A/B testing included.

Without Webflow's paid Analyze add-on, a published site does not show where visitors click or how far they scroll, and comparing the conversion rates of two page variants means adding the separate Optimize add-on. The usual answer is stacking Google Analytics with Hotjar and then a third testing tool, which leaves you with three scripts to load and a cookie consent banner to cover them.
Humblytics replaces that stack with one async script. Connected to Webflow, it tracks pageviews, clicks, form submissions, and other visitor actions automatically. Heatmaps start recording as soon as the script is live, A/B tests launch from the Humblytics dashboard with no extra code, and a hosted MCP server lets an AI agent read the same numbers and open experiments against them. Humblytics stores no cookies or local storage identifiers, so its own tracking runs without a consent banner.
Growth marketers running paid traffic use the integration to tie Meta ad spend to Stripe revenue, while agencies test and report across client portfolios through share links that need no client login. Freelancers and no-code builders get behavioral data and split testing without writing JavaScript.
How to integrate Humblytics with Webflow
What is Humblytics? Humblytics is a privacy-first analytics platform that also ships visual A/B testing, heatmaps, funnels, and revenue attribution in a single tag. It anonymizes visitors with a one-way hash of IP address and device characteristics and discards raw IP addresses immediately. Its own FAQ puts the tag at roughly 36 KB loaded asynchronously, and Humblytics lists the REST API and the hosted MCP server on every paid plan.
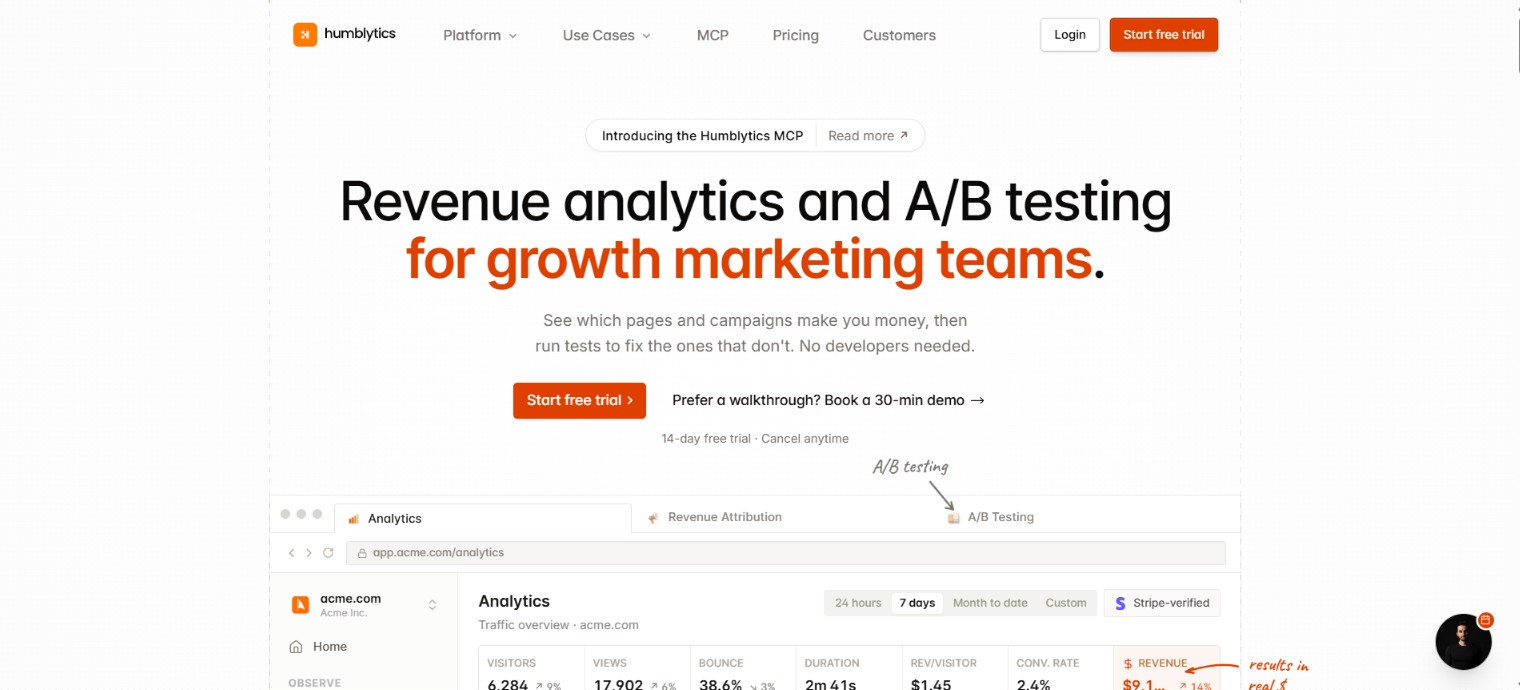
Teams pair Humblytics with Webflow when they want behavioral data and experiments on a site they already publish visually. One script covers static pages, Webflow CMS collection pages, and utility pages like 404 and password pages. The Humblytics case study for Dedication Agents describes a rollout across 30+ client sites in five working days, with no per-site engineering.
The Humblytics and Webflow integration supports four approaches:
- The Humblytics app installs tracking through one-click authorization inside Webflow, with no code to write.
- The custom code script embed pastes the tracking tag into your site's head and body tags and needs a paid Site plan.
- The hosted MCP server connects an AI agent to live analytics so it can query the data and open split tests.
- The Webflow and Humblytics APIs give you full control over script deployment and data retrieval, and require server-side development.
The app and the manual embed are two routes to the same script, so pick one rather than running both. The MCP server and the APIs then sit on top of whichever route you chose.
Install the Humblytics app
The Humblytics app in the Webflow Marketplace installs tracking without custom code. It is published by Eight Parallel, it connects through one-click authorization, and the Webflow listing says tracking starts automatically once you approve it. The app requests read access to site data and publishing, CMS data, page data, site forms and submissions, and the Ecommerce store, plus read-write access to custom code, which is how it injects the tracking tag without you touching any code yourself. Humblytics documents no plan requirement for this route, unlike the manual embed below.
To set up the integration:
- Open the Apps panel in Webflow and search for Humblytics.
- Select the app and click Install on site.
- Click Authorize app. Tracking begins automatically.
Once connected, the app covers:
- Traffic insights: Page views, real-time visitors, geographic data, and top referral sources land in the dashboard with no further setup.
- Conversion tracking: Custom attributes on links and buttons name the clicks you care about, so they report as readable events instead of raw selectors.
- Content engagement: Scroll depth and session analytics show how far visitors get down a long page before they leave it.
- Split testing: Tests run against live published pages and are launched from the Humblytics dashboard rather than from Webflow.
To review or revoke the connection later, go to Site settings > Apps & integrations. If you want direct control over where the script sits, use the manual embed below instead.
Add the tracking script with custom code
The manual method pastes one script tag into your site's head code. This route needs a paid Webflow Site plan, since custom code is not available on the free Starter plan. A Code Embed element can also carry the script inside a page layout, but Humblytics documents head code as the placement for site-wide coverage.
Install site-wide in head code
Site-wide installation covers every page from one paste, including CMS collection pages and pages populated from changing data.
To install the script:
- In Humblytics, click Add Website and enter your domain without
https://orwww, for exampleyour-site.com. - Copy the tracking script:
<script async src="https://app.humblytics.com/hmbl.min.js?id=YOUR_ID_HERE"></script> - In Webflow, click the W logo, open Site settings > Custom code, paste the script under Head code, and click Save.
- Publish the site to your primary domain. Custom code does not go live until you publish.
- Back in Humblytics, click Verify Website, open the published site in an incognito window, and refresh once.
A green Verified badge and a live visitor count appear shortly after the first pageview lands.
Install on specific pages
To track only certain pages, add the script at the page level instead.
To set up page-level tracking:
- In the Pages panel, click the gear icon next to the page name.
- Under Page settings > Custom code, paste the script in the Inside
<head>tag section and click Save. - Publish the site.
Keep the script in head code either way, since Humblytics documents head code as the required placement rather than footer code. The domain registered in Humblytics must also match the published domain, not the preview URL.
Label click events with custom attributes
Humblytics tracks clicks and form events automatically once the script loads. Custom attributes give specific events readable names, per the Humblytics custom event tracking guide for Webflow sites.
To label an event:
- Select the element and open the element settings panel.
- Under Custom attributes, click Add custom attribute.
- Enter
humblyticsas the name and a label likehero-nav-btnas the value.
Named events appear under Analytics > Links in the Humblytics dashboard.
Connect AI agents with the Humblytics MCP server
Humblytics runs a hosted MCP server at https://mcp.humblytics.com/v1 that gives a compatible AI agent read-write access to the same analytics you see in the dashboard. Its agent setup documentation lists roughly 36 tools spanning traffic and trends, funnels, A/B tests, and heatmap and click data, and names Claude Code, Cursor, and Codex CLI alongside any agent that supports remote MCP servers.
The quickest path is OAuth. Copy the setup prompt from the API page in your Humblytics dashboard, paste it into your agent, approve access in the browser, and the agent registers the server with a key you never handle. Authorization links expire after five minutes, so paste the prompt again if one times out.
To register the server manually in Claude Code:
claude mcp add humblytics --transport http https://mcp.humblytics.com/v1 \
  --header "Authorization: Bearer YOUR_API_KEY"
Account keys work across every property and are the type Humblytics recommends for agents, while property keys stay scoped to one site. API access sits behind a paid Humblytics plan, so a trial account can install tracking before it can drive that tracking from an agent. Pointing an agent at this server and at Webflow's own MCP server puts reading the result and editing the page that produced it in the same session.
Build with the Webflow and Humblytics APIs
Developers who need programmatic control work with both platforms' REST APIs directly. This path covers deploying the tracking script across many sites, pulling analytics into external dashboards, and creating split tests from code. It requires server-side development and, for custom code operations, an OAuth Data Client app. Humblytics publishes no general outbound webhooks, so automation on that side means polling its REST API.
The relevant APIs:
- Humblytics External Analytics API: The External Analytics API serves traffic, pages, clicks, forms, and funnel data from
https://app.humblytics.com/api/external/v1. - Humblytics Split Testing API: The Split Testing API creates split tests programmatically and returns per-page test recommendations generated from your own analytics.
- Webflow Data API custom code: The Webflow Data API custom code endpoints register a hosted script and apply it site-wide or per page.
- Webflow webhooks: Webflow webhooks fire on events like
form_submission,site_publish, andecomm_new_order, which is how you react to Webflow-side activity.
Humblytics API keys are Bearer tokens generated in the dashboard under Utilities > API Access. When you use a property-scoped key, the propertyId in the request path must match that key's property, or the API returns 403.
Pull analytics data with the External Analytics API
Polling this API is how you feed Humblytics data into external systems, since Humblytics publishes no outbound webhooks.
To query the API:
- Generate an API key with the
metricspermission enabled. - Call
GET https://app.humblytics.com/api/external/v1/properties/{propertyId}/traffic/summarywith the key as a Bearer token in theAuthorizationheader. - Query other endpoints as needed, such as
/pages/breakdown,/clicks/details,/forms/breakdown, and/funnels.
Paginate results and keep trend queries within the documented bucket ceiling. POST variants accept a { "propertyIds": [...] } body for multi-property aggregates.
Deploy the tracking script through the Webflow custom code endpoints
The custom_code:read and custom_code:write scopes are available only to Data Client apps, so site tokens cannot call these endpoints. This path suits agencies rolling Humblytics out across many Webflow sites without opening each one.
To apply the script programmatically:
- Register it with
POST https://api.webflow.com/v2/sites/{site_id}/registered_scripts/hostedand passhostedLocation,integrityHash,version,displayName, andcanCopy. - Read currently applied scripts with
GET https://api.webflow.com/v2/sites/{site_id}/custom_code. - Apply the registered script with
PUT https://api.webflow.com/v2/sites/{site_id}/custom_codeand list every script with itsid,location, andversion.
The PUT body must include all scripts currently applied, because anything you omit gets removed. Set location to header, since Humblytics documents head code as the required placement.
Create split tests programmatically
The split testing endpoints expose POST /properties/{propertyId}/split-tests to create and activate a test, and Humblytics documents two test types. A nocode test injects runtime element changes such as text swaps, CSS overrides, HTML replacements, and image swaps. A redirect test sends visitors to entirely different page URLs, which fits the duplicate-page workflow you already use in Webflow.
To run a redirect test from code:
- Duplicate the Webflow page you want to test and publish the variant URL.
- Send
POST /properties/{propertyId}/split-testswith the control and variant URLs and a conversion goal. - Monitor results with
GET /properties/{propertyId}/split-tests/{experimentId}on the same base URL, which returns full experiment details with per-variant metrics.
Before you write any of this by hand, check whether the MCP server already covers it, since the same create, read, and stop operations are exposed there as agent tools.
What you can build with the Humblytics Webflow integration
Integrating Humblytics with Webflow gives you measurement and experiments on every page from a single script, with revenue attached to the result rather than sitting in a separate tool.
- Landing page A/B tests without deploys: Duplicate a pricing page in Webflow, swap the headline, publish the variant URL, then enter both URLs in Humblytics and launch from the dashboard.
- Conversion funnels with drop-off analysis: Map page views, clicks, and form submissions into multi-step funnels showing drop-off percentages. Agency Wakeford Digital describes following visitors on the Trout Tales Tasmania site from the homepage through to the packages page.
- Heatmap-driven page fixes: Overlay click density and scroll depth on desktop, tablet, and mobile views of live pages. A scroll map of a long Webflow landing page shows what share of visitors stop before the booking CTA, so you can move the button and re-measure.
- Revenue attribution for paid campaigns: Connect Meta ad spend to Stripe revenue, matched by UTM and session, and score A/B winners by revenue per variant instead of by clicks.
If you are rolling the tag across a portfolio rather than one site, follow our walkthrough on applying custom code programmatically. Then connect the Webflow MCP server so the agent reading your Humblytics results can also edit and publish the page that produced them.
Frequently asked questions
Only for the manual script method. Custom code in site or page settings requires a paid Webflow Site plan, and it is not available on the free Starter plan. The Humblytics app installs the same tracking through one-click authorization instead, and Humblytics documents no plan requirement for that route.
Yes. Humblytics tracks native Webflow forms with no configuration, and they appear as a named source under Dashboard > Conversions > Forms, per the forms data documentation. Third-party embedded forms such as Typeform, HubSpot, Cal.com, and Tally render in iframes or JavaScript and bypass standard submission events, so they need the
Humblytics.trackFormSubmission()hook covered in the form submission guide. Counts reflect every firing event, not deduplicated contacts.The most common cause is an unpublished site, because custom code only goes live after you publish. The other usual causes are testing the preview URL instead of the published site, a domain mismatch between Humblytics and the live URL, a wrong
id=value in the script, or an ad blocker or content security policy blockingapp.humblytics.com. Work through the troubleshooting guide, then click Verify Website in Humblytics from an incognito window.No, not for its own tracking. Humblytics stores no cookies or local storage identifiers and anonymizes visitors through a one-way hash of IP address and device traits, with raw IP addresses discarded immediately. Its own cookie-free analytics guide adds the caveat that the exemption "is not automatic in every jurisdiction" and recommends confirming your obligations with counsel. Other technologies on your site, such as ad pixels or chat widgets, may still require a banner.
Yes. Humblytics runs a hosted MCP server that gives agents such as Claude Code read-write access to traffic, funnels, heatmaps, and split tests, so an agent can read the numbers and create a test without you copying anything across. API access requires a paid Humblytics plan. Publishing the winning variant still happens in Webflow.
Description
Track visitor behavior and run split tests on Webflow pages without cookies or consent banners. Install through the one-click Marketplace app, or by pasting the tracking script into custom code in head and body tags.
This integration page is provided for informational and convenience purposes only.

Google site tools for Webflow
Google site tools for Webflow is Webflow's own app for reading GA4 and Search Console data inside Webflow and adding your Google Tag Manager script without code.

Data Goat (by Flow Ninja)
Data Goat shut down in November 2024. Replace its tracking with Webflow Analyze or a marketplace analytics app, GA4 scripts you install through Code Embed, and the Webflow Data API v2 for form data server-side.

Countdown Bar Timer
Connect Countdown Bar - Timer with Webflow to add urgency-driven countdown timers to landing pages, product pages, and sitewide promotions.
Smartarget Reviews
Connect Smartarget Reviews with Webflow to display curated customer testimonials and star ratings on your site without building a review system from scratch.
TripleChecker
Connect TripleChecker, an automated proofreading tool, with Webflow to scan your published site for spelling errors, grammar mistakes, and broken links on a recurring schedule.
Cookie Consent
Connect Cookie Consent, a GDPR and CCPA compliance app, with Webflow to add configurable cookie banners that block third-party scripts until visitors make a consent choice.
Gemini
Connect Google Gemini to Webflow to add AI text generation, image analysis, and automated content pipelines to your site.
Datadog
Connect Datadog with Webflow to monitor real user performance, track frontend errors, and run synthetic uptime checks on your published site.
Braintrust
Connect Braintrust with Webflow to monitor AI-powered features on your site and sync evaluation data into your CMS.
Related integrations
Get started for free
Try Webflow for as long as you like with our free Starter plan. Purchase a paid Site plan to publish, host, and unlock additional features.
