

Getform
Connect Getform, a headless form backend, with Webflow to handle file uploads, spam filtering, UTM tracking, and submission routing to tools like Slack, HubSpot, and Salesforce.
Webflow forms collect submissions and send email notifications, but the native form handling has limits. File uploads require a Business site plan. There is no built-in UTM tracking, no server-side field validation, and no way to route submissions to CRMs or messaging tools without additional services. Spam protection is basic, and exported Webflow sites lose form functionality entirely.
Getform, now called Forminit, acts as a dedicated form backend that processes everything after a visitor clicks submit. Connecting it to Webflow gives you server-side validation, file storage up to 25 MB, spam filtering through reCAPTCHA v3 or hCaptcha, and submission routing to tools like Slack, Salesforce, and HubSpot through Zapier or webhooks. With the JavaScript SDK method, it also captures marketing attribution such as UTM parameters and ad click IDs automatically. You design the form in Webflow and Forminit handles the rest.
This integration is most useful for Webflow designers who need file upload forms without upgrading to a Business plan, agencies managing forms across multiple client sites, SaaS marketing teams tracking which ad campaigns drive form completions, and developers who want full API access to submission data without building backend infrastructure.
How to integrate Getform with Webflow
What is Getform? Getform is a headless form backend API that receives, validates, stores, and routes form submissions. It was originally known as Getform.io and rebranded to Forminit in January 2026 — all features, accounts, and data carried over unchanged.
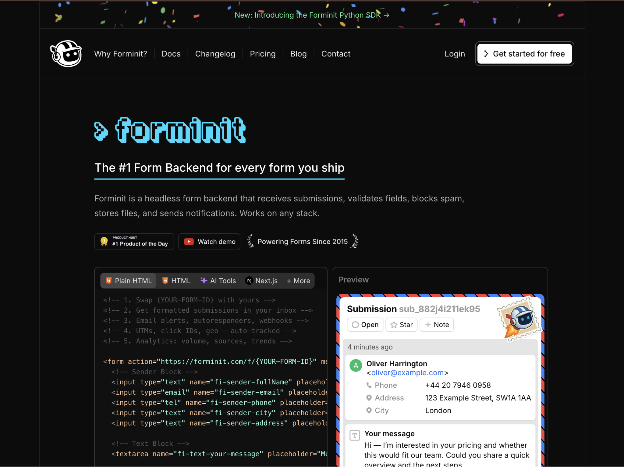
Getform supports email notifications, file uploads, spam protection, webhooks, a REST API, and integrations with Zapier, Slack, and Discord.
Teams use Getform with Webflow when native form handling falls short of project requirements. Common triggers include needing file uploads on a non-Business Webflow plan, wanting automatic UTM and ad click ID capture for marketing attribution, or routing submissions to external tools without building a custom server.
The Getform-Webflow integration supports 3 approaches:
- Custom form actions and the JavaScript SDK handle direct form submission routing from Webflow to Getform without writing backend code.
- Zapier connects Getform submissions to Webflow CMS items and other apps through automated workflows.
- The Webflow and Getform APIs give you full control over submission processing, CMS syncing, and webhook-driven workflows, but require server-side development.
Most implementations start with the JavaScript SDK method and add Zapier or API integrations as the project grows more complex.
Connect Webflow forms to Getform
Getform receives submissions through an HTTP POST endpoint that you point your Webflow form at. There are two ways to set this up — a no-code form action URL that works on all Webflow plans, and a JavaScript SDK approach that preserves Webflow's on-page success and error states while adding UTM tracking. Both methods require a Forminit account and a form endpoint created in the Forminit dashboard.
Before starting, note that setting a custom action on a Webflow form disables Webflow's built-in submission storage, email notifications, and spam filtering. Getform takes over all of those functions. You can also add file upload fields using Code Embed elements on paid Webflow plans, giving you file collection without a Webflow Business plan.
Set a custom form action URL
This method works on all Webflow plans including the free Starter tier. It requires no JavaScript — you paste the Forminit endpoint URL into the form settings and Forminit handles the submission. The tradeoff is that the page redirects after submission instead of showing Webflow's on-page success message. You also lose automatic UTM and ad click ID capture.
To set up a custom form action:
- Sign up at forminit.com and create a new form in the dashboard.
- Copy your form endpoint URL — it follows the format
https://forminit.com/f/YOUR-FORM-ID. - Set the authentication mode to Public in the form settings.
- In Webflow, select your Form Block on the canvas, then open the Settings panel in the right sidebar.
- In the Send To section, click the delete icon next to any existing Webflow or Email notification destinations.
- Click the add icon, select Custom action, paste your Forminit endpoint URL, set the method to POST, and click Save.
- Select each input field in the form and update the Name attribute in the Settings panel to match Forminit's naming convention — for example,
fi-sender-emailfor email,fi-sender-fullNamefor name, andfi-text-messagefor a message field. - Publish the site and submit a test entry to confirm data appears in the Forminit dashboard.
After setup, configure post-submission redirects in Getform at Form Settings > After Submission > Redirect URL if you want visitors sent to a custom thank-you page.
Add the Getform JavaScript SDK
The JavaScript SDK method is Getform's recommended approach for paid Webflow site plans. It intercepts the form submission, sends data to Getform via AJAX, and then triggers Webflow's native .w-form-done and .w-form-fail elements — so visitors see on-page success or error messages without a redirect. The SDK also automatically captures UTM parameters and ad click IDs from Google, Facebook, Microsoft, TikTok, X, and LinkedIn.
This method requires a paid Webflow site plan because it uses custom code in head and body tags.
To add the JavaScript SDK:
- Create a form endpoint in the Forminit dashboard and copy your Form ID.
- In Webflow, open the Pages panel, hover over your target page, click the gear icon to open Page Settings, and select the Custom Code tab.
- Paste the Forminit SDK script into the Before
</body>tag section. The script loads the SDK fromhttps://cdn.forminit.com/v2/forminit.min.js, initializes the Forminit object, and binds to your form's Element ID. Retrieve the complete script from the Forminit Webflow setup guide. - Add a Form Block to your page from the Add Elements panel.
- Select the
<form>element, open the Settings panel, and enter an Element ID (such ascontact-form) that matches theWEBFLOW_FORM_IDvalue in your script. - In the form's Send To section, remove existing destinations, add a Custom action, paste your Forminit endpoint URL, set the method to POST, and save.
- Rename each input field's Name attribute to follow Forminit's field naming convention (e.g.,
fi-sender-email,fi-text-message).
Custom code does not run in Webflow's preview mode. Publish the site before testing the integration. If the form does not submit, check that your Webflow domain is listed in Getform's authorized domains under the form's settings.
Add file upload fields with a Code Embed element
Webflow's native forms only support file uploads on the Business site plan with a 10 MB per-file limit. Forminit accepts file uploads on all paid plans with a 25 MB per-submission limit and supports 50+ file types including PDF, DOCX, PNG, and ZIP.
To add a file upload field:
- In Webflow, drag a Code Embed element from the Add Elements panel into your Form Block.
- Paste the file input HTML using Getform's naming convention:
<input type="file" name="fi-file-resume" />
For multiple file uploads, add the multiple attribute:
<input type="file" name="fi-file-documents[]" multiple />
- Publish the site and test a submission with an attached file.
When using the JavaScript SDK method, the FormData object handles the multipart/form-data encoding automatically. If you are using the plain form action URL method without JavaScript, add enctype="multipart/form-data" to your form tag.
Connect with Zapier
Getform has a native connector on Zapier that triggers workflows when new form submissions arrive. This lets you route Getform submissions to Webflow CMS and other tools without writing code. Getform functions as a trigger source only in Zapier — you cannot push data into Getform through a Zapier action.
The Getform trigger available on Zapier:
- Getform New Submission → Webflow action workflows begin when a new form submission is received on a selected Getform form.
Examples of Zapier workflows for this pairing include:
- New Forminit submission → create Webflow CMS item
- New Forminit submission → add row to Google Sheets
- New Forminit submission → send Slack message
- New Forminit submission → create Salesforce lead
- New Forminit submission → add Mailchimp subscriber
- New Forminit submission → create HubSpot contact
These examples show the most common ways Webflow teams route Getform submissions after collection.
To set up a Zapier integration:
- Open the Getform + Webflow integration page on Zapier and select a template or create a new Zap.
- Choose Getform as the trigger app and select the New Submission trigger.
- Authenticate your Getform account and select the form to monitor.
- Choose an action app such as Webflow and configure the action — for example, mapping form fields to CMS collection fields.
- Test the Zap and turn it on.
Build with the Webflow and Getform APIs
For projects that need custom submission processing, CMS synchronization, or multi-system data flows, the Getform and Webflow APIs provide full programmatic control. This path requires server-side development — you will need a backend service or serverless function to handle requests, authenticate with both APIs, and process data.
The relevant APIs:
- The Getform Submit Form API accepts submissions via
POST https://forminit.com/f/{formId}with JSON, multipart, or URL-encoded payloads - The Getform List Submissions API retrieves stored submissions via
GET https://forminit.com/v1/forms/{formId}with pagination and search filtering - Getform webhooks send a POST request to your endpoint on each
form.submittedevent - Webflow Data API reads form configurations and submissions
- Webflow webhooks trigger on events like
form_submission,collection_item_created, andsite_publish
These APIs support two primary integration patterns for Webflow sites.
Relay Webflow form submissions to Getform
This pattern registers a Webflow webhook that fires on form submissions and forwards the data to Getform's API for centralized storage, validation, and routing. It is useful when you want to keep Webflow's native form submission flow intact while also storing data in Getform.
To implement this:
- Register a Webflow webhook by sending a POST request to
https://api.webflow.com/v2/sites/{site_id}/webhookswithtriggerTypeset toform_submissionand theurlpointing to your backend endpoint. Authenticate with a Bearer token that has thesites:writescope. - Build a backend handler that receives the Webflow webhook payload, extracts the form field data, and sends a POST request to
https://forminit.com/f/{formId}with theX-API-KEYheader set to your Forminit API key. - Map Webflow field names to Forminit's naming convention in the relay — for example, transform
"email"to"fi-sender-email"and"First Name"to"fi-sender-firstName".
Getform API keys use the fi_ prefix. Generate them in the Getform dashboard under Account > API Tokens.
Write Getform submissions to Webflow CMS
This pattern uses Getform webhooks to push new submissions into a Webflow CMS collection, creating a live directory of form entries on your site. For example, testimonials submitted through a form could appear on a reviews page automatically.
To implement this:
- Create a CMS collection in Webflow with fields matching the data your form collects (e.g., Name, Email, Message).
- In the Forminit dashboard, go to your form's settings, select Actions > Webhook, and enter the URL of your backend endpoint.
- Build a handler that receives Forminit's
form.submittedwebhook payload, maps the submission fields to your Webflow collection schema, and sends a POST request tohttps://api.webflow.com/v2/collections/{collection_id}/items/liveto create and publish the CMS item. Authenticate with a Bearer token that has thecms:writescope.
The Webflow CMS supports up to 2,000 items on the CMS plan and 10,000 on the Business plan. Factor these limits into your design if you expect high submission volumes.
What can you build with the Getform Webflow integration?
Integrating Getform with Webflow lets you collect, validate, and route form submissions from any Webflow site without building server-side infrastructure.
- Lead capture with marketing attribution: Build landing pages with forms that automatically tag each submission with UTM parameters and ad click IDs from Google, Facebook, TikTok, LinkedIn, Microsoft, and X. Route tagged leads to Salesforce or HubSpot through Zapier for campaign-level conversion tracking.
- Job application portals with file uploads: Create career pages where applicants submit resumes, cover letters, and portfolio files up to 25 MB — without upgrading Webflow to a Business plan. Use Forminit's autoresponder to send personalized confirmation emails from your company's domain.
- Event registration with automated calendar delivery: Build registration forms that collect attendee details, then use Forminit's autoresponder to send confirmation emails with attached
.icscalendar invite files. Push registrations to Google Sheets or Airtable through Zapier for attendee management. - Multi-client form management for agencies: Manage forms across multiple Webflow client sites from a single Forminit workspace. Assign team members with role-based access, restrict each form endpoint to its authorized client domain, and send notification emails from each client's own domain using custom SMTP.
If you need more control over submission processing or want to sync entries into Webflow CMS collections in real time, the API integration path covers those cases with full flexibility.
Frequently asked questions
Yes. Webflow's built-in submission storage and email notifications cannot run at the same time as a custom action URL. When you add a custom action pointing to Getform, you must first delete the existing Webflow and Email notification destinations in the form's Send To section. Getform then handles submission storage, email notifications, and spam filtering. The Webflow form documentation confirms this constraint.
The no-code form action URL method works on all Webflow plans, including the free Starter tier. The JavaScript SDK method requires a paid Webflow site plan because it uses custom code injection. File upload fields added via Code Embed elements also require a paid plan. For full details on plan-level feature access, see the Webflow pricing page.
Yes. Create a separate form endpoint in the Getform dashboard for each form on your site — for example, one for contact inquiries and another for newsletter signups. Each Webflow Form Block gets its own custom action URL and its own Element ID if you are using the JavaScript SDK. This allows different notification rules, spam settings, and webhook destinations per form. The Getform Webflow guide covers multi-form configuration.
Several verified causes exist. If site-level reCAPTCHA is enabled in Webflow's site settings, every form on the page must include a reCAPTCHA element — even forms using a custom action — or submissions will fail. CORS errors appear when your Webflow domain is not listed in Forminit's authorized domains setting. Also, custom code does not execute in Webflow's preview mode, so always test on the published site. Check the Getform troubleshooting guide for a complete list of common issues and fixes.
Yes. Getform.io rebranded to Forminit in January 2026. All features, accounts, endpoints, and data carried over with no migration required. The
getform.iodomain redirects to forminit.com, and the Zapier connector is accessible under both names. If your existing Webflow forms point togetform.ioendpoints, they should continue to resolve, but review them to confirm. The official rebrand announcement has full details.
Description
Routes Webflow form submissions to Getform (now Forminit) for server-side validation, file uploads, spam protection, and email notifications via custom form actions or the JavaScript SDK.
This integration page is provided for informational and convenience purposes only.

POWr
Embed POWr forms, popups, countdown timers, and much more. No coding necessary!
POWR
Transform your Webflow site with powerful no-code widgets. Add forms, popups, galleries, and 60+ interactive apps to boost engagement, capture leads, and increase conversions — all without writing a single line of code.
Paperform
Connect Paperform, a design-first form builder, with Webflow to embed payment forms, conditional intake flows, and booking pages directly on any page with inline, popup, or full-screen layouts.

MightyForms
Connect MightyForms' advanced form builder to your Webflow site for powerful data collection, automation, and payment processing — no coding required.

Mailchimp Forms
Connect Mailchimp Forms with Webflow to capture leads and grow your email list through native form integration.
JotForm
Connect Jotform's powerful form builder with Webflow to create advanced forms with payment processing, file uploads, and automated workflows. Collect submissions that automatically create CMS items, sync data in real-time, and extend beyond Webflow's native form limitations.

Jinglebell
Jinglebell brings you an intuitive module to fully integrate your Webflow-designed forms.

Form Sparrow
Connect Form Sparrow to Webflow for serverless form handling without backend code. Process submissions, manage email notifications, and protect against spam — all while maintaining full design control in Webflow.
FormToEmail
Connect FormToEmail, a hosted form-to-email backend, with Webflow to route form submissions to specific inboxes, send autoresponder emails, and filter spam with reCAPTCHA and IP blocking.
Related integrations
Get started for free
Try Webflow for as long as you like with our free Starter plan. Purchase a paid Site plan to publish, host, and unlock additional features.
