






Bubble
Connect Bubble with Webflow when your site needs user authentication, database-driven features, and application logic alongside a content-focused frontend.

Connecting Bubble with Webflow splits the work across two specialized platforms. Webflow serves the public-facing site, where SEO, design fidelity, and content management matter most. Bubble handles everything behind the login, including user accounts, database operations, and backend workflows. Data flows between the two through iframe embeds, automation tools like Zapier, or direct API calls.
This integration pattern fits SaaS founders building MVPs with a separate marketing site and product app. Agencies delivering client projects use it to pair design-forward Webflow pages with Bubble-powered dashboards and portals. Freelancers and no-code teams adopt it to ship complete products without managing traditional development stacks.
How to integrate Bubble with Webflow
What is Bubble? Bubble is a full-stack no-code app builder that covers frontend design, backend logic, database management, and hosting. It supports custom workflows, a built-in database, API integrations, and hosting. Teams use Bubble to build marketplaces, SaaS platforms, internal tools, and community applications.
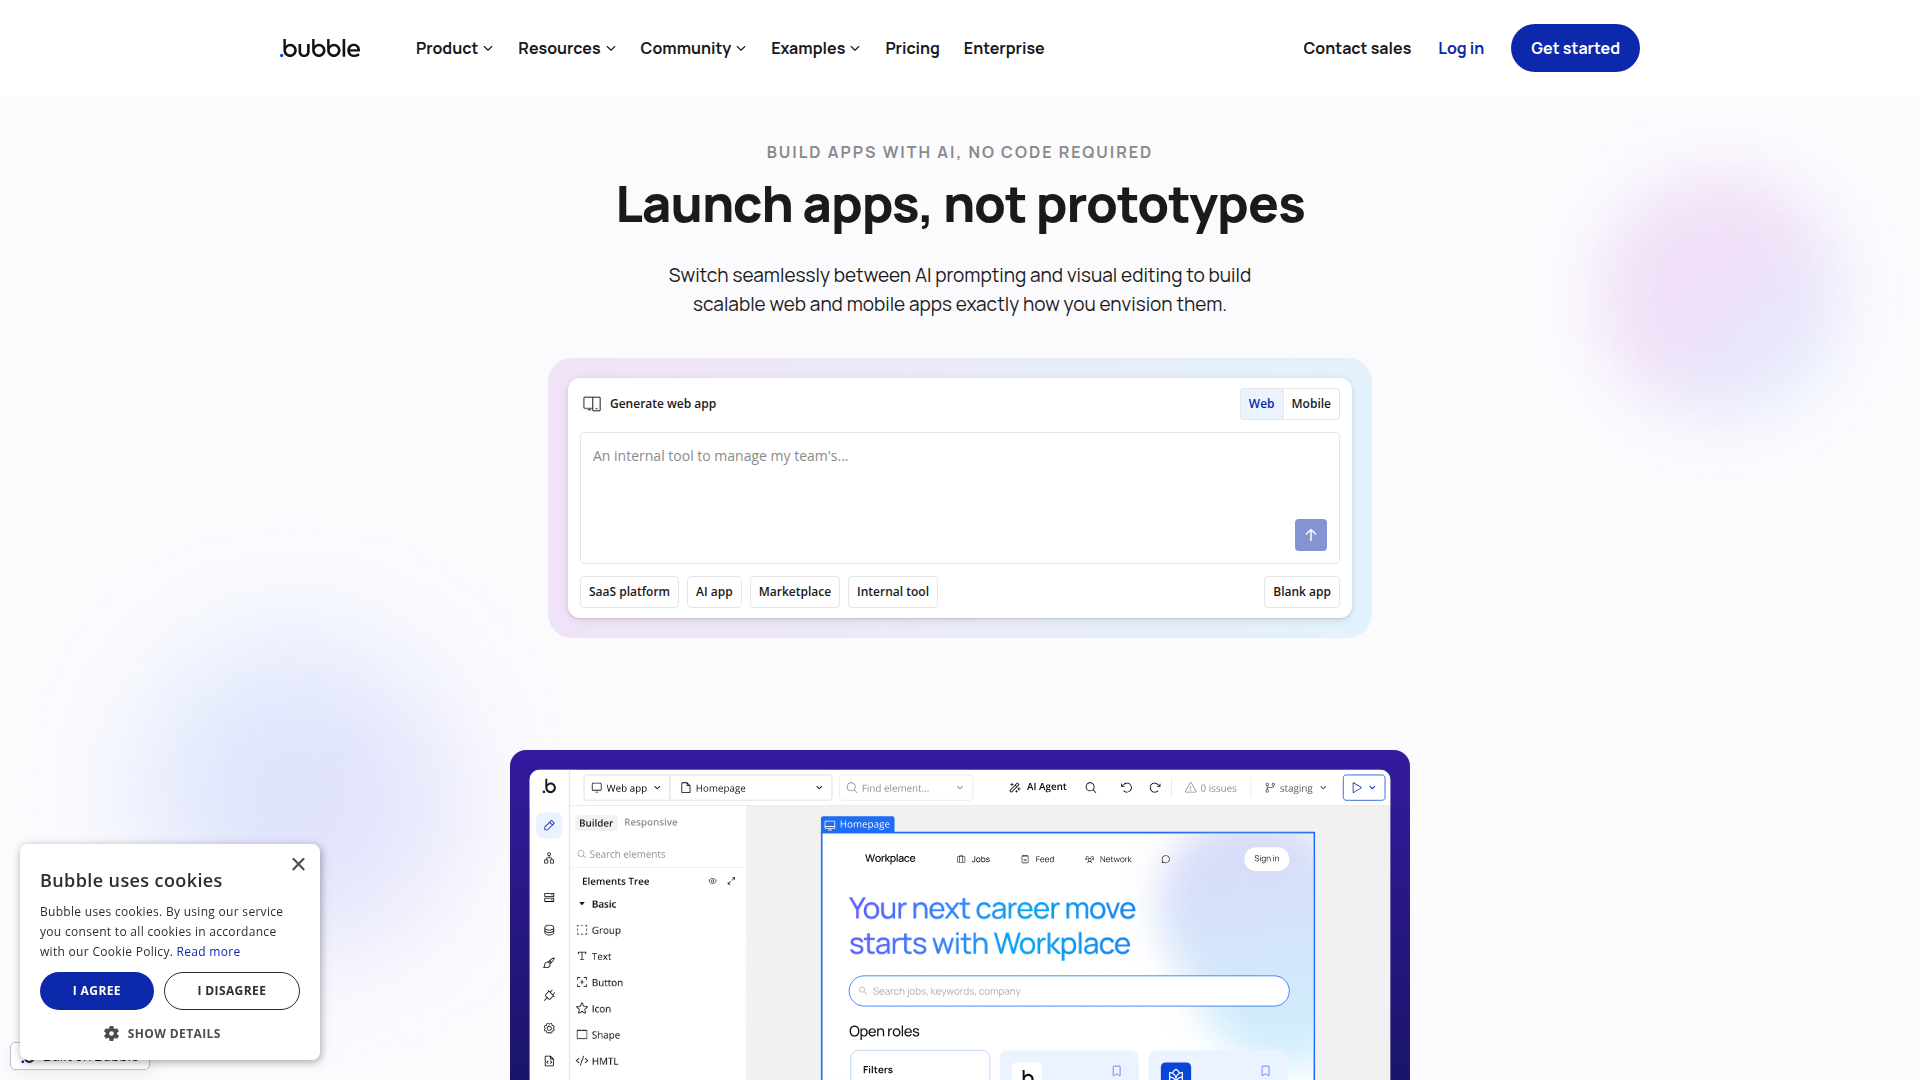
Teams pair Bubble with Webflow when they need SEO-friendly marketing pages alongside a database-driven application. The typical architecture places the homepage, blog, pricing page, and documentation on Webflow, while Bubble handles user accounts, dashboards, and backend logic on a subdomain like app.yoursite.com. This split gives each platform the job it does best.
The Bubble-Webflow integration supports 3 approaches:
- Iframe embeds with Code Embed elements display Bubble app pages directly inside Webflow layouts without server-side development.
- Zapier syncs data between Webflow forms, Webflow CMS collections, and Bubble's database through pre-built automation workflows.
- The Webflow and Bubble APIs give you full control over CMS content sync, form processing, and user authentication, but require server-side development.
Most implementations combine two or more of these methods depending on the complexity of the setup.
Embed Bubble pages with Code Embed elements
This method displays a fully functional Bubble app page inside a Webflow page using an iframe. It works for embedding calculators, booking forms, configurators, authenticated portals, or any Bubble-built interface into a Webflow layout. No server-side development is required. You add a Code Embed element in Webflow, paste an iframe snippet pointing to your Bubble app URL, and publish. Bubble must be configured to allow iframe rendering before the embed will work.
To set up the iframe embed:
- Open your Bubble app editor and go to Settings > General > Privacy & Security. Set "Allow to render the app in a frame/iframe" to Allow all iframes.
- Copy the URL of the Bubble page you want to embed, for example
https://your-app-name.bubbleapps.io/your-page-name. - In Webflow, open the page where you want the Bubble app to appear. Press A to open the Add panel, drag a Code Embed element onto the canvas, and double-click it to open the code editor.
- Paste the following iframe code, replacing the
srcvalue with your Bubble page URL:
<iframe
  id="myIframe"
  src="https://your-app-name.bubbleapps.io/your-page-name"
  width="100%"
  height="600px"
  frameborder="0"
  scrolling="no">
</iframe>
- Click Save & close, then Publish your Webflow site.
The iframe displays the Bubble page within a fixed-height container. Users interact with the Bubble app directly inside the Webflow page. Capabilities include:
- Embedding authenticated Bubble app pages (login portals, dashboards, user profiles) inside Webflow marketing layouts
- Displaying Bubble-powered calculators, product configurators, or booking systems inline with Webflow content
- Running Bubble database queries and workflows from within the embedded page
This approach has trade-offs to consider. Enabling iframe rendering in Bubble is app-wide, meaning every page in your Bubble app becomes embeddable. Bubble's security dashboard flags this setting as a clickjacking vulnerability. The embedded Bubble UI does not inherit Webflow's CSS, so you need to style the Bubble page separately to match the surrounding design. Some browsers block cookies set by iframed content, which can affect Bubble session and authentication features.
Add a responsive iframe with auto-height
Fixed-height iframes often produce scrollbars or empty space. The iFrameResizer library solves this by adjusting the iframe height to match the Bubble page content automatically.
To set up a responsive iframe:
- In your Webflow Code Embed element, include the iFrameResizer parent script and configure it to target your iframe:
<style>#myiframe { width: 1px; min-width: 100%; }</style>
<iframe id="myIframe"
  src="https://your-app-name.bubbleapps.io/your-page-name"
  width="100%"
  frameborder="0">
</iframe>
<script>
iFrameResize({ log: true, checkOrigin: false, heightCalculationMethod: 'grow' }, '#myIframe')
</script>
- In your Bubble app, add an HTML element to the embedded page and paste the iFrameResizer content window script:
<div data-iframe-height> </div>
<script type="text/javascript" src="[iframeResizer.contentWindow.min.js URL]"></script>
- In the Bubble editor, uncheck fixed width on the page to allow responsive behavior.
The iframe now resizes dynamically as users interact with the Bubble app content.
Inject Bubble scripts site-wide or per page
For Bubble-connected widgets, chat interfaces, or tracking scripts that need to run across multiple Webflow pages, use custom code in head and body tags instead of individual Code Embed elements.
To add scripts site-wide:
- Open the Webflow Dashboard and go to Site Settings > Custom Code.
- Paste your Bubble script tag in the Head Code or Footer Code field.
- Save and publish the site.
To add scripts to a single page:
- In Webflow, select the target page and open Page Settings (gear icon).
- Paste the script in the Custom Code section, either before
</head>or before</body>. - Publish the site.
This method is useful for Bubble-connected chat widgets or event tracking that must appear on every page.
Connect with Zapier
Automation platforms sync data between Webflow and Bubble without custom code. These tools handle backend data flows, not visual embeds. When a Webflow form is submitted, an automation can create a record in Bubble's database. When a Bubble workflow fires, it can create or update a Webflow CMS item. Zapier supports direct Webflow-to-Bubble connections with pre-built templates. Before connecting, enable Bubble's Data API by going to Settings > API > Enable Data API in your Bubble app editor.
Confirmed Webflow triggers available on these platforms include:
- Webflow: New form submission
- Webflow: New order placed
- Webflow: Collection item created, changed, or deleted
- Webflow: Site published
Confirmed Bubble actions include:
- Bubble: Create a new thing (database record)
- Bubble: Modify a thing by ID
- Bubble: Trigger an API workflow
- Bubble: Search for database records
To connect Webflow and Bubble with Zapier:
- Go to the Bubble + Webflow Zapier page and select a pre-built template, such as "Create new Bubble things from new Webflow form submissions."
- Connect your Webflow account via OAuth and your Bubble account using your API key.
- Map form fields or CMS fields between the two platforms using Zapier's visual field mapper.
- Click Turn on Zap to activate the automation.
Zapier offers four confirmed pre-built templates for the Webflow-Bubble connection. These automations work well for event-driven data passing like routing form leads into a Bubble database or publishing Bubble records to Webflow CMS collections. They do not embed Bubble UI into Webflow pages.
Build with the Webflow and Bubble APIs
For full control over data sync, content publishing, authentication flows, and webhook-driven automation, use the Webflow and Bubble APIs directly. This approach requires server-side development. Bubble's Backend Workflows can call Webflow's API server-to-server, avoiding CORS issues that block browser-side requests. Webflow webhooks can POST directly to Bubble's Workflow API endpoints, creating real-time event-driven connections between the two platforms.
Available APIs:
- Bubble's Data API handles CRUD operations on database records
- Bubble's Workflow API triggers server-side workflows via HTTP requests
- Webflow's Data API v2 handles CMS collections, pages, forms, and site publishing
- Webflow webhooks trigger real-time events when forms are submitted, CMS items change, or orders are placed
Both platforms use bearer token authentication. Store API tokens in server-side environment variables only. Webflow API calls require the appropriate OAuth scopes (for example, cms:write for creating CMS items). Bubble API calls require the Data API or Workflow API to be enabled in Settings > API.
Sync Bubble database records to Webflow CMS
This pattern pushes content from Bubble's database into Webflow CMS collections. It works for publishing blog posts, product listings, job postings, or directory entries created in Bubble to SEO-friendly Webflow pages displayed through Collection Lists.
To implement the sync:
- In Bubble, go to Settings > API and enable the Data API. Generate an admin API token.
- Retrieve your Webflow
site_idby callingGET https://api.webflow.com/v2/siteswith your Webflow bearer token. - Retrieve the target
collection_idby callingGET https://api.webflow.com/v2/sites/{site_id}/collections. - In Bubble, go to Backend Workflows and create a new workflow triggered by a database condition (for example, when a blog post record is created).
- Add an API Connector action in the workflow that calls Webflow's CMS endpoint:
POST https://api.webflow.com/v2/collections/{collection_id}/items/live
Authorization: Bearer <webflow_token>
Content-Type: application/json

{
  "fieldData": {
    "name": "Blog Post Title",
    "slug": "blog-post-title",
    "content": "Post body text here"
  },
  "isDraft": false,
  "isArchived": false
}
- Map Bubble field values to Webflow
fieldDatakeys. The keys must match the field slugs in your Webflow CMS collection exactly.
This completes the Bubble-to-Webflow CMS publishing flow.
The /items/live endpoint publishes items immediately. The /items endpoint creates drafts that require a separate publish call. Bulk operations support a maximum of 100 items per request. CMS plan sites support up to 2,000 CMS items. Business plan sites support a base allocation with optional add-ons for additional items. Any Bubble-to-Webflow CMS integration requires at minimum a Webflow CMS plan, since Starter and Basic plans have no CMS API access.
Route Webflow form submissions to Bubble
This pattern sends Webflow form data to Bubble's database using webhooks. When someone submits a form on your Webflow site, Bubble receives the payload and creates a database record automatically.
To implement webhook-based form routing:
- In Bubble, go to Backend Workflows and create a new API workflow named
handle_webflow_form. Check Expose as a public API endpoint. - Set authentication to "No authentication" for the open webhook receiver, and use "Automatic detection" for parameter mapping. Send a sample Webflow form payload to the
/initializeendpoint to auto-detect field names. - Add a workflow action that creates a Thing in your Bubble database using the incoming parameters.
- Register the webhook in Webflow by calling:
POST https://api.webflow.com/v2/sites/{site_id}/webhooks
Authorization: Bearer <webflow_token>
Content-Type: application/json

{
  "triggerType": "form_submission",
  "url": "https://your-app.bubbleapps.io/api/1.1/wf/handle_webflow_form"
}
- Publish your Webflow site before testing. Form submission webhooks only fire on published sites.
This webhook setup gives you a real-time path from Webflow forms into Bubble records.
Webflow supports 14 webhook trigger types, including form_submission, collection_item_created, collection_item_changed, site_publish, and e-commerce events. Each can POST to a Bubble Workflow API endpoint using the same pattern. Bubble returns HTTP 200 on successful workflow execution, which satisfies Webflow's delivery confirmation requirement.
Display Bubble data dynamically on Webflow pages
This pattern fetches records from Bubble's Data API and renders them on a Webflow page using client-side JavaScript inside a Code Embed element.
To implement dynamic data display:
- Enable the Bubble Data API and configure Privacy Rules to allow appropriate data access for the fields you want to expose.
- In Webflow, add a Code Embed element to the target page. Write JavaScript that calls the Bubble Data API on page load:
GET https://your-app.bubbleapps.io/api/1.1/obj/listings?limit=20&cursor=0
Authorization: Bearer <bubble_token>
- Parse the
response.resultsarray and inject content into named DOM elements on the page. - For pagination, use the
cursorparameter for the next request.
This approach works for displaying non-sensitive data like directory listings, event feeds, or product catalogs. For personalized content requiring user authentication, manage sessions entirely in Bubble and embed authenticated pages via iframe rather than exposing user-specific API endpoints to client-side code. Store API tokens in server-side environment variables only.
What can you build with the Bubble Webflow integration?
Integrating Bubble with Webflow lets you ship complete web products with both a marketing site and an interactive application without maintaining separate development stacks.
- SaaS marketing site with product app: Build your homepage, pricing page, blog, and documentation in Webflow for SEO. Run user authentication, subscription management, and the product dashboard in Bubble on a subdomain like
app.yoursite.com. Data flows between the two through API calls or Zapier automations that sync user signups to your CMS. - Marketplace with SEO-friendly listings: Display public listing pages and category indexes through Webflow CMS collections for search engine visibility. Handle user accounts, booking logic, payment workflows, and vendor management in Bubble. A backend workflow in Bubble pushes new listings to Webflow's CMS API automatically.
- Client portal behind a marketing site: Serve the agency or company website in Webflow with lead generation forms. Embed a Bubble-powered client dashboard using an iframe Code Embed element where authenticated users view reports, manage accounts, and interact with project data. Sessions stay managed in Bubble.
- Membership site with gated content: Publish the public blog, resource library, and course catalog through Webflow CMS. Run member registration, progress tracking, gated content access, and user profiles in Bubble. Zapier routes new Webflow form signups into Bubble's user database to trigger onboarding workflows.
If you need more control over authentication flows, real-time data sync, or webhook-driven automation, the API integration path covers those cases with full flexibility.
Frequently asked questions
Yes. If you need to sync data with Webflow CMS through the API, you need at minimum a CMS plan, since Starter and Basic plans have no CMS API access. The CMS plan supports up to 2,000 CMS items, and the Business plan supports a base allocation with optional add-ons for additional items. See Webflow pricing for current plan details.
No. Bubble does not have an app listing in the Webflow Apps Marketplace. Webflow positions Bubble as a competing product on its comparison page. All integration methods use third-party automation tools, iframe embeds, or direct API calls. A community-built Webflow plugin by Zeroqode exists in Bubble's plugin marketplace for managing Webflow CMS content from inside Bubble workflows.
Bubble manages its own authentication independently. The two platforms do not share session state by default. The recommended pattern is to manage sessions entirely in Bubble and embed authenticated Bubble pages within Webflow layouts via iframe. For more advanced setups, you can implement a JWT gateway where Bubble verifies login credentials and passes signed tokens via URL parameters, as described in this Bubble community thread.
The standard approach uses separate subdomains:
www.yoursite.comfor Webflow andapp.yoursite.comfor Bubble. Running both on the same root domain with DNS creates conflicts, as community reports on the Bubble forum indicate only one service works at a time when both sets of IP addresses are configured. Hosting Bubble at a subdirectory path (likeyoursite.com/app) requires a reverse proxy, which adds significant configuration complexity.Go to Settings > API in your Bubble app editor and enable the Data API. This exposes your database tables as REST endpoints at
https://your-app.bubbleapps.io/api/1.1/obj/{data-type}. Generate an API token on the same settings page. The Data API is for exposing Bubble data to external systems. The API Connector plugin (a separate feature) is for calling external APIs into Bubble. These are two different settings. See Bubble's Data API documentation for endpoint details and authentication requirements. Once enabled, Webflow or an automation layer can read Bubble data through those endpoints according to your privacy rules.
Description
Adds Bubble app pages, user authentication, and database-driven features to Webflow sites through iframe embeds, automation platforms, or direct API calls.
This integration page is provided for informational and convenience purposes only.

Google Docs
Connect Google Docs with Webflow to embed live documents, sync content to CMS Collections, or build custom API publishing pipelines.

Zapier
Connect Zapier with Webflow to automate form routing, CMS updates, and ecommerce order processing across 7,000+ apps.

Airtable
Connect Airtable with Webflow to publish base records as CMS items and route form submissions back into Airtable.

Pipe dream
Connect Pipedream with Webflow to turn form submissions and CMS changes into automated workflows across thousands of connected apps. Orders can trigger workflows too.

Smartarget Contact Us
Connect Smartarget Contact Us with Webflow to add a floating multi-channel contact widget that lets visitors reach you on WhatsApp, Telegram, email, and 12+ messaging platforms.
CMS Bridge
Connect CMS Bridge with Webflow to sync Airtable records to your CMS collections with record-level control over content states and publishing.
Osmo SVG Import
Connect Osmo SVG Import with Webflow to add fully editable SVG elements to your site without character limits or manual code editing.
Telegram Chat - Contact Us
Connect Telegram Chat - Contact Us to your Webflow site to add a floating Telegram chat widget that lets visitors message you directly from any page.
Form Fields Pro
Connect Form Fields Pro with Webflow to add advanced input types, including searchable selects, date pickers, number range pickers, and file uploaders, to native Webflow forms.
Related integrations
Get started for free
Try Webflow for as long as you like with our free Starter plan. Purchase a paid Site plan to publish, host, and unlock additional features.
