Poptin

Conecta Poptin, una herramienta de creación de popups y captura de leads, con Webflow para añadir ventanas emergentes de intención de salida, formularios activados por desplazamiento, superposiciones con cuenta regresiva y campañas con pruebas A/B, todo gestionado desde el panel de control de Poptin.

→
↗
►
↓
←
↑
Instalar aplicación
→
↗
►
↓
←
↑
Ver sitio web
→
↗
►
↓
←
↑
Ver lección
→
↗
►
↓
←
↑
Configuración de registros A
→
↗
►
↓
←
↑
Configuración de registros CNAME
Poptin

Webflow gives you control over layout, content, and hosting, but popup behavior and advanced lead capture usually require an extra tool.

Webflow handles layout, content, and hosting. Popup and overlay behavior requires an external tool. Exit-intent offers and email capture lightboxes require an external tool. Native Webflow forms collect submissions and focus on form capture, while behavioral triggers, display rules, and templates built for conversion live in external tools.

Poptin adds a popup builder and embedded form tool that runs on top of any Webflow site. After a one-time code snippet install, you create and manage all popup campaigns from Poptin's dashboard without returning to Webflow for each new campaign. Poptin handles exit-intent detection, scroll triggers, A/B testing, page targeting, and lead routing to 70+ marketing platforms.

Teams often use this setup to grow email lists, reduce cart abandonment, convert pricing page visitors, or manage popup campaigns across multiple client sites. Anyone who needs overlays focused on conversion on a Webflow site will benefit from this setup.

How to integrate Poptin with Webflow

What is Poptin? Poptin is a popup builder and embedded forms tool that helps website owners capture leads, grow email lists, and reduce cart abandonment. It offers 40+ templates, a drag-and-drop editor, behavioral triggers like exit-intent and scroll depth, and native connections to email marketing and CRM tools. All popup creation, targeting, and analytics happen inside Poptin's own dashboard.
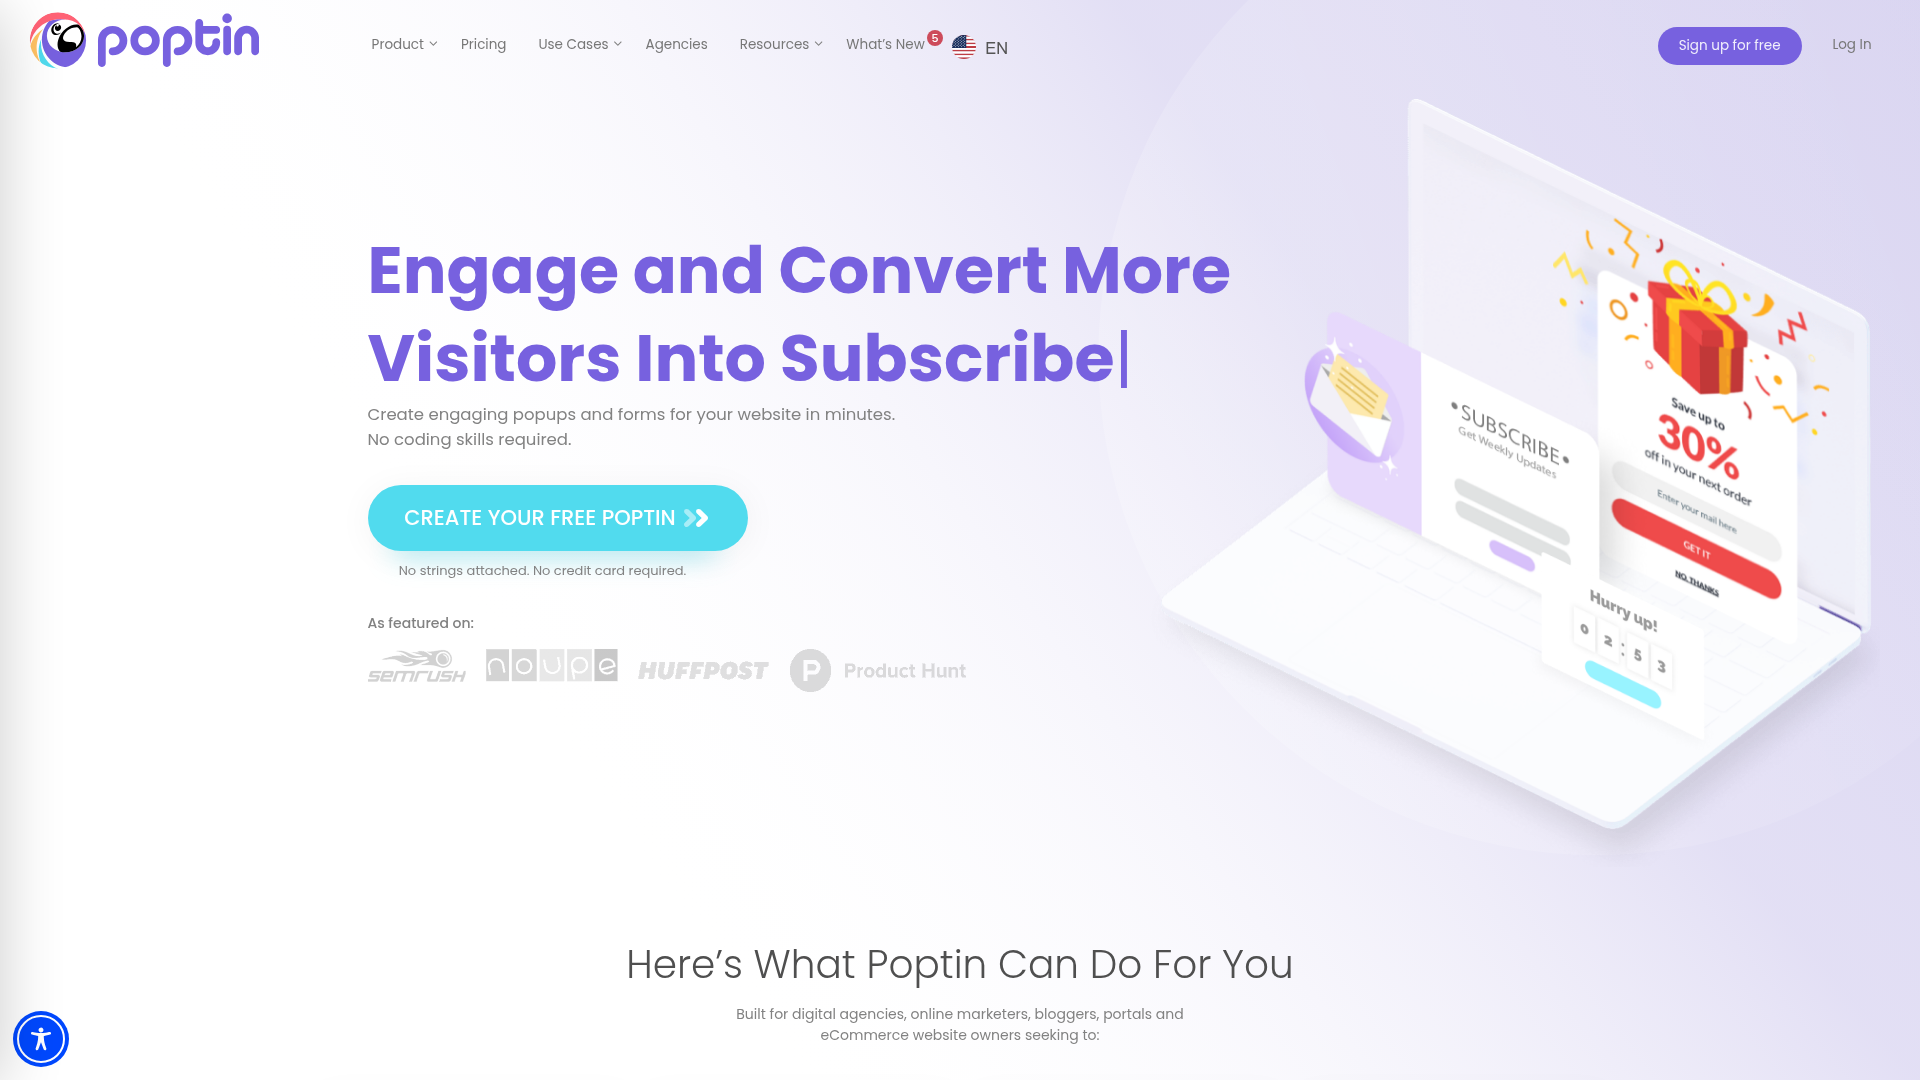
Teams connect Poptin with Webflow when they need overlays that respond to visitor behavior. A Webflow site handles the design and content layer, while Poptin adds lead capture on top. Once the initial snippet is installed, marketers can launch new popups, run A/B tests, and adjust targeting rules without touching site settings again.

You can connect Poptin to Webflow in three ways:

  • Custom code snippets load Poptin site-wide or on specific pages, activating all popup types without any per-page configuration.
  • Code Embed elements place inline Poptin forms at exact positions on the Webflow canvas.
  • Zapier connects Poptin's "New Lead" trigger to Webflow CMS actions or other downstream tools, sending form submissions automatically.

Most implementations combine the site-wide snippet with one or both of the other methods depending on whether inline forms or lead routing automation are needed.

Add Poptin to your site with custom code

Most teams paste Poptin's JavaScript snippet into custom code in head and body tags at the site level. This loads Poptin on every published page, and all popup management happens from the Poptin dashboard afterward. You install the snippet once per domain, and every new popup you create in Poptin appears automatically on your site without further changes. A paid Webflow plan is required, either a paid Workspace plan (Core, Growth, Agency, or Freelancer) or an active paid Site plan, because the free Starter plan does not support custom code. Poptin accounts on any plan, including Free, generate a valid snippet.

To set up site-wide Poptin loading:

  1. Log in to your Poptin dashboard and click Installation Code in the left sidebar.
  2. Select Any Website and copy the JavaScript snippet.
  3. Open your Webflow Dashboard, select your site, and click the gear icon to open Site Settings.
  4. Click the Custom Code tab.
  5. Paste the Poptin snippet into the Footer Code field. Footer placement prevents render-blocking and keeps page load times fast.
  6. Click Save Changes, then click Publish to push the snippet live.

After publishing, you can create and launch popups entirely from Poptin:

  • Choose from lightbox modals, full-screen overlays, slide-ins, floating bars, countdown popups, gamified spin-to-win wheels, and video popups
  • Set behavioral triggers including exit-intent, time delay, scroll depth, page count, inactivity, and on-click
  • Target by URL path, geography, device type, traffic source, new vs. returning visitors, and day/hour scheduling
  • Run A/B tests (or multi-variant A/B/C/D tests) on any popup, available on all plans including Free

Saving in site settings alone does not make changes live. You must also publish. Poptin's snippet is short and will not approach the 50,000-character limit per custom code section.

Scope Poptin to a single page

If you only need popups on specific landing pages, you can add the Poptin snippet to individual page settings instead of site-wide settings.

To add Poptin to a single page:

  1. Open the target page in Webflow.
  2. Open Page Settings for that page.
  3. Scroll to the Custom Code section.
  4. Paste the Poptin snippet into the Before tag field.

  5. Save and publish.

Page-level code applies only to that specific page and renders after any site-wide custom code. You can also skip per-page code entirely by installing the snippet site-wide and using Poptin's built-in page targeting rules to control which URLs display each popup.

Place inline Poptin forms with Code Embed elements

Poptin uses two distinct code types, and confusing them is the most common setup error. The site-wide Installation Code, covered above, activates Poptin's popup engine. A separate per-form embed code places a specific inline form at an exact position on your page. Use this second method when you want a visible, static form embedded in your page layout rather than a triggered popup overlay. This approach works well for newsletter signup sections, contact forms within content blocks, or CTA forms placed between page sections.

[image placeholder]

Poptin uses different code for each purpose. The Installation Code comes from the top-level dashboard. The per-form embed code is generated inside the form builder at Step 3 (Display Rules).

Get the per-form embed code from Poptin

To retrieve the embed code:

  1. In your Poptin dashboard, go to Forms and click New Form.
  2. Select a template and customize the form with the drag-and-drop editor.
  3. Proceed to Step 3: Display Rules.
  4. Copy the unique embed code shown on the right side of the Display Rules screen.
  5. Click Publish changes within Poptin.

Publish the form inside Poptin so it can render on your Webflow site.

Add the form to your Webflow page

To embed the form in Webflow:

  1. Open your page in Webflow.
  2. Open the Add panel (the + icon).
  3. Navigate to Components → Embed and drag the Code Embed element to the desired position on the canvas.
  4. Paste the per-form embed code into the Custom Code modal.
  5. Click Save & Close.
  6. Publish your site.

Publish both the Poptin form and the Webflow site so the form can appear. Code Embed elements support up to 50,000 characters, which is much more than any Poptin form snippet requires. If you want both popups and inline forms, combine this method with the site-wide snippet from the previous section.

Connect Poptin and Webflow with Zapier

Zapier supports direct Poptin-to-Webflow connections. You can send Poptin lead submissions into Webflow CMS collections, email tools, CRMs, or spreadsheets without writing server-side code. Use Zapier when you need new popup leads to appear as Webflow CMS items or trigger downstream workflows.

Zapier has one Poptin trigger relevant here: "New Lead," which fires each time a visitor submits a Poptin popup or form. Webflow's available actions include creating new CMS collection items.

Available triggers and actions:

  • Poptin "New Lead" trigger fires on form submission, passing name, email, phone, message, lead source, conversion page URL, and landing page URL
  • Webflow "Create Item" action writes a new CMS collection item with the lead data
  • Webflow "New Comment" trigger can initiate workflows in the other direction

These are the core Zapier events used in this integration.

To set up a Poptin-to-Webflow Zap:

  1. In Poptin, open your popup editor, go to Email and integrations, click +Add integration, and select Zapier. Copy the API key and note the Poptin ID.
  2. In Zapier, create a new Zap. Select Poptin as the trigger app and choose New Lead. Authenticate with the API key from step 1.
  3. Select your specific popup by name and ID.
  4. Add Webflow as the action app. Choose Create Item and select your target CMS collection.
  5. Map Poptin fields (email, name, phone) to your Webflow CMS collection field slugs.
  6. Test the Zap and turn it on.

If you need more control over how lead data moves, the webhook and API section below covers a custom route.

Build with the Webflow API and Poptin webhooks

For custom data flows beyond what Zapier offers, you can connect Poptin's outbound webhooks directly to a server-side handler that calls the Webflow Data API. This approach requires development resources but gives you full control over field mapping, data transformation, and multi-step workflows.

Poptin does not have a public REST API. Instead, it sends outbound webhook POST requests on every form submission. The Webflow Data API (v2) handles the receiving side, with endpoints for CMS item creation, custom code management, and webhook subscriptions.

Available integration surfaces:

All Webflow API calls require Authorization: Bearer <token> and the appropriate OAuth scopes (cms:write for item creation, custom_code:write for script injection).

Route Poptin leads to a Webflow CMS collection

When a visitor submits a Poptin popup form, the webhook sends a JSON payload containing form fields, lead source, conversion page URL, and landing page URL. Your middleware maps these fields to Webflow CMS collection field slugs and creates a new item.

To implement this:

  1. In your Poptin popup editor, go to Email and integrations, click Add integration, search for Webhooks, paste your middleware endpoint URL, and click Approve. Clicking Approve immediately sends a test payload to your URL.
  2. Retrieve your target CMS collection's field slugs with GET /v2/collections/{collection_id} (requires cms:read scope).
  3. In your middleware, map the incoming Poptin fields to the collection's field slugs and POST to https://api.webflow.com/v2/collections/{collection_id}/items with a fieldData object.
  4. Optionally publish the item by calling POST /v2/collections/{collection_id}/items/publish.

This flow gives you a direct way to write Poptin lead data into a Webflow CMS collection.

The slug field must be unique per collection item. Generate it from the email address plus a Unix timestamp to avoid collisions. CORS restrictions prevent calling the Webflow API directly from client-side JavaScript, so a server-side proxy or serverless function is required.

Inject the Poptin script programmatically

If you manage multiple sites, the Custom Code API lets you register and apply the Poptin script without opening site settings manually.

To inject the script via API:

  1. Register Poptin's CDN script as a hosted script with POST /v2/sites/{site_id}/registered_scripts/hosted (requires custom_code:write scope).
  2. Apply it site-wide with PUT /v2/sites/{site_id}/custom_code. This endpoint uses full replacement, so call GET /v2/sites/{site_id}/custom_code first to retrieve any existing scripts before overwriting.
  3. Publish the site with POST /v2/sites/{site_id}/publish to make the script active.

This method is useful for agencies deploying Poptin across a group of Webflow client sites from a single automation script.

What can you build with the Poptin Webflow integration?

Poptin with Webflow adds behavioral lead capture, targeted promotions, and other engagement elements to any page without building your own popup system.

  • Exit-intent lead capture on pricing pages: Create a lightbox popup that triggers when a visitor moves to leave your SaaS pricing page. The popup offers a free trial or demo signup, and Zapier routes the submission to your CRM and triggers a follow-up email sequence automatically.
  • Scroll-triggered newsletter forms on blog posts: Add a slide-in popup that appears after a reader scrolls 60% through a blog post. Poptin's URL pattern targeting (/blog/*) applies the popup across all Collection List pages without per-page configuration, and submissions flow directly to Mailchimp or ConvertKit through Poptin's native integrations.
  • Countdown promotions for seasonal campaigns: Display a full-screen overlay with a countdown timer during a limited-time sale. Schedule the popup to run only during specific dates and hours using Poptin's date scheduling rules, and remove Poptin branding on paid plans for a consistent brand experience.
  • Agency-managed popup campaigns across client sites: Install the Poptin snippet on each client's Webflow site once, then manage all popup creation, targeting, and A/B testing from a single Poptin Agency account with sub-accounts and user permissions for each client.

If you need more control over lead data flow, such as writing popup submissions into a Webflow CMS collection with custom field mapping, the webhook and API integration path covers those cases with full flexibility.

Preguntas frecuentes

  • Solo tienes que instalar el fragmento de Poptin una vez por dominio. Tras esa configuración inicial, toda la magia de crear, editar, segmentar y publicar popups ocurre dentro del panel de Poptin. Solo tendrás que volver a los ajustes de código personalizado de Webflow si añades un nuevo dominio personalizado que necesite su propio fragmento.

  • Se recomienda colocarlo en el pie de página. Insertar scripts de terceros en la sección de código del pie de página (antes de </body>) evita el bloqueo del renderizado y mantiene la carga de tu página a toda velocidad. La documentación sobre código personalizado explica la diferencia entre colocar el código en el encabezado o en el cuerpo. Si usas el encabezado, añade async o defer a la etiqueta del script para no ralentizar la carga inicial.

  • Sí. El fragmento de código se carga en todas las páginas publicadas, incluidas las de colección y las plantillas. Para mostrar un popup solo en una colección específica, como las entradas del blog, usa las reglas de segmentación por página de Poptin con un patrón de URL como /blog/*. No hace falta tocar el código de cada página.

  • Los formularios de Poptin y los nativos de Webflow van por caminos separados. Las respuestas de Poptin se guardan y gestionan en su propio panel, y se conectan con herramientas externas a través de sus más de 70 integraciones nativas, webhooks o Zapier. El registro de envíos de formularios de Webflow no los incluye. Si necesitas los datos en ambos lados, aprovecha la integración por webhook o Zapier para guardar los leads de Poptin directamente en una colección del CMS de Webflow.

  • ¡Claro que sí! Los tests A/B están disponibles en todos los planes de Poptin, incluido el gratuito. Puedes probar varias versiones (A/B/C/D) de cualquier popup y comparar activadores, diseños, textos y tiempos. Poptin rota las variantes de forma automática entre tus visitantes y te muestra las tasas de conversión de cada una en sus analíticas integradas. No hace falta tocar nada en tu sitio de Webflow para configurar o lanzar estas pruebas.

Poptin
Poptin
Joined in

Descripción

Poptin añade popups de comportamiento, formularios integrados y pruebas A/B a Webflow mediante la instalación de un fragmento de código único. Crea y gestiona campañas desde el panel de Poptin con reglas de intención de salida, desplazamiento y segmentación sin necesidad de volver a Webflow.

→
↗
►
↓
←
↑
Instalar aplicación

Esta página de integración se ofrece únicamente con fines informativos y de conveniencia.


Other Interacción con el cliente integrations

Other Interacción con el cliente integrations

Chatbot de YourGPT

Chatbot de YourGPT

Conecta YourGPT Chatbot, una plataforma de soporte con IA sin código, con Webflow para implementar un agente de IA que responda preguntas y capture clientes potenciales mediante la aplicación o integraciones.

Interacción con el cliente
Más información
Contexto completo

Contexto completo

FullContext ofrece una solución de JavaScript integrable que gestiona interfaces conversacionales mediante un único fragmento de código, eliminando la necesidad de crear una infraestructura de chat o mantener lógica de validación de formularios.

Interacción con el cliente
Más información
ManyChat

ManyChat

Conecta ManyChat, una plataforma de marketing conversacional y automatización de mensajes, con Webflow para dirigir los envíos de formularios hacia flujos de mensajería y activar conversaciones en Instagram, Messenger y WhatsApp.

Interacción con el cliente
Más información
Unbounce

Unbounce

Unbounce y Webflow funcionan juntos mediante un script de ventana emergente, un CNAME de subdominio y la sincronización de leads a través de Zapier o webhooks. Aquí te explicamos qué cubre cada método y qué no.

Interacción con el cliente
Más información
Zendesk Chat (Zopim)

Zendesk Chat (Zopim)

Añade el widget de Zendesk Messaging a Webflow mediante un fragmento de código en el pie de página para ofrecer chat en vivo, respuestas de agentes de IA y soluciones del centro de ayuda en tus páginas de marketing.

Interacción con el cliente
Más información
Zendesk

Zendesk

Conecta Zendesk, una plataforma de atención al cliente basada en la nube, con Webflow para añadir chat en vivo, mensajería asistida por IA y creación de tickets a cualquier página de tu sitio.

Interacción con el cliente
Más información
Foro de Website Toolbox

Foro de Website Toolbox

Conecta Website Toolbox Forum, una plataforma de discusión comunitaria alojada, con Webflow para integrar foros con hilos, gestión de usuarios y herramientas de moderación en cualquier página sin necesidad de código backend.

Interacción con el cliente
Más información
UserVoice

UserVoice

Conecta UserVoice con Webflow para recopilar solicitudes de funciones, votos y actualizaciones de tu hoja de ruta directamente en tu sitio.

Interacción con el cliente
Más información
Trustpilot

Trustpilot

Conecta Trustpilot, una plataforma de reseñas independiente, con Webflow para mostrar widgets TrustBox en páginas clave y enviar invitaciones a dejar reseñas mediante integraciones o API.

Interacción con el cliente
Más información

Integraciones relacionadas

No se encontraron elementos.

Empieza gratis

Prueba Webflow todo el tiempo que quieras con nuestro plan Starter gratuito. Compra un plan de sitio de pago para publicar, alojar y desbloquear funciones adicionales.

Empieza, es gratis