


Webflow natively supports Stripe in its Ecommerce checkout, but that's not the only way to accept payments. If you're collecting money for a service, a digital product, or a one-off sale, there's a faster path.
"I just want to take payments. Do I need to set up the full Ecommerce store?" The answer is no, and that's one of the most useful things to know before you start.
Stripe has two ways to connect to a Webflow site, and which one you use depends on whether you need a full shopping cart with product pages or just a clean way to take payment from a button on a landing page.
This guide walks through both approaches, including the prerequisites, exact steps, and troubleshooting fixes for the most common errors that occur during setup.
2 ways to add Stripe Checkout to Webflow, and when to use each
There's no single "Connect Stripe" button in Webflow that handles every payment scenario. The right approach depends on whether you need a full shopping cart, a shareable payment link, or an embeddable checkout button.
The two methods are:
For most builders and service providers, Method 1 (Payment Links) is the fastest path to a working checkout. You skip the Ecommerce plan entirely, go live in under 20 minutes, and still get Stripe's full checkout experience: PCI-compliant, multi-currency, with Apple Pay and Google Pay enabled by default.
The main trade-off is that customers click away to Stripe's hosted checkout page instead of completing payment on your site. Method 2 uses the same hosted checkout but gives you a styled, branded button that renders directly on your page instead of a plain link.
The trade-off is that it requires pasting embed code, and the button's styling options are more limited than those of a fully custom design.
The walkthrough below covers both methods in the order most people need them.
What do you need to connect Stripe to Webflow?
Two things: a verified Stripe account and a paid Webflow site plan. That's it. No Ecommerce plan, no custom code, no third-party plugins. Both methods in this guide work with Webflow's Basic plan ($14/month) and up.
Before running through any of the methods, verify these two prerequisites. Both are common blockers, and neither one takes more than a few minutes to sort out.
A fully verified Stripe account
A partially configured Stripe account processes test payments but silently fails on live ones. Stripe requires identity verification, business information, and a linked bank account before real charges go through.

To verify your account status: log into your Stripe Dashboard, click the bell icon in the top right, and check for any outstanding requirements. If you see items like "Add business details" or "Provide bank account for payouts," complete those before testing with a real card.
The Webflow integration itself connects without issue. But the first live purchase will fail if Stripe hasn't approved your account.
For client work, use a Google account and a Stripe account that the client controls in the long term. Stripe keys are tied to the account that generated them, and rotating them later means updating both the Stripe dashboard and Webflow settings simultaneously.
The right Webflow plan for your use case
If you're using Method 1 (Payment Links) or Method 2 (Buy Button), any paid Webflow Site Plan works: Basic and above. No Ecommerce plan needed.
The Plus plan ($74/month, billed annually) removes the Webflow transaction fee and increases your product limit to 5,000 items. For stores doing more than roughly $2,250/month in sales, upgrading to Plus pays for itself through the fee savings alone.
Method #1: Using Stripe Payment Links (no Ecommerce plan required)
Payment Links is Stripe's no-code approach: you create a hosted checkout page in the Stripe Dashboard, copy the URL, and paste it onto any button or link in Webflow. Customers click the button, land on Stripe's secure checkout page, and complete payment there. No custom code, Ecommerce plan, or cart to configure.
The checkout page supports 40+ payment methods (cards, Apple Pay, Google Pay, local payment methods) and 135+ currencies, with Adaptive Pricing automatically presenting local currency to customers in 150+ countries.
For service businesses, agencies, consultants, and anyone selling a defined SKU without needing an on-site cart, this is the fastest path from zero to live payments.
Step #1: Create a product and payment link in Stripe
Log in to your Stripe Dashboard and navigate to Payments → Payment Links in the left sidebar (or go directly to dashboard.stripe.com/payment-links).

Click + Create test payment link.
On the Payment page tab, click + Add a new product to define what you're selling.
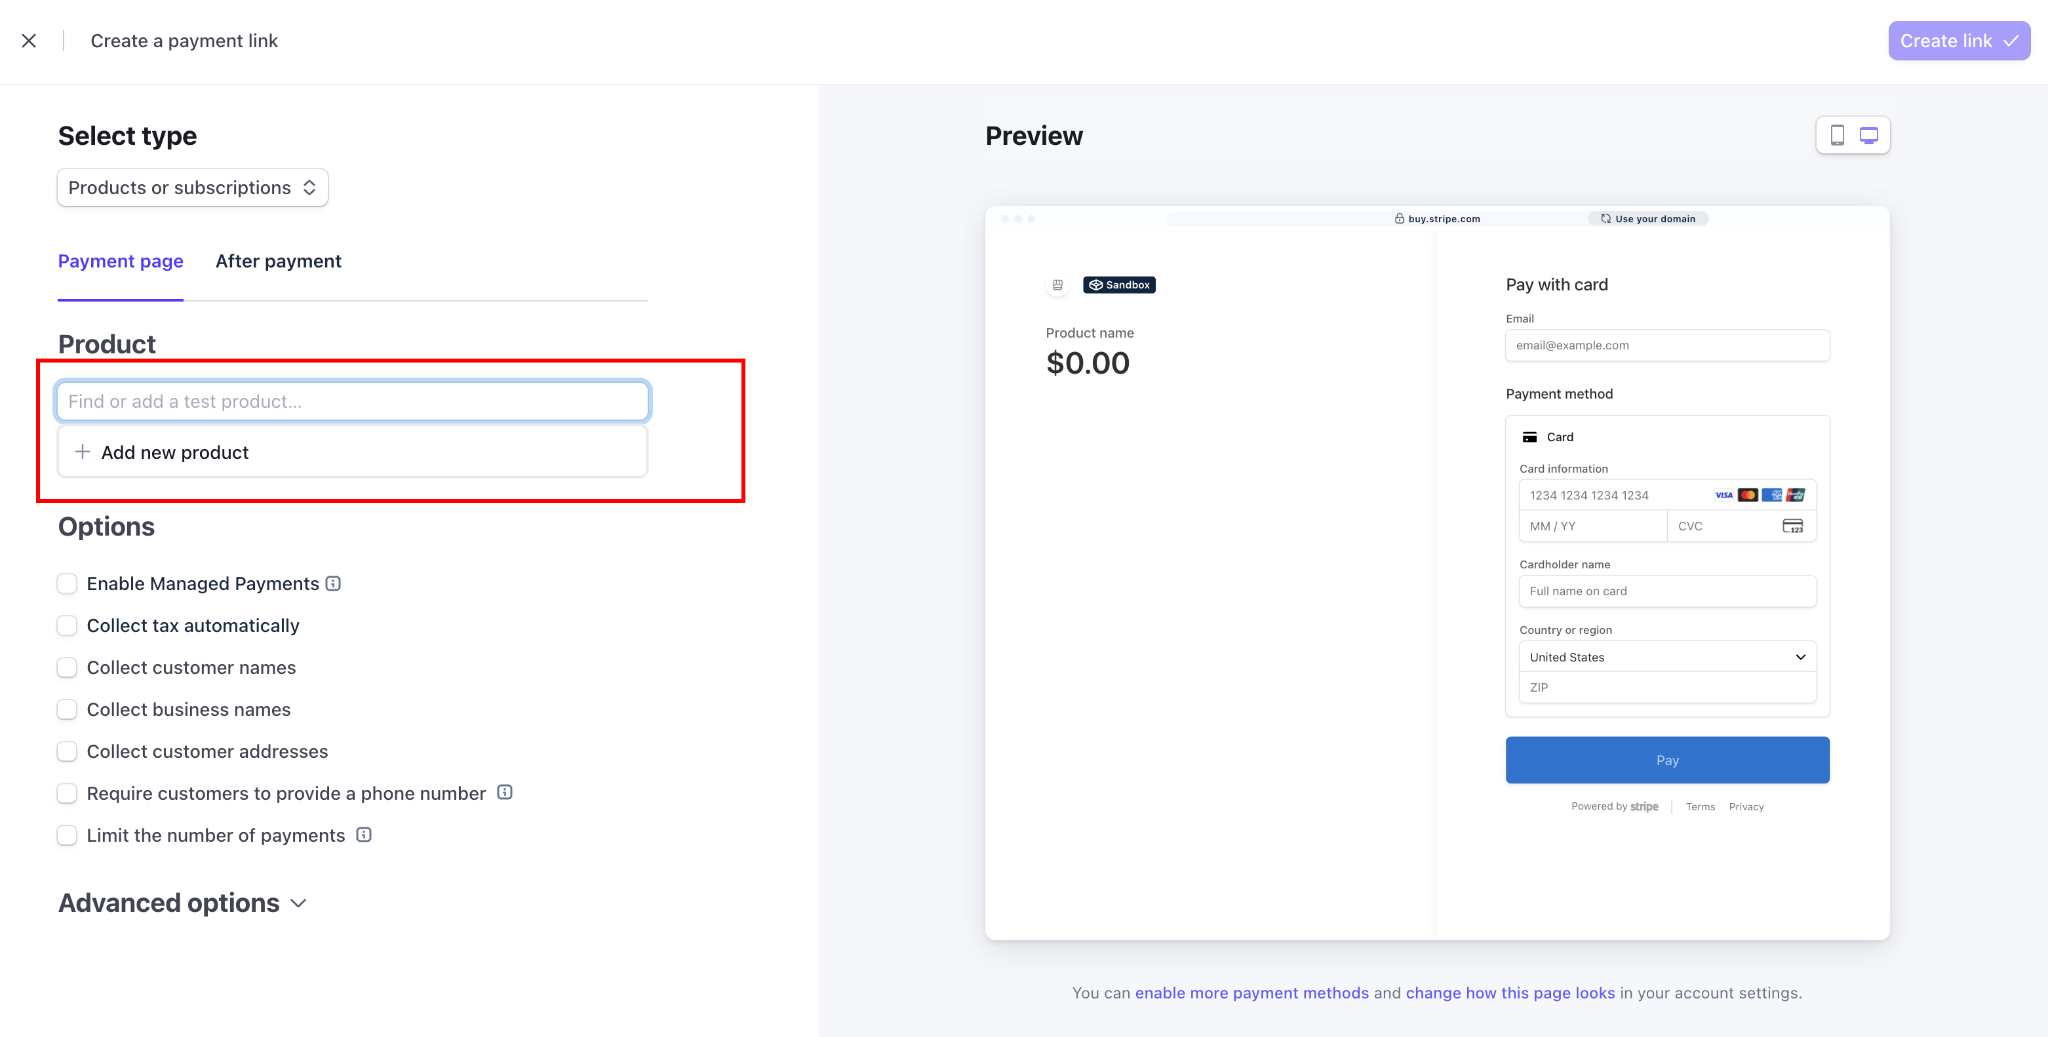
Enter the product name, price, and payment type:
- One-time payment: A fixed amount charged once: consultations, digital downloads, event tickets
- Recurring payment: A subscription charged on a set interval: monthly retainers, memberships, SaaS plans
After defining your product, you can redirect customers to a URL on your Webflow site (recommended as this keeps the experience consistent) or show Stripe's default confirmation page.
Click Create link. Stripe generates a URL that looks like buy.stripe.com/xxxxx.
To send customers to a confirmation page on your Webflow site after payment, click After payment in the Payment Link builder and enter your Webflow URL. Without this, Stripe shows its default confirmation screen.
Before going live, return to the Stripe Dashboard and toggle from Test mode to Live mode (top-right switch). Recreate the payment link in live mode; test links and live links are separate. Your live link will have a different URL starting with buy.stripe.com.
Step #2: Add branding to your Stripe checkout page
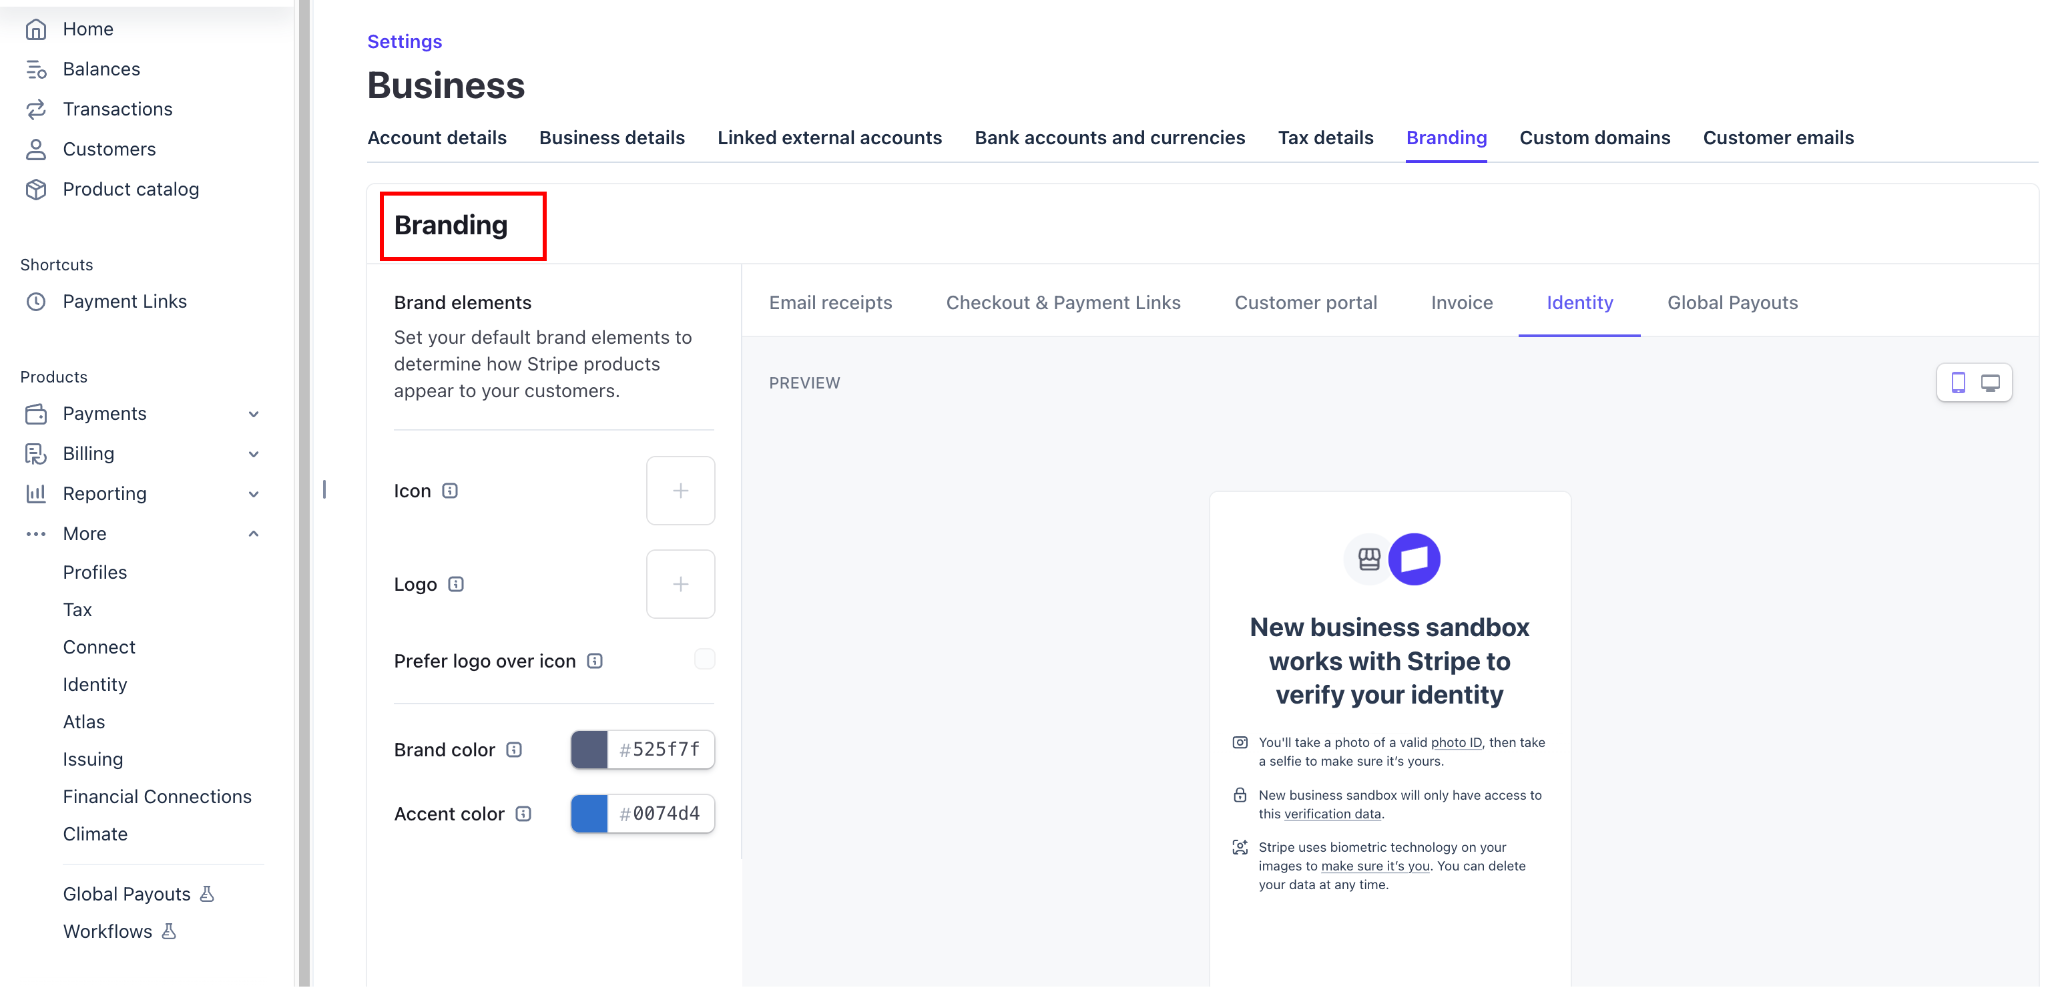
Before pasting the link anywhere on Webflow, spend two minutes on the Stripe checkout branding. Go to Settings in your Stripe Dashboard (gear icon in the top right), then scroll to the Business settings section and click Branding.
Upload your logo, set your brand color, and configure your business name. These appear on the hosted checkout page that your customers will see.
This matters more than it sounds. A checkout page without a logo and a generic Stripe header visually disconnects it from your Webflow site, increasing abandonment. Customers who aren't expecting to leave your site need immediate visual reassurance that they're still there.
Step #3: Paste the link into a Webflow button
In your Webflow project, select the button or link element that should trigger checkout.
In the Settings panel for that element, paste your Stripe Payment Link URL into the URL field. Set the link to open in a New Tab if you want customers to return to your Webflow page after payment; set it to the Current Tab if you're redirecting them to a confirmation page on Webflow afterward.
Publish your site and test the flow using a real device. The payment link is a live URL as soon as Stripe creates it.
Method #2: Stripe Buy Button (embedded on-page checkout)
Stripe's Buy Button embeds a branded, styled purchase button directly on a Webflow page via a code embed. Like Payment Links, clicking the button redirects customers to Stripe's hosted checkout page to complete payment.
The difference from Method 1 is that the button itself is a Stripe-rendered component — its appearance is configured in Stripe's dashboard (colors, shape, font, and label), not in Webflow's Designer. This keeps the button visually consistent with the hosted checkout page, but means you can't style it from within Webflow.
Step #1: Generate the Buy Button in Stripe
In your Stripe Dashboard, go to Payments → Payment Links. Select an existing Payment Link (or create one following Method 1), then click the Buy button from the link's detail page.
Stripe's Buy Button builder lets you choose between a simple button and a card widget layout, and customize the brand colors, shapes, fonts, and call-to-action label.
Once configured, click Copy code. The snippet looks like this:
<script async
  src="https://js.stripe.com/v3/buy-button.js">
</script>

<stripe-buy-button
  buy-button-id="buy_btn_XXXXXXXXXXXXXXXX"
  publishable-key="pk_live_XXXXXXXXXXXXXXXXXXXXXXXXXXXXXXXX"
>
</stripe-buy-button>
Two important notes: the buy-button-id and publishable-key values in this snippet are specific to your account and product. Copy the generated code directly from Stripe.
Step #2: Embed the code in Webflow
In your Webflow Designer, add an Embed element (found in the Elements panel under Components) to the page where you want the button to appear. Paste the Buy Button code into the Embed element's code field. Click Save & Close.
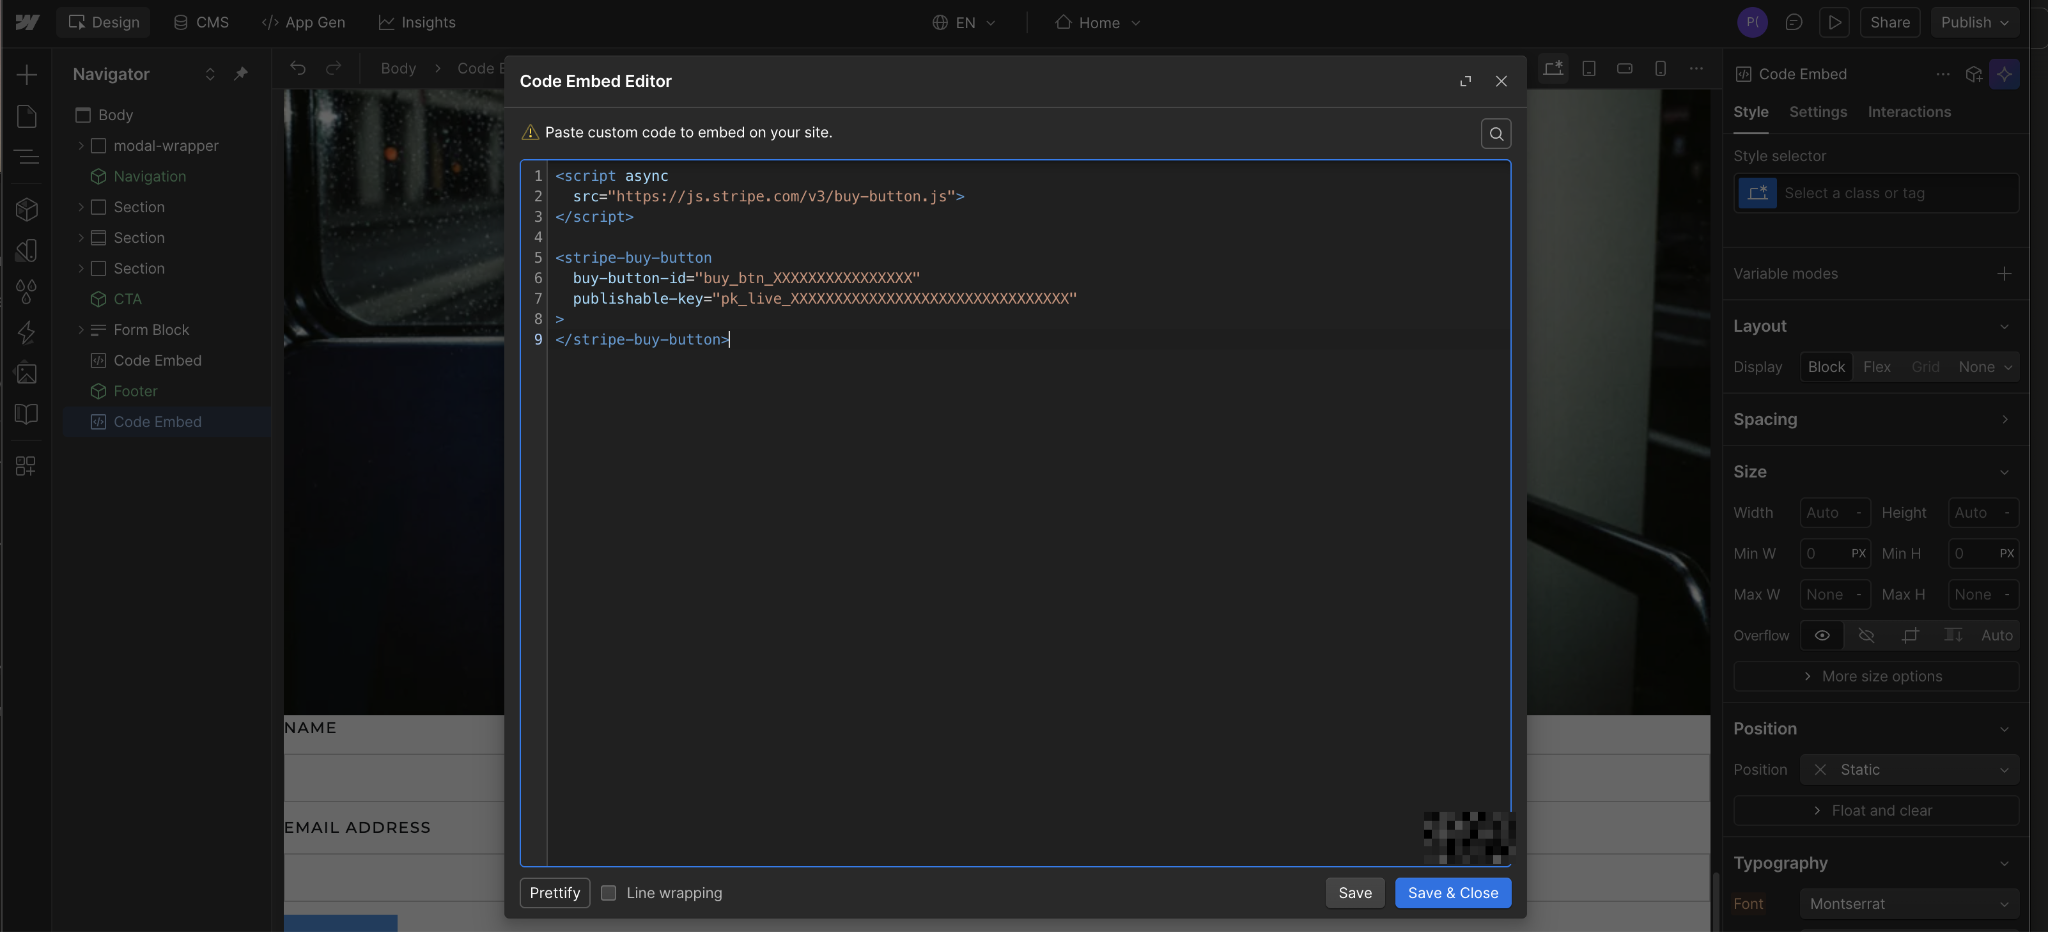
The embed won't render inside the Designer preview; you'll see a gray placeholder. Publish your site and view the live page to confirm the Buy Button renders and redirects to Stripe's hosted checkout page correctly.
What causes Stripe checkout to fail on Webflow?
Most Stripe checkout failures in Webflow trace to one of two root causes: an incomplete Stripe account that passes test mode but blocks live payments, or a plan and settings mismatch in Webflow Ecommerce.
Here are the causes behind it and the fixes that consistently resolve it.
Incomplete Stripe account verification
This is the most common root cause, especially for new accounts. Stripe requires verified identity, business information, and a linked bank account before processing live payments. A test-mode purchase succeeds because test mode bypasses verification, but live payments fail silently.
Fix: In your Stripe Dashboard, click the bell notification icon and resolve any items listed as outstanding requirements. Look for prompts to verify your identity, add a tax ID, or confirm business details.
Once Stripe confirms your account is fully activated, run another live test.
"Connect Stripe" is shown, but checkout still isn't live
Connecting Stripe in payment settings is a prerequisite, not the full activation. For Webflow Ecommerce, you also need to add an Ecommerce site plan and enable checkout from the Ecommerce settings. The Stripe connection without a plan in place means the checkout page exists visually, but isn't active.
Fix: Confirm your project has an active Ecommerce Site Plan (check from the site settings in the Webflow Dashboard). Then, in the Designer, go to Settings panel → Ecommerce → Checkout and confirm checkout is enabled. Both conditions must be true for live checkout to work.
Explore Webflow's full Stripe integration
Stripe is one piece. The full Webflow payments ecosystem also covers PayPal, Apple Pay, and shop management tools that connect directly into the Designer.
Explore Webflow-Stripe integration for a full range of approaches, including the Stripe App (built by Flowout), which lets you manage Stripe products and payment links directly in Webflow's visual editor without switching between dashboards.
Explore Webflow + Amazon Pay if you’re looking for Amazon's one-click checkout experience alongside existing Stripe or PayPal flows.
Browse Webflow's payment processing integrations for the full range of payment options available on Webflow, including regional processors like Mollie (EEA), Razorpay (India), and KOMOJU (Japan and Korea).
Frequently asked questions
Do I need a Webflow Ecommerce plan to accept Stripe payments?
No. Stripe Payment Links and the Stripe Buy Button work with any paid Webflow Site Plan: Basic and above. The Webflow Ecommerce plan is only required if you want Webflow's native cart and checkout system, including product pages, a shopping cart, order management, and built-in confirmation emails. If you're collecting payments for a service, consulting work, digital product, or event ticket, Payment Links handles it all without an Ecommerce plan.
What is the 2% transaction fee on Webflow Ecommerce Standard?
It's a Webflow platform fee applied to the Standard Ecommerce plan, charged on top of Stripe's own processing fee. Stripe's standard processing fee in the US is 2.9% + 30¢ per successful card charge. On the Standard plan, Webflow adds 2% to that. The Webflow fee disappears on the Plus and Advanced plans.
Can I accept recurring payments (subscriptions) through Webflow?
Yes, via Stripe Payment Links. In the Stripe Dashboard, create a Payment Link with a recurring price (monthly, yearly, or custom interval) and paste it into a Webflow button. Stripe manages the billing cycle, failed payment retries, and customer notifications automatically. Customers can update or cancel through Stripe's hosted customer portal.
Does Stripe checkout work on Webflow's free plan?
No. Stripe Payment Links technically work on any published Webflow page, including free plan .webflow.io subdomains. The practical limitation is that the free Starter plan restricts you to 2 pages and a Webflow subdomain (not a custom domain), which isn't appropriate for a live checkout flow. Any paid Webflow Site Plan (Basic and above) gives you a custom domain and full publishing access.


