






Clip Path Bae
Connect Clip Path Bae with Webflow to clip images, divs and other elements into polygon, circle, ellipse or custom SVG shapes without writing code.

You can't draw a clip shape over an image or div in the Style panel. You can type a clip-path value into Custom properties, but you work out the coordinates yourself, and Custom properties don't accept vendor-prefixed properties such as -webkit-clip-path. A common workaround is a transparent PNG exported from Figma. PNGs with transparency are often large files, and you re-export one for every revision. Clip Path Bae by Web Bae closes that gap from inside Webflow.
With the app installed, you select an element on the canvas and pick a polygon, circle or ellipse. You drag points to adjust it, then click Clip it. The app writes the clip path onto the element as an inline style. The built-in shape ships as CSS and scales with the element. You can also import custom SVGs from Figma or Illustrator, including multi-path files. The app inserts them as hidden DOM elements and normalizes their coordinates so they stay proportional at any size. Webflow interactions and custom code can then animate the clipped element.
Designers who build from Figma or Illustrator comps can get the most out of this integration. For them, a custom shape becomes a file upload instead of a coordinate list. Agency and freelance teams handling client revisions can benefit too. A shape change requires a CSS edit and avoids exporting a new image. Interaction designers can use it as the starting point for hover and scroll effects on clipped elements.
How to integrate Clip Path Bae with Webflow
What is Clip Path Bae? Clip Path Bae is a free Webflow App published by Keegan Leary of Web Bae that applies CSS clip paths to images, divs and other elements. It ships pre-built polygon, circle and ellipse shapes and accepts custom SVG files from Figma or Illustrator, including multi-path SVGs. It writes each clip as an inline style and converts SVG coordinates to relative values, so shapes scale with the element.
The clip lives on the element as a style attribute, so it also works on images bound to the Webflow CMS. Put the clipped image inside a Collection List and every item renders the same element with the same clip. The coordinates are relative, so the shape stretches to each image's box. Give the images one fixed aspect ratio and every item shows the same proportions.
The Clip Path Bae app handles shape selection, point editing and SVG import inside Webflow without code. Once an element is clipped, Webflow interactions or custom code can animate it. Developers who want reusable clip-path classes or scripted deployment work with the Webflow APIs directly, because Clip Path Bae's listing documents no API of its own.
Install the Clip Path Bae app
Installing Clip Path Bae adds it to the Apps panel, where it opens in an App window on the canvas. Its Marketplace listing marks it as approved by Webflow and priced Free. The listing names two App capabilities, "Access site data" and "Designer workflow". You need the Site manager or Designer site role to install or uninstall it. Per the Webflow Apps overview, authorizing the app for a Workspace covers every current and future site in that Workspace, while authorizing for a single site keeps the scope narrow.
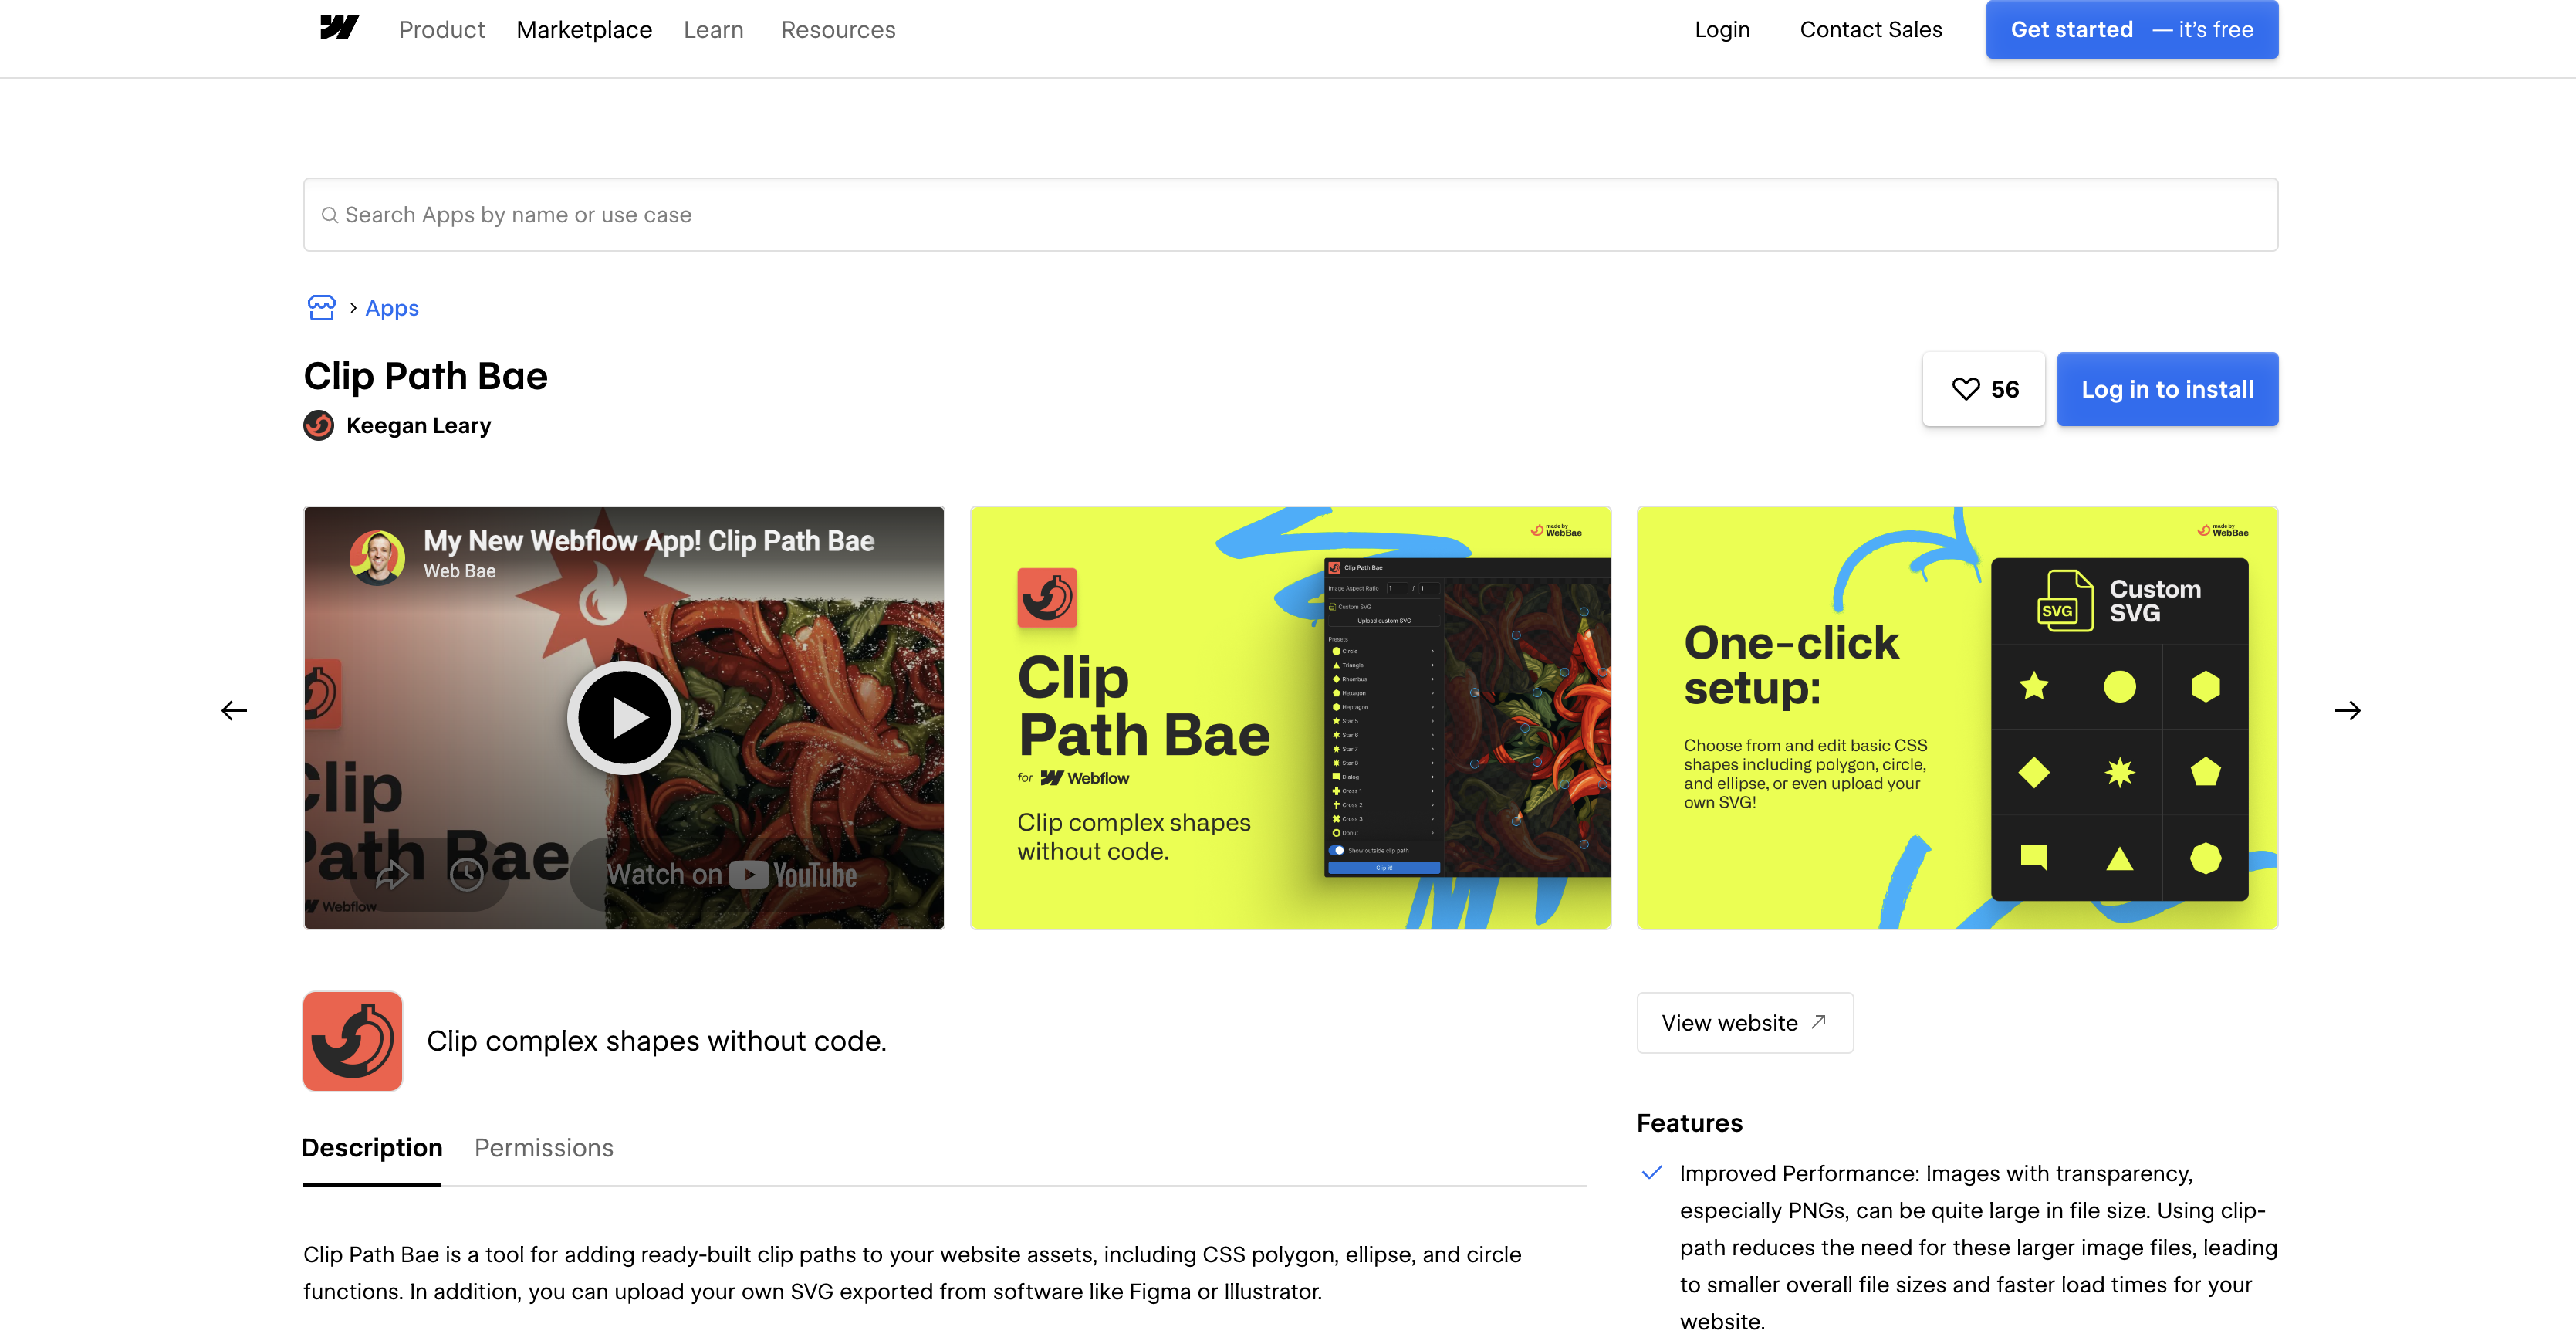
To set up the integration:
- Open the Clip Path Bae listing on the Webflow Marketplace and click Add to site.
- Select the Workspaces or sites that should have access.
- Click Authorize app.
- Click Go to "Clip Path Bae" on the pop-up banner.
- In Webflow, open the Apps panel from the left toolbar (shortcut E), hover over Clip Path Bae, and click Launch.
As an alternative to step 1, search for the app directly in the Apps panel and click Install on site.
Once it is installed, the App window gives you these controls:
- Pre-built shapes: The app ships polygon, circle and ellipse clip paths, and you can drag the points of a shape to adjust it.
- Custom SVG upload: You can load an SVG exported from Figma or Illustrator, including files with multiple paths.
- Coordinate conversion: The app converts absolute SVG coordinates to relative values, so the shape scales with the element.
- Preview aspect ratio: You set an aspect ratio for the preview so it matches the target image before you apply the clip.
The next two sections walk through the pre-built route and the custom SVG route.
Clip with a pre-built shape
The fastest path is one of the bundled shapes, which the app writes to the selected element as an inline clip-path style. Web Bae's launch walkthrough video shows a star applied to a "fire badge" image, then dragged into an irregular shape.
- Select the image or div on the canvas.
- In the App window, pick a shape from the pre-built list.
- Set the preview aspect ratio to match the element, for example 1:1 for a square image.
- Drag any points you want to move.
- Click Clip it.
Import a custom SVG from Figma or Illustrator
For shapes that no polygon editor will produce, export an SVG from Figma or Illustrator and load it through the app. The app inserts the SVG into the page as hidden DOM elements and points the element at it through a custom clip-path attribute whose URL references the SVG element ID. The walkthrough demonstrates this with a "spots" pattern cut into a chili-pepper image.
To clip with a custom SVG:
- Select the target element on the canvas.
- In the App window, click custom SVG and choose the file.
- Click Clip it.
Multi-path SVGs work, and the app normalizes the coordinates so the mask holds its proportions at any image dimension.
Animate clipped elements with interactions and Code Embed
A clip path is a CSS property, and MDN's clip-path reference lists it as animatable when both values are basic shapes. Clip Path Bae's listing notes that clipped elements can take hover effects, transitions and animations, and the launch walkthrough mentions animating clip paths with CSS and JavaScript. Webflow interactions animate the clipped element as a whole, and the custom code recipe further down changes the shape itself.
Animate scale and reveal with Webflow interactions
Moving, scaling or fading a clipped element needs no custom code, because the clip travels with the element. Web Bae's Lightning Demo on Made in Webflow shows this: its bolts carry inline polygon clip paths, and a page-load interaction moves them, with no Code Embed on the page.
To add a reveal on scroll:
- Clip the element with the app as described above.
- Select the clipped element and open the Interactions panel.
- Add a Scroll trigger and animate scale or opacity on the element.
- Preview, then publish.
Webflow's interactions docs advise against running CSS transitions and interactions on the same element and property, so keep the clip-path transition from the next section off any element an interaction animates.
Add transitions and morphs with custom code
Hover transitions and shape morphs need CSS or JavaScript. Custom code requires a Core, Growth, Agency or Freelancer Workspace, or an active Site plan. Each Code Embed element holds up to 50,000 characters. Site-wide CSS belongs in the head section described in Webflow's guide to head and body code. Each section allows 50,000 characters, and code goes live only after publishing.
The app's inline clip-path overrides any clip-path in a class, so set transitions in the class and change the shape inline with JavaScript. To add a hover transition:
- Give the clipped element a class in the Style panel, for example
clipped-hero. - Drag a Code Embed element onto the page, or open Site settings > Custom code.
- Add CSS that transitions
clip-pathon the class:
<style>
.clipped-hero {
  transition: clip-path 400ms ease;
}
</style>
- For a morph, swap the inline value with JavaScript. Keep the same number of coordinate pairs as the starting shape.
<script>
const hero = document.querySelector('.clipped-hero');
const startShape = 'polygon(0 0, 100% 0, 100% 100%, 0 100%)';
const endShape = 'polygon(10% 0, 90% 0, 100% 100%, 0 100%)';

hero.addEventListener('mouseenter', () => {
  hero.style.clipPath = endShape;
});

hero.addEventListener('mouseleave', () => {
  hero.style.clipPath = startShape;
});
</script>
Replace both values with polygons that match the point count of the shape the app wrote.
- Publish the site to see the effect live.
Per MDN's basic-shape reference, two polygons only interpolate when they share a fill rule and the same number of coordinate pairs; otherwise the change is a hard cut.
Build with the Webflow APIs around Clip Path Bae output
Clip Path Bae works inside Webflow, but the same CSS is reachable through Webflow's own APIs. The Designer API style properties list clip-path as a string property, with circle(50%) as the example. On the server side, the Data API custom code endpoints apply registered scripts to sites and pages, and the same API handles CMS collections. Webflow webhooks fire site_publish and collection_item_* events for post-publish checks and CMS-driven workflows.
Apply clip paths from a Designer Extension
Clip Path Bae's listing documents no public API, webhooks or developer docs. The walkthrough shows the app writing an inline style attribute and, for custom SVGs, a hidden SVG element, and neither source says which Webflow APIs it calls internally. For programmatic control you work with the Webflow APIs directly. Use your own Designer Extension or a server-side Data Client app. This path suits developers who want to apply reusable clip-path classes or deploy animation scripts across many elements. Developers can also ship animation scripts to several sites this way.
You first register and build your own Designer Extension App. A Designer Extension runs as client-side JavaScript in an iframe. It can write clip-path to a class, which is what Style panel Custom properties do by hand. Unlike the app's inline styles, this route creates a reusable class and supports breakpoint and pseudo-state options.
To apply a clip path through the Designer API:
- Get the target element with
webflow.getSelectedElement(), which needs thecanAccessCanvasability. - If you are working with a custom SVG clip, read the app's clip-path attribute with
element.getCustomAttribute(name). - Create or fetch a class with
webflow.createStyle(name)orwebflow.getStyleByName(name). - Set the desired value with
style.setProperty("clip-path", "circle(50%)", { pseudo: "hover" }), or usebreakpointwith values like"medium"or"small". - Apply the class with
element.setStyles([style]).
Each method lists its own App Modes requirements. createStyle and setProperty need design mode on the canvas, and createStyle also needs the primary locale. Writing custom attributes needs the canDesign ability, which requires the primary locale, main branch and design mode per the app modes reference.
Ship animation scripts for app-clipped elements with the Data API
Some animation scripts have to reach elements Clip Path Bae already clipped across several sites or pages. A Data Client app can register such a script once and apply it by API instead of pasting it into each Code Embed. The custom_code:read and custom_code:write scopes are limited to Data Client apps, so site tokens cannot use these endpoints.
To deploy a script server-side:
- Register it with POST
https://api.webflow.com/v2/sites/{site_id}/registered_scripts/inlinefor inline code up to 2000 characters, or POST/v2/sites/{site_id}/registered_scripts/hostedfor a hosted file. - Attach it with PUT
/v2/sites/{site_id}/custom_codefor the whole site, or PUT/v2/pages/{page_id}/custom_codefor one page. Any script omitted from the PUT body is removed. - Publish with POST
/v2/sites/{site_id}/publish. - Subscribe to the
site_publishwebhook to run a visual check on clipped elements after each publish.
To strip every script your app applied to a site in one call, use DELETE /v2/sites/{site_id}/custom_code, documented under remove app-applied scripts. It leaves the site's registered scripts in place.
What you can build with Clip Path Bae and Webflow
These builds use the app for the shape and Webflow for everything around it.
- Shaped hero sections: Clip a landing-page background image to a diagonal or polygon so the hero reads as a designed shape instead of a rectangle. A community diagonal layouts template on Made in Webflow combines Clip Path Bae with Section Divider Bae for this layout.
- CMS-driven portfolio galleries: Apply one shape to the image inside a Collection List and every item the content team adds inherits it. The clip uses relative coordinates, so it follows each CMS image's box.
- Badges and textured cutouts without PNGs: Replace a transparent badge or texture overlay with a clipped element, as the launch walkthrough does with a star on a fire badge image and a custom spots SVG on a chili-pepper photo.
- Scroll and hover reveals: Pair a clipped element with an interaction or a Code Embed script for motion, in the style of Web Bae's Lightning Demo described above.
For the scripted side of these builds, read our custom code API guide. To set up reusable classes without writing a Designer Extension, connect an agent to Webflow's MCP server, which can create classes and build styles from raw CSS on your site.
Frequently asked questions
No. The Clip Path Bae Marketplace listing prices the app as Free and names no plan requirement. A plan comes into play when you add custom code for animation: Code Embed and the head and body custom code sections require a Core, Growth, Agency or Freelancer Workspace, or an active Site plan, per Webflow's Custom code embed article.
Yes. Clip Path Bae writes the clip onto the element as a style attribute, so a clipped image inside a Collection List item carries the same clip on every item. The coordinates are relative, so the shape stretches to each image's box. Give the images a fixed aspect ratio and every item shows the shape at the same proportions.
Yes, for motion on the clipped element. A Webflow interaction can move, scale or fade it without custom code, as Web Bae's Lightning Demo does with a page-load interaction. To change the shape itself, use custom CSS or JavaScript. MDN's basic-shape reference notes that two polygons only interpolate when they share a fill rule and the same number of coordinate pairs; otherwise the change is a discrete jump.
Clipped elements are expected to stay on the page, because elements an App added remain after you revoke it (per Webflow's Apps overview). Webflow removes custom code the App added at the next publish. Test a publish on a staging site to confirm the clips and hidden SVGs persist. To remove the app, go to Site settings > Apps & integrations > Revoke, or open the Apps panel, click the app and choose Remove app.
Team members with the Site manager or Designer site role can install and uninstall Apps. The Site roles and permissions article also limits custom code access to those two roles. Limited designer, Designer (needs approval), Marketer, Content editor and Reviewer cannot install Apps at the site level. At the Workspace level, the Workspace roles article allows every role except Reviewer to install Apps. Once your role is set, start from the Clip Path Bae listing and click Add to site.
Description
Install the Clip Path Bae app to apply pre-built or custom SVG clip paths to images, divs and other elements. Animate the clipped shapes with interactions or custom code.
This integration page is provided for informational and convenience purposes only.

Iconik
Connect Iconik, a cloud-based media asset management platform, with Webflow through custom API integration to sync video libraries and asset metadata to CMS collections.

Section Divider Bae
Connect Section Divider Bae with Webflow to add responsive SVG section dividers to your pages without writing code.

Spline
Connect Spline with Webflow to add interactive experiences to your website.

Amazon CloudFront
Serve large S3-hosted media through CloudFront on Webflow pages and purge the edge cache automatically on publish.
Frame.io
Connect Frame.io with Webflow to automate video publishing workflows from review approval to web publication.

Google Drive
Connect Google Drive, a cloud storage and file management platform, with Webflow to embed live documents, host downloadable files, and build CMS-driven resource libraries that update without republishing.

Lordicon
Connect Lordicon with Webflow to add animated icons that respond to pointer and scroll interactions without building animations from scratch.

Lottieflow
Connect Lottieflow, a free Lottie animation library by Finsweet, with Webflow to add customizable JSON animations to pages using the native Lottie element, interaction triggers, and CMS-driven playback.

Rive
Connect Rive, an interactive experience engine for real-time vector animation, with Webflow to add reactive animations using the native Rive element or embeds.
Related integrations
Get started for free
Try Webflow for as long as you like with our free Starter plan. Purchase a paid Site plan to publish, host, and unlock additional features.
