


You know the drill. You need to pull CMS data into another app, audit your collections, or build a shared Postman collection your team can actually use.
The usual path: dive into the Webflow API docs, find the right endpoints, sort out authentication, construct the request, hit send, debug whatever's wrong, repeat.
It works, but it's friction nobody asked for. And there's a better way.
The Webflow MCP server is now available in Postman's agent mode—and it changes that workflow entirely.
What this means in practice
The Webflow MCP server (MCP is a standard that lets AI agents discover and call APIs) exposes the full Webflow API as tools that Postman's agent can use. This combination enables developers to use AI to build, test, and manage the Webflow APIs from a single place.
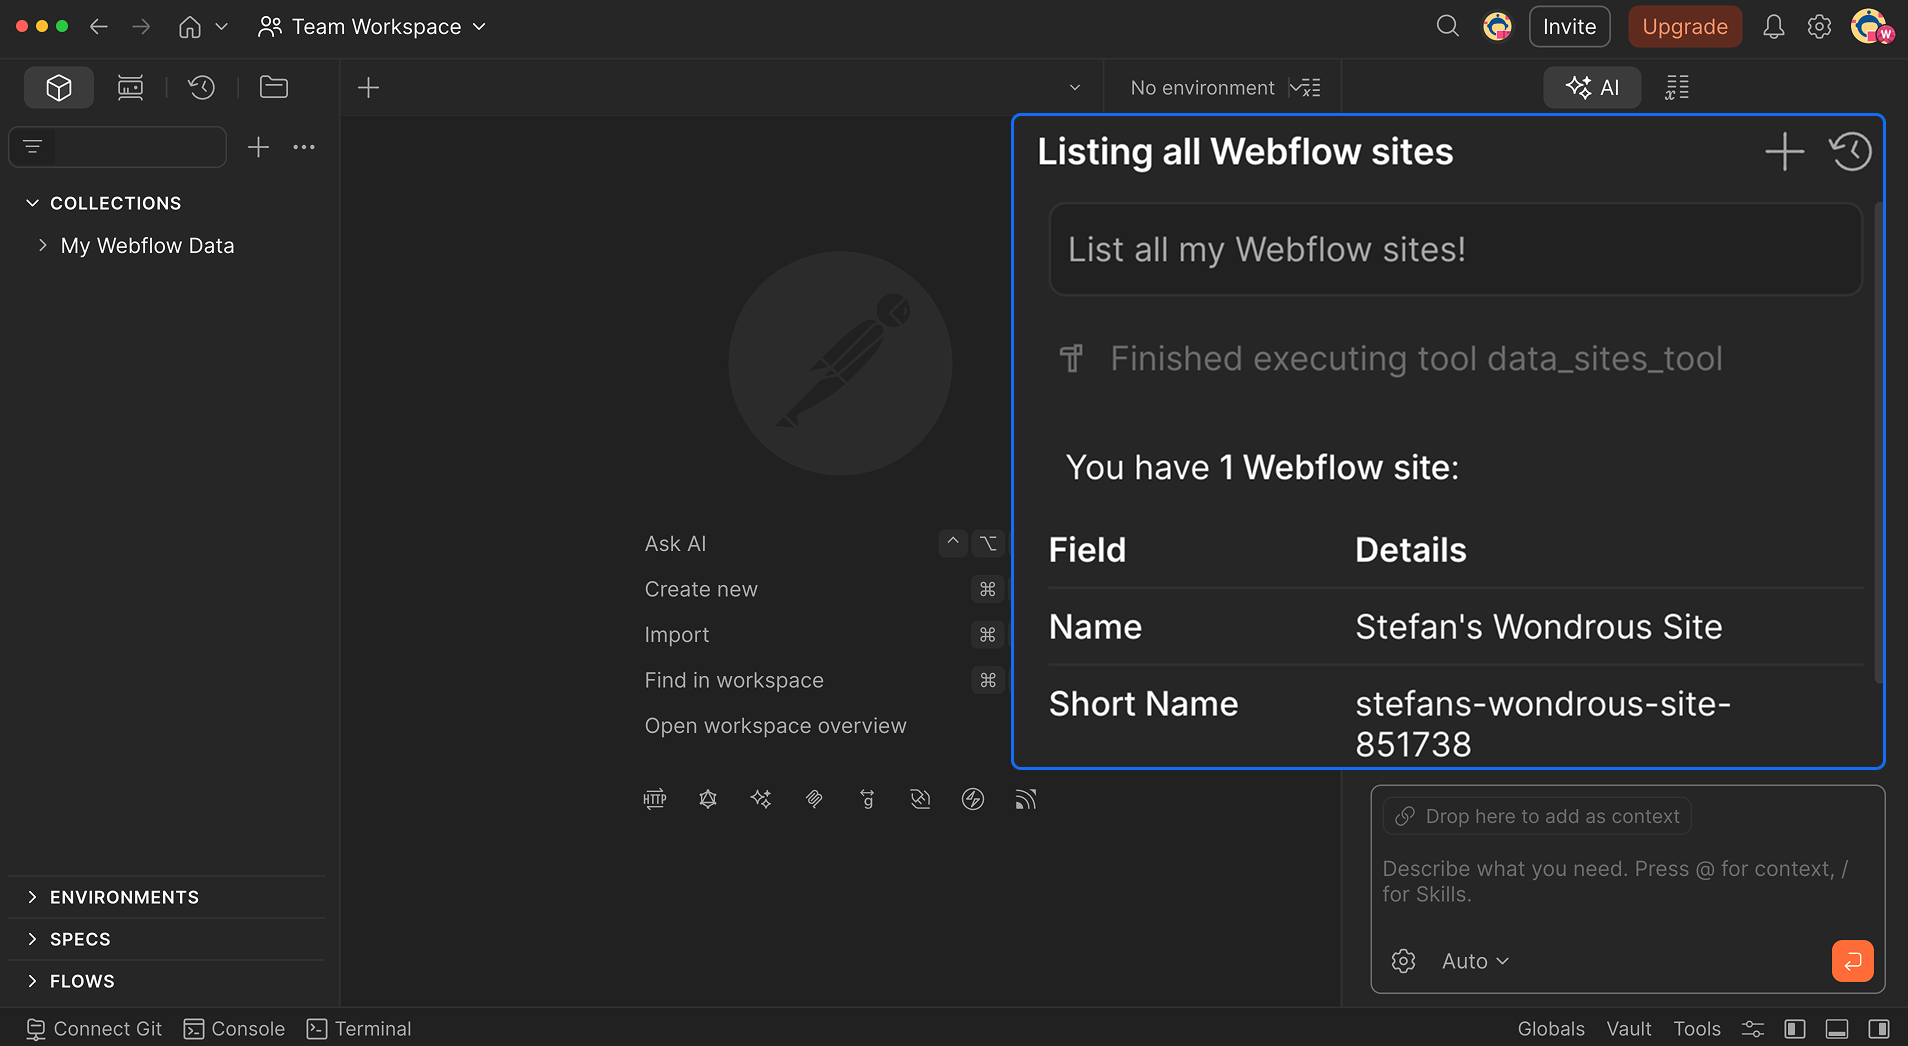
Add it with one click, and instead of reading docs to figure out how to fetch your CMS collections, you just ask.
"List my Webflow sites"
"Show me all blog posts"
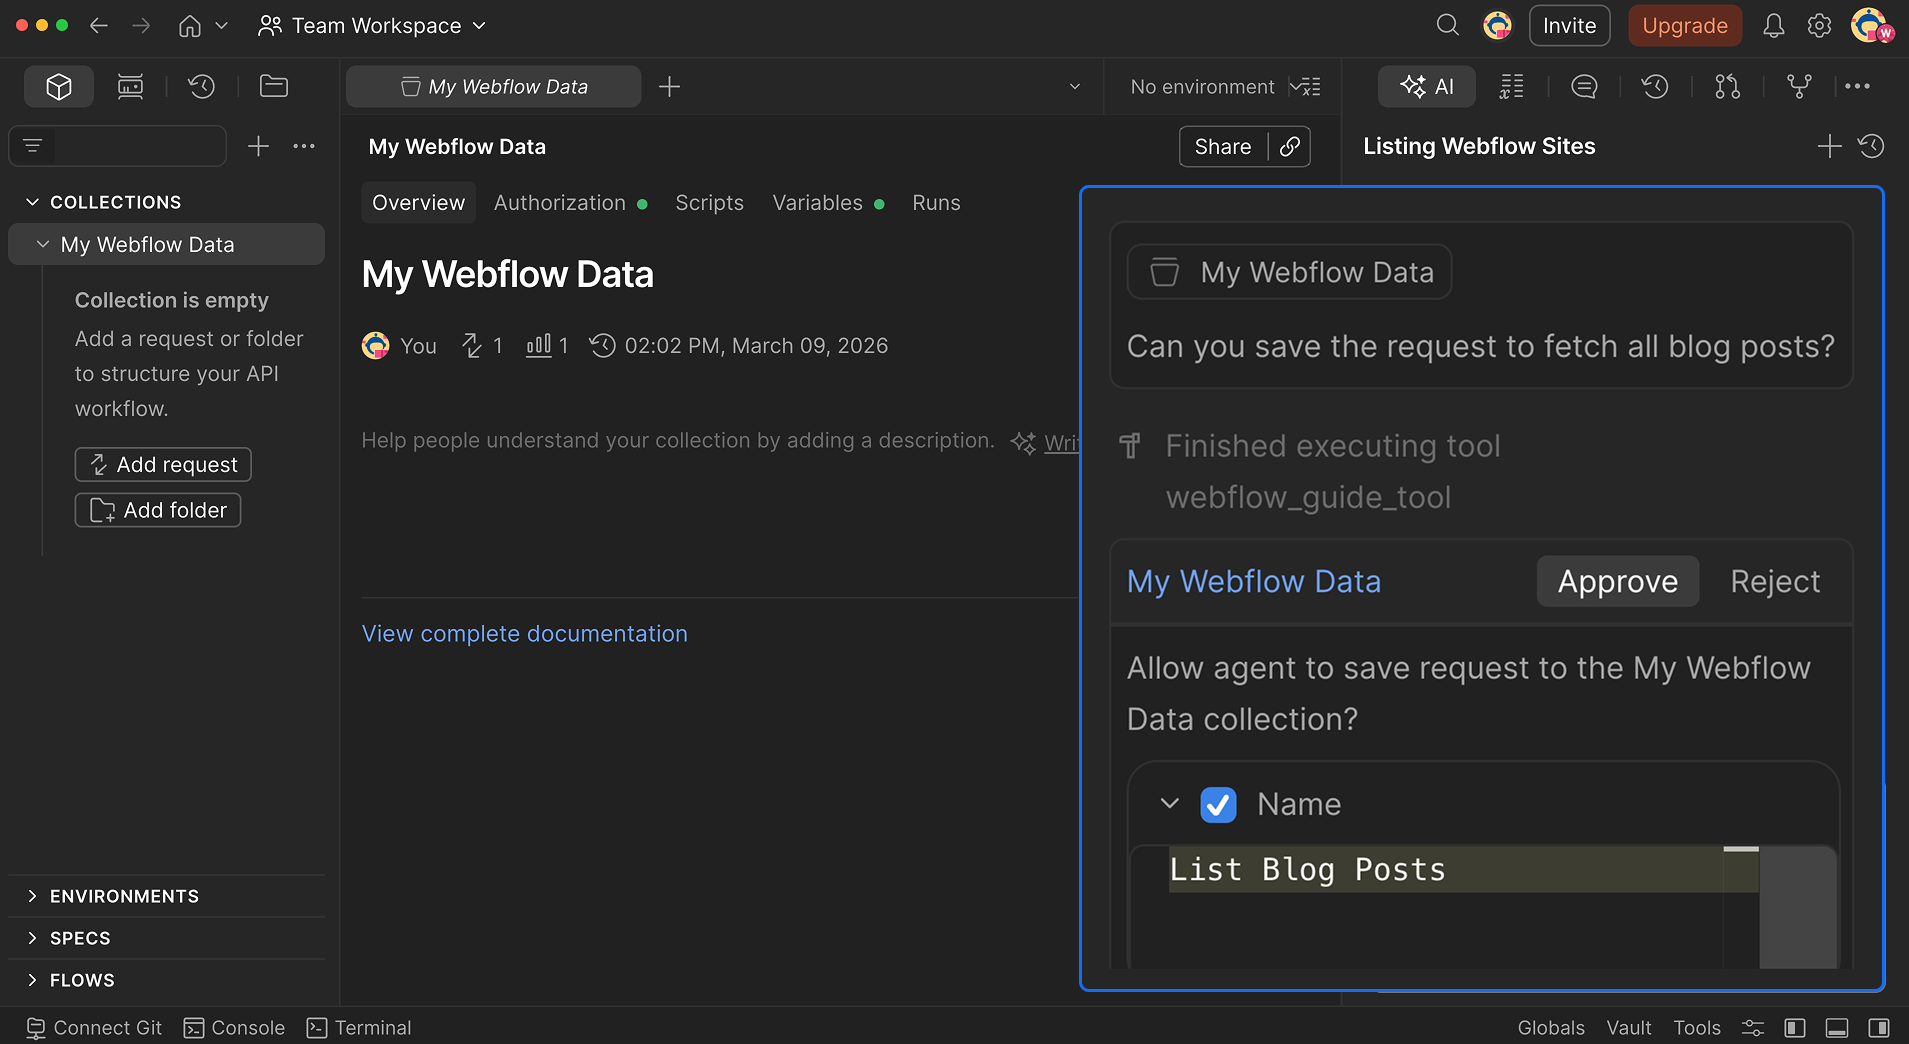
"Create a request to fetch blog posts from my portfolio site"
The Postman agent figures out which tools to call, handles the API surface, and returns real data from your Webflow account. When you have what you need, you can turn the conversation directly into a saved, reusable request in your collection. You can start building after having a casual conversation with your favorite agent.
No tab-switching. No docs. No guessing at parameter names.
Getting started
Setup takes about two minutes and here's the full walkthrough of adding the Webflow MCP to your Postman agent.
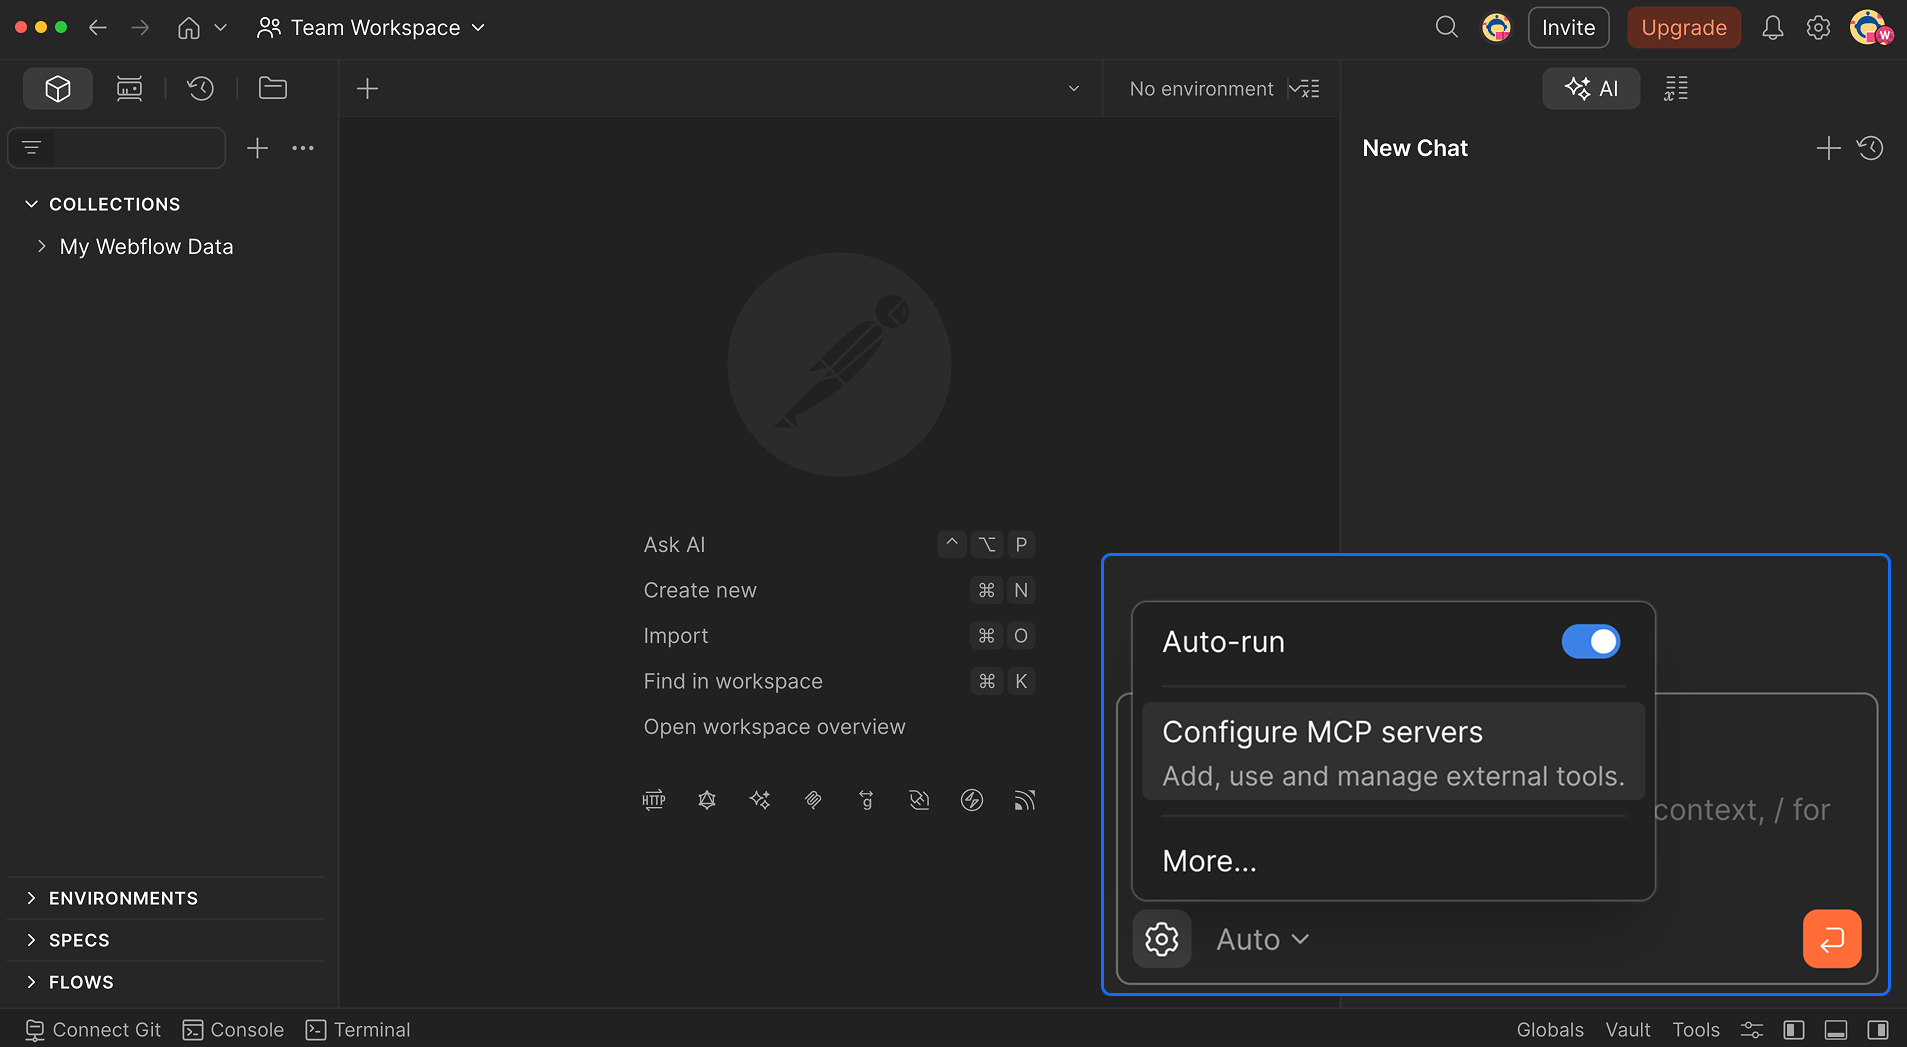
1. Enable MCP in Postman
Open Postman, head over to the Postman AI agent and click Configure MCP servers.
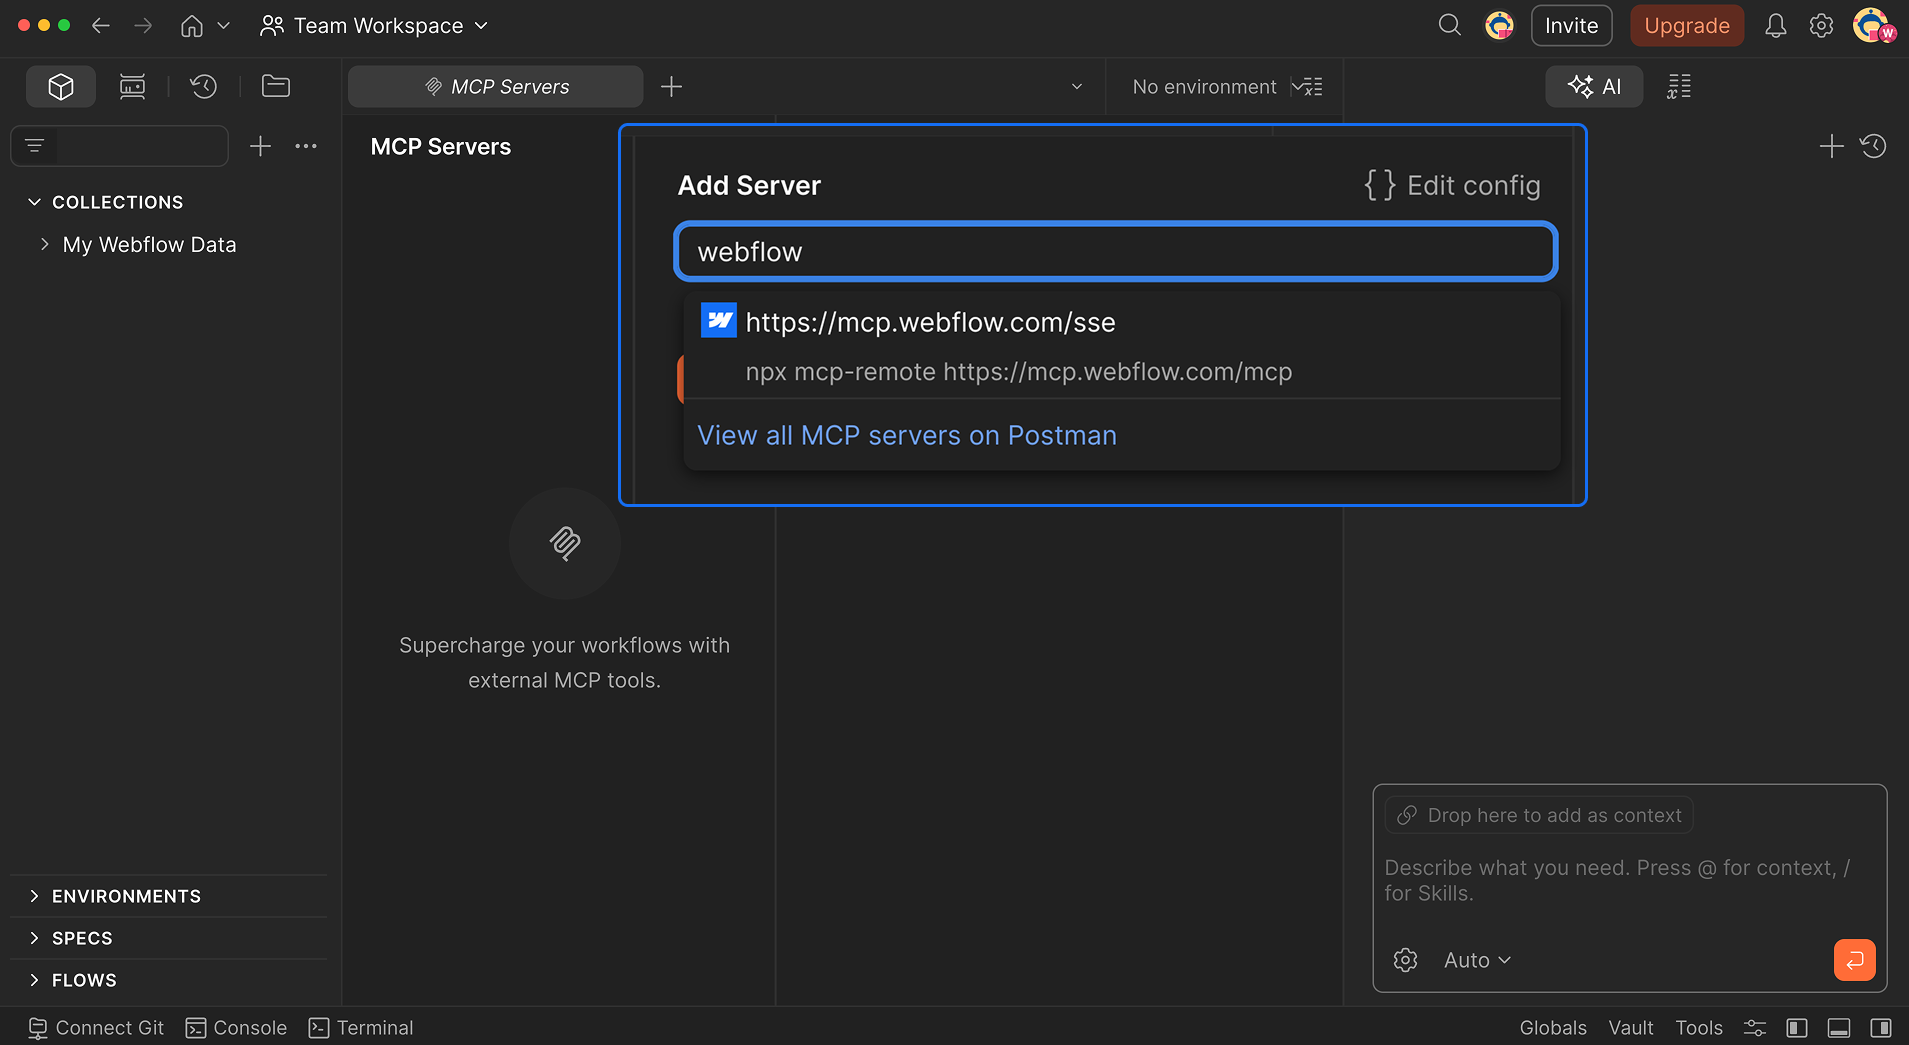
2. Add the Webflow MCP server
Add the Webflow MCP server by searching for "Webflow". Click "Add Server" once you found it. Postman will start communicating with the Webflow MCP endpoint via https://mcp.webflow.com/mcp.
3. Authorize with Webflow
Once you add the server, Postman will ask you to authorize and connect to your Webflow workspace. Agent Mode will request read access to sites, collections, and pages, plus write access to CMS items if you want to create drafts. Log in, grant access, and you're done—this is a one-time step and all the Webflow tools will be available.
4. Open a collection and start asking
Navigate to any collection, open the agent panel, and type a natural language request like "List my Webflow sites". The agent discovers the available tools, calls the right endpoints, and returns your data.
By default, Agent Mode asks for approval before modifying anything. You can turn on auto-run if you trust the workflow.
5. Save requests for you and your teammates
Once you have the data you're looking for, ask the Postman agent to save the request to a Postman request collection. Your team can reuse it from there—auth and all.
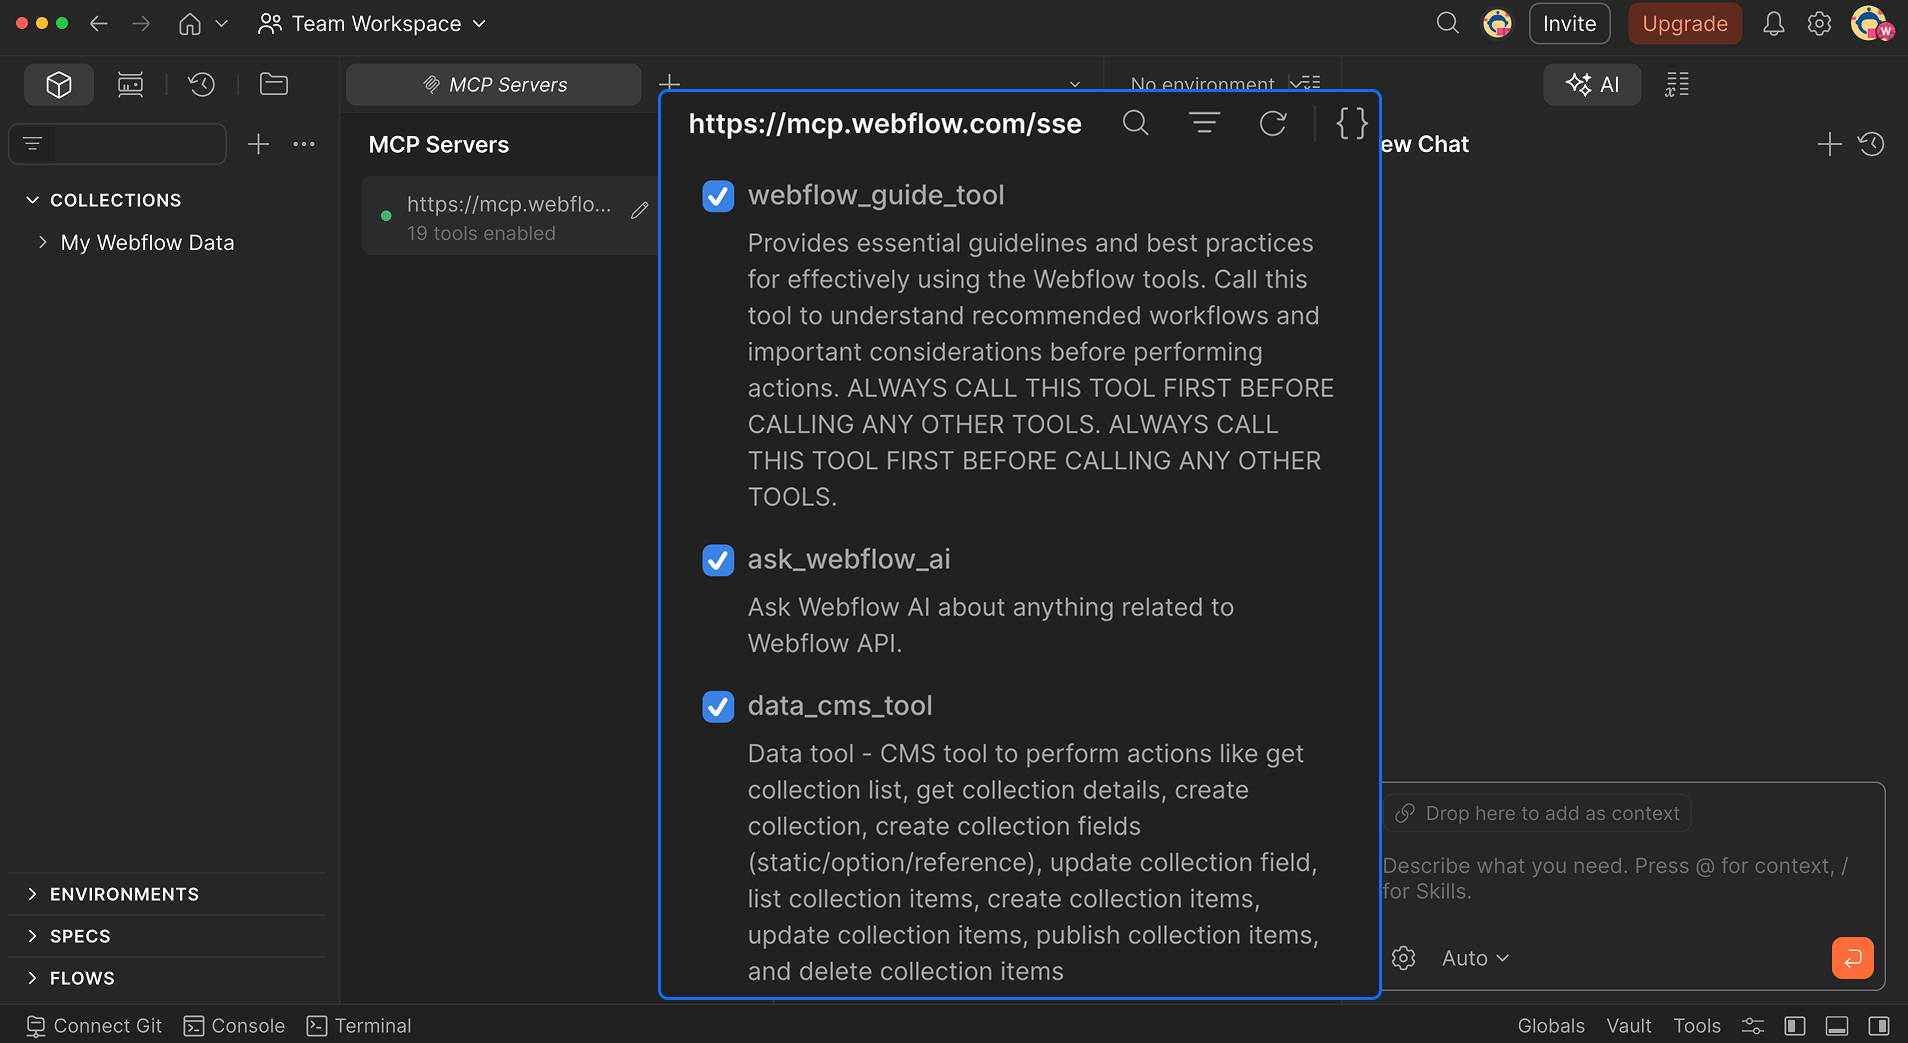
What's available in the Webflow MCP server
This quick walkthrough only scratched the surface. Here's the full set of tools the Webflow MCP server gives the Postman agent access to.
- Sites - List and manage Webflow sites
- Pages - Get page content and metadata
- Components - Work with reusable components
- Collections - Manage CMS collections
- Fields - Define and update collection fields
- Items - Create, read, update, and delete CMS items
- Custom Code - Manage site-wide custom code
These tools make a perfect addition to your existing Postman workflows. No more reading of API docs, everything will just be available in your Postman agent. Have a conversation and build up your required requests naturally.
Check the documentation to explore the Designer API tools too—those modify elements on the Webflow canvas, adjust classes and styles, and manage design tokens.
Go further with official prompts
If you don't want to start from scratch, we published a prompt library designed specifically for agents. These are ready-made workflows for things like automated SEO audits, keyword optimization, and broken link checks—copy, paste, run.
Each prompt follows the same pattern: discover the site, verify the collection, do the analysis, present results, get approval, then execute. Your AI agent can do the hard work while you're at lunch.
And if you're ready to task AI with more API work, the official Postman Agent Mode Prompt Library will give you plenty of ideas to automate everyday tasks.
Start building with Webflow and Postman
Open Postman, add the Webflow MCP server, and try asking for your site list, blog posts, or any data you're interested in. You'll have a working request collection before you finish your coffee.
The full Webflow MCP server documentation lives in the Webflow Developer Docs.


