











Unify your entire AI chat stack within Webflow Cloud to eliminate the complexity of managing disparate proxy services. This approach consolidates your route handlers, streaming logic, and conversation history into a single, high-performance deployment.
Before Webflow Cloud, adding a real AI feature to a Webflow site meant a detour through a separate service: a Vercel function, a Netlify serverless endpoint, or a full-blown Express server living somewhere else. The setup worked (I've shipped it multiple times), but it always felt like duct tape.
With Webflow Cloud, you can have a Next.js app, including the OpenAI route handler, the conversation history queries, and the streaming response logic, run inside Webflow's own infrastructure. One deployment, one environment variable panel, one place to look when something goes wrong.
This article explores how to build a streaming AI chat feature on Webflow Cloud: how to initialize the OpenAI client correctly for the Cloudflare Workers runtime, how to stream tokens to the browser using Next.js Route Handlers, and how to persist conversation history in Supabase so your AI has context across sessions.
What do you need to build an AI-powered app on Webflow Cloud?
You need a Webflow workspace with Cloud access, the Webflow CLI, Node.js and npm, an OpenAI account with a funded API key, and a Supabase project for conversation storage. The conversation history component is optional.
If you're building a stateless one-shot AI feature rather than a persistent chat, you can skip Supabase and work through Steps 1–3 only.
Here's what you need before writing any integration code.
A Webflow workspace with Cloud access
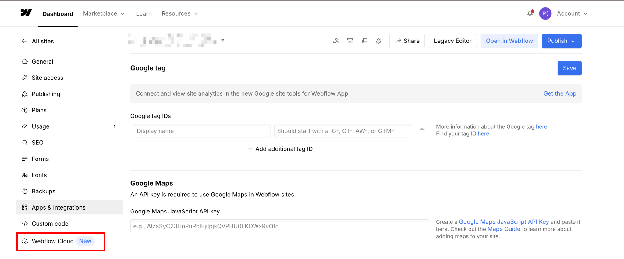
Webflow Cloud is available on paid workspace plans. Confirm you have access to the Cloud section in your Webflow dashboard before starting. If you don't see Cloud in the left sidebar, check your plan tier.
Node.js 22+ and npm
Webflow Cloud requires Node.js 22 or later, and npm is currently the only supported package manager. Confirm both are available with node -v and npm -v. Note that the Webflow CLI raises the effective floor slightly, so match the version in the Webflow Cloud prerequisites list rather than whatever your machine has.
The Webflow CLI
The CLI handles authentication and deployment. Install it globally:
npm install -g @webflow/webflow-cliConfirm the installation with webflow --version before initializing the project.
An OpenAI account with an API key
You'll need an OpenAI account with billing set up and an API key generated from the OpenAI platform dashboard. The API key is a secret; never put it in client-side code, never commit it to version control.
The same discipline applies to any OpenAI call from Webflow Cloud, which our guide to proxying image generation works through in detail.
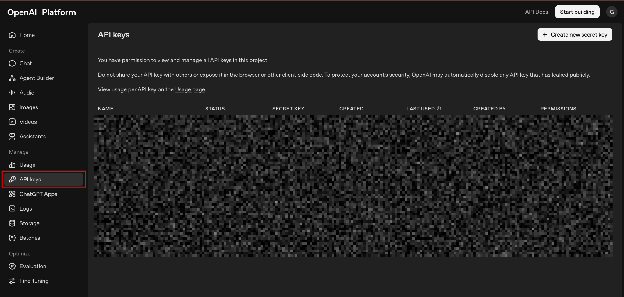
You'll add it to your Webflow Cloud project's Settings → Variables, where it's available to your server-side route handlers at request time.
This guide uses gpt-5.6-luna, the cost-sensitive tier of OpenAI's current generation. It supports Chat Completions and streaming, which is all this build needs, and at $0.20 per million input tokens, it is cheap enough for conversational volume.
Swap in gpt-5.6-terra for a better intelligence-to-cost balance, or gpt-5.6-sol (aliased gpt-5.6) as the flagship, by changing the model string. All three take the same call shape, so nothing else in this guide changes.
One knob worth knowing: these models expose a reasoning_effort setting from none through max, defaulting to medium. For a chat UI where first-token latency is the whole experience, lower effort is usually the right trade.
A Supabase project for conversation history
Create a project at supabase.com to store conversation history. If you also want signed-in users rather than anonymous sessions, our Supabase Auth guide covers that setup on Webflow Cloud.
You'll need the project URL and the publishable key (sb_publishable_...). If you only want stateless AI responses and don't need conversation memory, this prerequisite is optional. Steps 1 through 3 cover the full streaming implementation without Supabase.
Once these are ready, here are the five steps to a working AI-powered app on Webflow Cloud.
5 steps to build an AI-powered app on Webflow Cloud with OpenAI and Supabase
These five steps cover project scaffolding, OpenAI client setup, implementing a streaming API route, persisting conversation history, and deployment. If you've already worked through the Webflow Cloud full-stack guide, Steps 1 and 2 will feel familiar, since Webflow Cloud's configuration is consistent across integrations.
The Webflow Cloud quickstart covers project initialization in more depth if you're new to the platform. For AI apps, the key steps are 3 and 4.
If you've already set up a Webflow Cloud project, skip to Step 2.
1. Initialize your Webflow Cloud project
The scaffolding for a Webflow Cloud project is the same regardless of which integrations you use.
Start with CLI authentication and project initialization:
webflow auth login
webflow cloud init
webflow auth login authenticates your CLI session with your Webflow workspace via the browser. webflow cloud init then scaffolds the project and links your local directory to a Webflow Cloud app.
A note on which commands to use, because the CLI is mid-migration. Webflow now treats the apps namespace as canonical (webflow apps init, webflow apps deploy) and documents cloud init and cloud deploy as deprecated aliases.
But apps currently ships only on the CLI's pre-release @next channel and does not exist on stable, so the cloud commands are the ones that work on a default install today. Use cloud now, and expect to move to apps once it reaches stable.
After initialization, you may see the files below. Treat them as things to understand rather than things you must author: Webflow Cloud reads your package.json, detects the framework, and generates the deployment configuration itself, so most projects need none of this committed.
The webflow.json file
The webflow.json file is the framework selector, and it is optional. Framework detection is automatic; add this file only if you want to pin the choice explicitly rather than let Webflow infer it.
For a Next.js project, it contains:
{
  "cloud": {
    "framework": "nextjs"
  }
}
This pins the build pipeline to the OpenNext Cloudflare adapter. Its absence does not fail the deploy, contrary to what you may read elsewhere: without it, Webflow Cloud detects the framework from your package.json and proceeds.
Thewrangler.jsoncfile
The wrangler.jsonc file is the Cloudflare Workers configuration. You will see nodejs_compat in it, which enables Node.js API compatibility in the Workers runtime, including node:crypto, node:buffer and node:stream.
You should know that Webflow Cloud applies Node.js compatibility automatically on deploy, so this is not a flag you have to remember to turn on:
{
  "$schema": "node_modules/wrangler/config-schema.json",
  "name": "nextjs",
  "main": ".open-next/worker.js",
  "compatibility_date": "2025-04-15",
  "compatibility_flags": ["nodejs_compat"],
  "assets": {
    "binding": "ASSETS",
    "directory": ".open-next/assets"
  },
  "observability": { "enabled": true }
}
This file is not local-only, which is the detail worth correcting if you have read otherwise. Wrangler reads it for npm run preview. Still, Webflow Cloud also reads the committed config at deploy time to provision storage bindings and inject the real IDs.
If a required field is missing, it logs the error, continues without your bindings, and the deploy still succeeds, so the app ships with storage silently disconnected.
Theopen-next.config.tsfile
The open-next.config.ts file configures the OpenNext adapter and is minimal for most projects:
import { defineCloudflareConfig } from "@opennextjs/cloudflare";
export default defineCloudflareConfig({});
Most projects don't need to modify this file beyond the default export. It becomes relevant if you add advanced OpenNext features like ISR or custom cache adapters, but for this stack, it stays as-is.
Thecloudflare-env.d.tsfile
The cloudflare-env.d.ts file provides TypeScript types for Cloudflare bindings:
interface CloudflareEnv {}One environment variable behavior worth getting right is where the values are available. Webflow Cloud makes environment variables available to your application's build process and to the deployed application at runtime, with secret values redacted from build logs.
Each environment supports up to 110 of them. Set all variables (including OPENAI_API_KEY) in your project's Settings → Variables in the Webflow dashboard.
Anything in .env.local applies only to local development and isn't read during production deployment.
Setting up the local preview environment
Install the OpenNext adapter and add a preview script so you can test against the actual Workers runtime before deploying:
npm install @opennextjs/cloudflareThen add this to your package.json scripts:
{
  "scripts": {
    "preview": "opennextjs-cloudflare build && opennextjs-cloudflare preview"
  }
}
Run npm run preview before every deploy. The Wrangler simulation it spins up is close enough to the production Workers runtime that if streaming works locally in preview, it'll work in production.
Streaming issues that appear in dev but not preview (or vice versa) are almost always due to environment or runtime differences; preview gives you the truth.
2. Install the OpenAI SDK and understand how it works on the Workers runtime
The OpenAI SDK has a clean story on Cloudflare Workers: it is designed for cross-platform environments and uses fetch internally, so there is nothing to configure.
This used to be a point of difference from Stripe, whose Node SDK defaulted to a node:https transport and needed an explicit httpClient: Stripe.createFetchHttpClient() override on Workers.
That is no longer true — current stripe-node ships worker builds selected automatically by the worker export condition, and those already default to the fetch client. If you are carrying that override in an older integration, it is now redundant rather than required.
That means you initialize it, call it, and iterate its streams exactly as you would in any Node.js environment.
Installing the package and create a shared client factory
Install the OpenAI SDK:
npm install openaiCreate a shared client factory at lib/openai.ts. The factory function pattern ensures the API key is read at request time rather than at module load time.
Webflow Cloud injects environment variables per-request in the Workers runtime, so top-level process.env reads can return undefined if they happen at module initialization:
// lib/openai.ts
import OpenAI from "openai";

export function getOpenAIClient() {
  const apiKey = process.env.OPENAI_API_KEY;

  if (!apiKey) {
    throw new Error("Missing OPENAI_API_KEY environment variable");
  }

  return new OpenAI({ apiKey });
}
No httpClient override, fetch-transport configuration, or edge runtime special-casing. The OpenAI SDK works in Cloudflare Workers exactly as you'd expect in Node.js. The for-await streaming pattern works, the stream: true option works, and the standard import path, import OpenAI from "openai", works.
Which means: if a tutorial tells you to swap the HTTP client for a Workers deployment, check whether that advice predates the SDK shipping its own worker build. For OpenAI, it never applied; for Stripe, it no longer does.
Configuring the environment variable
Add one variable in your Webflow Cloud project's Settings → Variables:
OPENAI_API_KEY=sk-...Your OpenAI API key starts with sk-. This is a server-side-only variable; it must never appear in client-side code or in any import that runs in the browser. Since Webflow Cloud only makes variables available in server-side route handlers (and you're not declaring any NEXT_PUBLIC_ prefix), it won't leak to the client bundle.
3. Build a streaming chat API route
Streaming is the defining technical requirement for a real AI chat experience. Without streaming, the browser waits for the full response before displaying anything. For a long response, this means 5–10 seconds of silence, which kills the conversational feel. With streaming, tokens appear in real time as the model generates them.
The streaming implementation has two parts: the server route that streams tokens to the browser, and the client component that reads the stream and renders tokens as they arrive.
Creating the server route
This route handler calls OpenAI with stream: true, then pipes the token stream through a TransformStream to the browser response.
The entire route runs in the Workers runtime on Webflow Cloud:
// app/api/chat/route.ts
import { getOpenAIClient } from "@/lib/openai";
import { NextRequest, NextResponse } from "next/server";

export async function POST(request: NextRequest) {
  const { messages } = await request.json();

  if (!messages || !Array.isArray(messages)) {
    return NextResponse.json(
      { error: "messages array is required" },
      { status: 400 }
    );
  }

  const openai = getOpenAIClient();

  const { readable, writable } = new TransformStream();
  const writer = writable.getWriter();
  const encoder = new TextEncoder();

  // Stream in the background, piping tokens to the TransformStream
  const streamPromise = (async () => {
    const stream = await openai.chat.completions.create({
      model: "gpt-5.6-luna",
      messages,
      stream: true,
    });

    try {
      for await (const part of stream) {
        const token = part.choices[0]?.delta?.content || "";
        if (token) {
          // Await the write. Dropping this promise discards
          // backpressure and, when the client disconnects, leaves a
          // rejected promise nothing is listening for.
          await writer.write(encoder.encode(token));
        }
      }
    } finally {
      // close() in finally, so a thrown error still ends the stream.
      // Never abort() after close() — that rejects too.
      await writer.close().catch(() => {});
    }
  })();

  // Don't await — return the ReadableStream immediately so tokens flow to the browser
  streamPromise.catch((err) => {
    console.error("OpenAI stream error:", err);
  });

  return new Response(readable, {
    headers: {
      "Content-Type": "text/plain; charset=utf-8",
      // No Transfer-Encoding: the runtime owns message framing, and
      // the header is illegal over HTTP/2 anyway. No Cache-Control
      // either: Webflow Cloud always replaces it with
      // `private, no-cache`.
    },
  });
}
The key architectural point here is the non-awaited streamPromise. The route starts the background stream, then immediately returns a Response with the readable end as the body.
The browser receives the response headers immediately and then receives token chunks as the background stream writes them to the writer. This is the Web Streams pattern for server-sent streaming; it works natively in the Cloudflare Workers runtime because TransformStream and ReadableStream are both Web APIs.
Creating the client-side chat component
The client reads the streaming response using the Fetch API's ReadableStream interface. This component manages the message state and renders tokens as they arrive:
// app/components/Chat.tsx
"use client";

import { useState } from "react";

type Message = {
  role: "user" | "assistant";
  content: string;
};

export default function Chat() {
  const [messages, setMessages] = useState<Message[]>([]);
  const [input, setInput] = useState("");
  const [isStreaming, setIsStreaming] = useState(false);

  async function sendMessage() {
    if (!input.trim() || isStreaming) return;

    const userMessage: Message = { role: "user", content: input };
    const newMessages = [...messages, userMessage];
    setMessages(newMessages);
    setInput("");
    setIsStreaming(true);

    // Add an empty assistant message that will be filled by the stream
    setMessages((prev) => [...prev, { role: "assistant", content: "" }]);

    // Webflow Cloud mounts your app at a base path. Server route
    // definitions get it automatically; client-side fetches do not,
    // so a bare "/api/chat" hits the parent Webflow site and 404s.
    const basePath = process.env.NEXT_PUBLIC_BASE_PATH ?? "";

    const response = await fetch(`${basePath}/api/chat`, {
      method: "POST",
      headers: { "Content-Type": "application/json" },
      body: JSON.stringify({ messages: newMessages }),
    });

    if (!response.ok || !response.body) {
      // Without this, an error JSON from the route is streamed
      // straight into the transcript and rendered as if the
      // assistant said it.
      setIsStreaming(false);
      throw new Error(`Chat request failed: ${response.status}`);
    }

    const reader = response.body.getReader();
    const decoder = new TextDecoder();

    while (true) {
      const { done, value } = await reader.read();
      if (done) break;

      const token = decoder.decode(value, { stream: true });

      setMessages((prev) => {
        const updated = [...prev];
        updated[updated.length - 1] = {
          role: "assistant",
          content: updated[updated.length - 1].content + token,
        };
        return updated;
      });
    }

    setIsStreaming(false);
  }

  return (
    <div>
      <div>
        {messages.map((msg, i) => (
          <div key={i}>
            <strong>{msg.role === "user" ? "You" : "AI"}:</strong>
            <span>{msg.content}</span>
          </div>
        ))}
      </div>
      <input
        value={input}
        onChange={(e) => setInput(e.target.value)}
        onKeyDown={(e) => e.key === "Enter" && sendMessage()}
        placeholder="Ask anything..."
        disabled={isStreaming}
      />
      <button onClick={sendMessage} disabled={isStreaming}>
        {isStreaming ? "Thinking..." : "Send"}
      </button>
    </div>
  );
}
This component passes the full conversation history (messages array) to the API route on every request. The model receives the complete conversation context, which is how it maintains the conversation thread.
Each message includes both the user's question and the assistant's prior responses. In Step 4, this conversation history gets persisted to Supabase, so it survives page refreshes.
4. Store and retrieve conversation history with Supabase
Without persistence, your AI chat starts fresh on every page load. The user refreshes, the conversation disappears, and the model forgets what was discussed. For a product AI feature (a support assistant, an onboarding guide, a personalized advisor), conversation continuity is what turns a demo into something users actually return to.
Supabase handles this with a single table that stores message history per session. Every message (user and assistant) is written to the table, and the conversation history loads on initial page render.
Because Supabase's JavaScript client uses the Fetch API internally, it works in the Cloudflare Workers runtime without any special configuration.
Setting up the Supabase table
In your Supabase dashboard, create a table called messages with the following columns
create table messages (
  id uuid default gen_random_uuid() primary key,
  session_id text not null,
  role text not null check (role in ('user', 'assistant')),
  content text not null,
  created_at timestamp with time zone default now()
);

-- Index for fast session lookups
create index messages_session_id_idx on messages (session_id, created_at);

-- Lock the table down in the same migration that creates it.
alter table public.messages enable row level security;
revoke all on table public.messages from anon, authenticated;
The session_id column links messages to a specific conversation. You can use a browser-generated UUID, a user ID from your auth system, or any stable identifier that represents "one conversation."
For unauthenticated demos, a UUID stored in sessionStorage works well. For authenticated apps, use the signed-in user's ID from Supabase Auth, which keeps the session identifier and the auth system in one place.
Those last two lines aren't optional, and they're why this section exists. Row Level Security is applied automatically only to tables created through the dashboard's Table Editor. A table created with raw SQL, which is what you just did, starts with RLS off, and on projects with default grants, a new table in public hands anon select, insert, update and delete on every row.
Ship it as-is, and any visitor holding your publishable key can read and delete every conversation in the database
Two separate mechanisms have to line up. Grants decide whether a role may touch the table at all; policies decide which rows. Adding a policy doesn't revoke a grant, which is why revoke exists.
For a demo, grant the narrow operations back and write a policy per operation. For a production app, add a user_id uuid references auth.users column and filter on auth.uid(), rather than reusing session_id for the purpose.
Installing and configuring the Supabase client
Install the Supabase JavaScript client:
npm install @supabase/supabase-jsCreate a shared client factory at lib/supabase.ts. This uses the same factory-function pattern from the full-stack guide. The client is instantiated inside a function to ensure environment variables are read at request time:
// lib/supabase.ts
import { createClient } from '@supabase/supabase-js';

export function getSupabaseClient() {
  // No NEXT_PUBLIC_ prefix: this factory only ever runs in route
  // handlers, and the prefix would inline the values into the
  // browser bundle for no reason.
  const supabaseUrl = process.env.SUPABASE_URL;
  const supabaseKey = process.env.SUPABASE_PUBLISHABLE_KEY;

  if (!supabaseUrl || !supabaseKey) {
    throw new Error('Missing Supabase environment variables');
  }

  return createClient(supabaseUrl, supabaseKey);
}
Add both variables in your Webflow Cloud project's Settings → Variables:
SUPABASE_URL=https://[your-project-ref].supabase.co
SUPABASE_PUBLISHABLE_KEY=sb_publishable_...
Use the sb_publishable_... key, not the legacy anon JWT. Supabase is retiring the anon and service_role keys by the end of 2026 in favor of publishable and secret keys, so start a new build with the current pair. (The anon Postgres role still exists — that is what a publishable key resolves to for a signed-out visitor — which is why the two names get confused.)
Adding conversation history routes
Two additional route handlers handle reading and writing message history. The first loads the conversation history for a given session.
The second saves a message after it's been sent or received:
// app/api/history/route.ts
import { getSupabaseClient } from "@/lib/supabase";
import { NextRequest, NextResponse } from "next/server";

export async function GET(request: NextRequest) {
  const { searchParams } = new URL(request.url);
  const sessionId = searchParams.get("session_id");

  if (!sessionId) {
    return NextResponse.json({ error: "session_id is required" }, { status: 400 });
  }

  const supabase = getSupabaseClient();

  const { data, error } = await supabase
    .from("messages")
    .select("role, content")
    .eq("session_id", sessionId)
    .order("created_at", { ascending: true });

  if (error) {
    return NextResponse.json({ error: error.message }, { status: 500 });
  }

  return NextResponse.json(data);
}

export async function POST(request: NextRequest) {
  const { session_id, role, content } = await request.json();

  if (!session_id || !role || !content) {
    return NextResponse.json(
      { error: "session_id, role, and content are required" },
      { status: 400 }
    );
  }

  const supabase = getSupabaseClient();

  const { error } = await supabase
    .from("messages")
    .insert({ session_id, role, content });

  if (error) {
    return NextResponse.json({ error: error.message }, { status: 500 });
  }

  return NextResponse.json({ success: true });
}
The history GET route returns messages ordered by created_at ascending (oldest first), which is the order they need to be passed to the OpenAI messages array.
The chat route handler (from Step 3) already accepts a messages array; your client component loads history from this route on mount, populates the messages state, and then passes the full array on each subsequent send.
Integrating history into the chat flow changes the sendMessage function in your client component: load history on mount via GET {basePath}/api/history?session_id=..., write each new message via POST {basePath}/api/history after sending and after the stream completes, and always pass the full accumulated message list to POST {basePath}/api/chat.
Every client-side call needs the base path prefix; the server route definitions do not.
With that loop in place, the AI maintains context across the entire session and across page refreshes.
5. Deploy to Webflow Cloud and configure production variables
With streaming working in local preview and conversation history writing correctly to Supabase, deploy to production:
webflow cloud deployThis command runs the full OpenNext build, compiles the Next.js app for the Cloudflare Workers runtime, and uploads the worker and static assets to Webflow Cloud. The CLI outputs a deployment URL when it finishes. The first deploy takes longer due to the initial asset upload; subsequent deploys are faster.
Verifying all environment variables before deploying
Before running the deploy command, confirm these variables are set in your Webflow Cloud project's Settings → Variables:
# OpenAI
OPENAI_API_KEY

# Supabase
SUPABASE_URL
SUPABASE_PUBLISHABLE_KEY
Environment variables set only in .env.local are not read during the Webflow Cloud build or at runtime in the deployed worker. If a variable is missing, the guard clauses in the factory functions (if (!apiKey) throw new Error(...)) will surface the failure immediately in the deployment logs rather than producing a cryptic downstream error.
Monitoring streaming in production
After deploying, test the streaming behavior from the live URL, not just from npm run preview. The Workers runtime in production occasionally behaves slightly differently from the local Wrangler simulation when streaming connections are involved, particularly around connection timeouts.
OpenAI's default timeout for streaming requests is 10 minutes. In practice, most streaming responses complete in under 30 seconds, but if you're using the API for longer-form generation, it's worth understanding the Cloudflare Workers execution limit (which scales with the request).
What causes AI apps on Webflow Cloud to fail?
Most failures in Webflow Cloud AI apps fall into four categories: missing or undefined environment variables, streaming connection drops, conversation context growing too large for the model's context window, and Supabase RLS blocking reads or writes.
Here's the diagnostic for each.
The streaming response starts, then cuts off mid-generation
Cause: The most common cause is a client-side timeout, not a server-side one. If the client fetch call has an AbortSignal or a custom timeout set, long responses can get cut off before the stream closes naturally. Another cause is hitting a Cloudflare Workers execution limit, though for standard gpt-4o-mini conversational responses, this is rarely the issue.
Fix: Verify your client fetch call doesn't have an explicit timeout. The browser's default fetch behavior has no timeout, which is what you want for streaming. If you added a cancellation signal, make sure it triggers only on user action (like a "Stop" button), not by a timer.
On the server side, close the stream on every path. Putting writer.close() in a finally block does that: a mid-generation throw still terminates the response instead of leaving the browser waiting.
Do not call writer.abort() afterward, since aborting an already-closed writer rejects and gives you a second, more confusing error on top of the first.
OPENAI_API_KEYis undefined in the deployed worker
Cause: The variable exists in .env.local but not in the Webflow Cloud project's Settings → Variables. This is the most common production issue with Webflow Cloud integrations. The .env.local file is only read during npm run dev and npm run preview locally; it’s never deployed to or read by the production worker.
Fix: Add OPENAI_API_KEY to your Webflow Cloud project's Settings → Variables and redeploy. The error message from the guard clause ("Missing OPENAI_API_KEY environment variable") will appear in the Webflow Cloud deployment logs if you check them after a failed request.
OpenAI returns acontext_length_exceedederror after long conversations
Cause: The messages array passed to OpenAI contains the full conversation history, and a long enough conversation will eventually exceed the model's context window.
That window is now large (1.05M tokens on the GPT-5.6 models), so this is far less likely than on earlier generations, but an unbounded array in a long-running session will eventually hit it, and it gets expensive well before it gets fatal.
Fix: Before sending to OpenAI, trim the conversation history to a recent window. For example, keep the system message plus the last 20 exchanges. A simple approach is to slice the messages array from the route handler before passing it to the API.
Alternatively, use a summarization step that condenses earlier conversation history into a single context message. Neither approach is complicated, but you need to handle it at the route level, not in the client component.
Supabase history queries return empty arrays despite messages existing
Cause: Row Level Security is enabled on the messages table, and the anon role doesn't have a SELECT policy. This returns an empty result with no error; identical behavior to an empty table, which makes it look like a logic bug rather than a permissions issue.
Fix: Check in this order, because the likeliest cause is the one people skip. First confirm the grants: a revoked grant raises a 42501 error before any policy is consulted. Then confirm RLS is actually enabled, since a raw-SQL table starts with it off and an open table returns rows rather than hiding them. Only then look at policies.
Write one policy per operation rather than a single for all. For a public demo, a select policy with a true condition is fine, as long as you understand it grants every visitor read access to every row.
For user-specific access, do not filter session_id = auth.uid(): session_id is a text column and auth.uid() returns a uuid, so the comparison errors on the type, and conceptually a session is a conversation rather than a person. Add a user_id uuid references auth.users column and filter on that instead.
Build more on top of your AI foundation
This guide covered the full setup for a streaming AI chat feature on Webflow Cloud: initializing the OpenAI client for the Workers runtime, streaming tokens to the browser through Next.js Route Handlers, and persisting conversation history in Supabase
Once the feature works, the next question is whether its answers are any good, which is what our Braintrust evaluation guide is for. The other obvious extension is adding authentication. Once you know who's asking, you can filter their conversation history from Supabase, personalize the system prompt with their account data, and gate AI access behind a paywall.
For the Webflow + ChatGPT integration reference, see the Webflow and ChatGPT integration page. For Supabase, the Webflow and Supabase page covers the database connection in more depth.
Frequently asked questions
Does the OpenAI SDK require any special configuration to work on Webflow Cloud?
No. The OpenAI SDK uses the Fetch API internally and works in Cloudflare Workers with no additional configuration. (Older guides contrast this with Stripe needing httpClient: Stripe.createFetchHttpClient(); current stripe-node ships a worker build that defaults to fetch, so that override is no longer needed either.) You initialize it with new OpenAI({ apiKey: process.env.OPENAI_API_KEY }) and use it exactly as you would in a standard Node.js environment.
Can I use the Vercel AI SDK instead of the raw OpenAI SDK?
Yes. The Vercel AI SDK (ai package with the @ai-sdk/openai provider) works on Cloudflare Workers and provides higher-level abstractions such as streamText on the server and useChat on the client. The useChat hook handles streaming fetches, message state management, and loading states automatically, thereby saving the client-side implementation described in Step 3.
How do I keep conversation history from growing too large?
Pass a trimmed slice of the conversation history to OpenAI rather than the full unbounded array. A practical approach is to keep the last 10–20 exchanges (20-40 messages) from the Supabase history query. For long-running sessions, implement a summarization step: when the history exceeds a threshold, send the oldest messages to OpenAI with a "summarize this conversation" prompt, store the summary as a single assistant message, and replace the old messages with it.
Which model should I use for a production AI feature?
Choose from the three GPT-5.6 tiers based on your needs: gpt-5.6-luna ($0.20/1M input tokens) ideal for fast support and simple Q&A; gpt-5.6-terra ($2.00/1M) for balanced intelligence and cost; and gpt-5.6-sol ($4.00/1M) for complex reasoning, coding, and content generation.
Legacy models like gpt-4o and gpt-4o-mini still function but feature smaller context windows and an October 2023 knowledge cutoff. Check OpenAI's deprecations page for current support status.


















